Making your own Duplo Train controller
The Duplo train is a great toy. My kids really enjoy playing with the builtin push-to-drive function and the colored action bricks.
There is also a tablet app that lets kids control the train remotely. But it turns out you can do so much more, without adding more screen time for your kids.
In this article, I’ll show you how you can build your own controller for the Duplo train using LEGO City, Technic, SPIKE, or MINDSTORMS using Pybricks.
You’ll also find some step-by-step instructions to build a simple lever to control the train, but we encourage you to get creative and build your own controller. The possibilities are endless!
We’ve made several examples that make controlling the train motor almost as easy as any other motor.
Requirements
To follow this project, you will need the following:
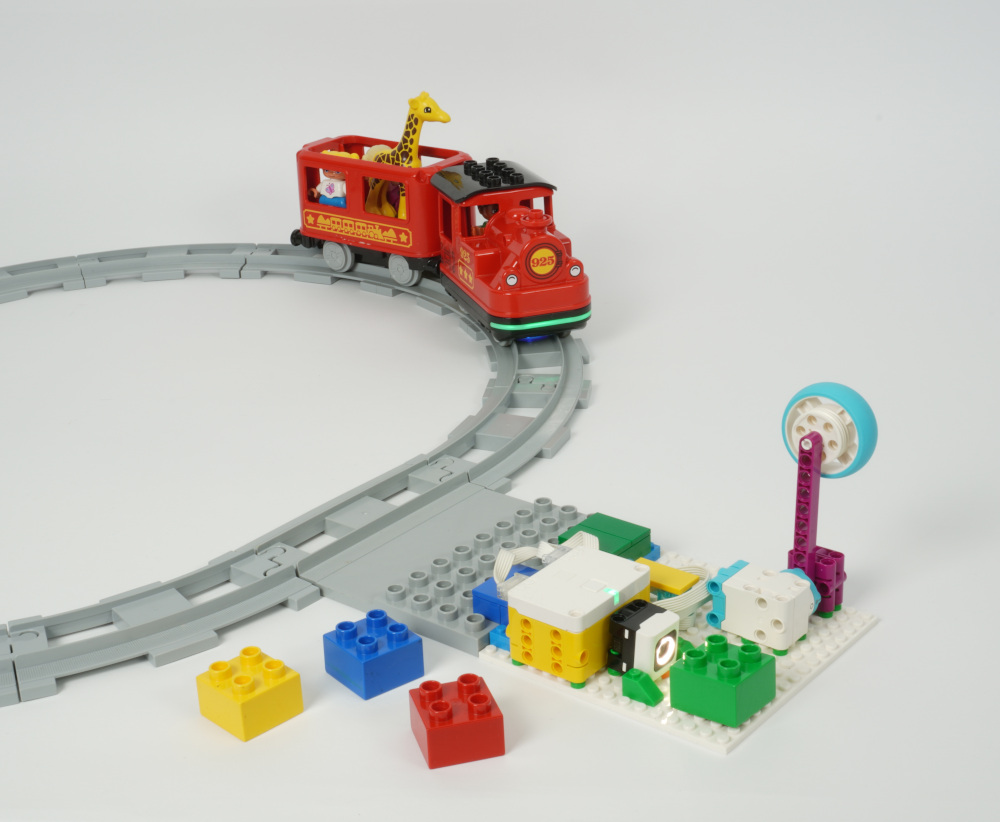
- A modern Duplo train such as the LEGO Duplo Steam Train (10874) or the LEGO Duplo Cargo Train (10875) . You’ll know it’s the right one if it has a light under the base next to the green button, which is normally used to scan those colored action bricks on the track.
- Any LEGO set with the City Hub, Technic Hub, SPIKE Prime Hub, SPIKE Essential Hub, or MINDSTORMS Robot Inventor Hub.
- Some motors or sensors to build interactive inputs for your controller, and some bricks to put it all together.
Controlling the train
You’ll control the train using another LEGO hub that runs Pybricks. You can see the basics in the video above.
The Duplo train itself doesn’t need any changes. It doesn’t run Pybricks. Instead, this other LEGO hub running Pybricks connects to the Duplo train by just sending the same Bluetooth commands that the tablet app normally would.
These commands to control the train aren’t included in Pybricks by default since it is a fairly specific use case. But this is one of those cases where Pybricks really shines: you can add an extra Python module and still easily use it in your block programs.
Adding the Duplo module
First, download duplo.py and
import it into Pybricks using the “Import file” button at the top of the file
menu in Pybricks.
While you’re welcome to see what’s inside that file, you won’t need to understand its contents to use it. Think of it as a module that provides a few functions that aren’t normally available as Pybricks blocks.
Using the Duplo module
To use this new module, you can import the extra functions into your block programs. Here’s an example:
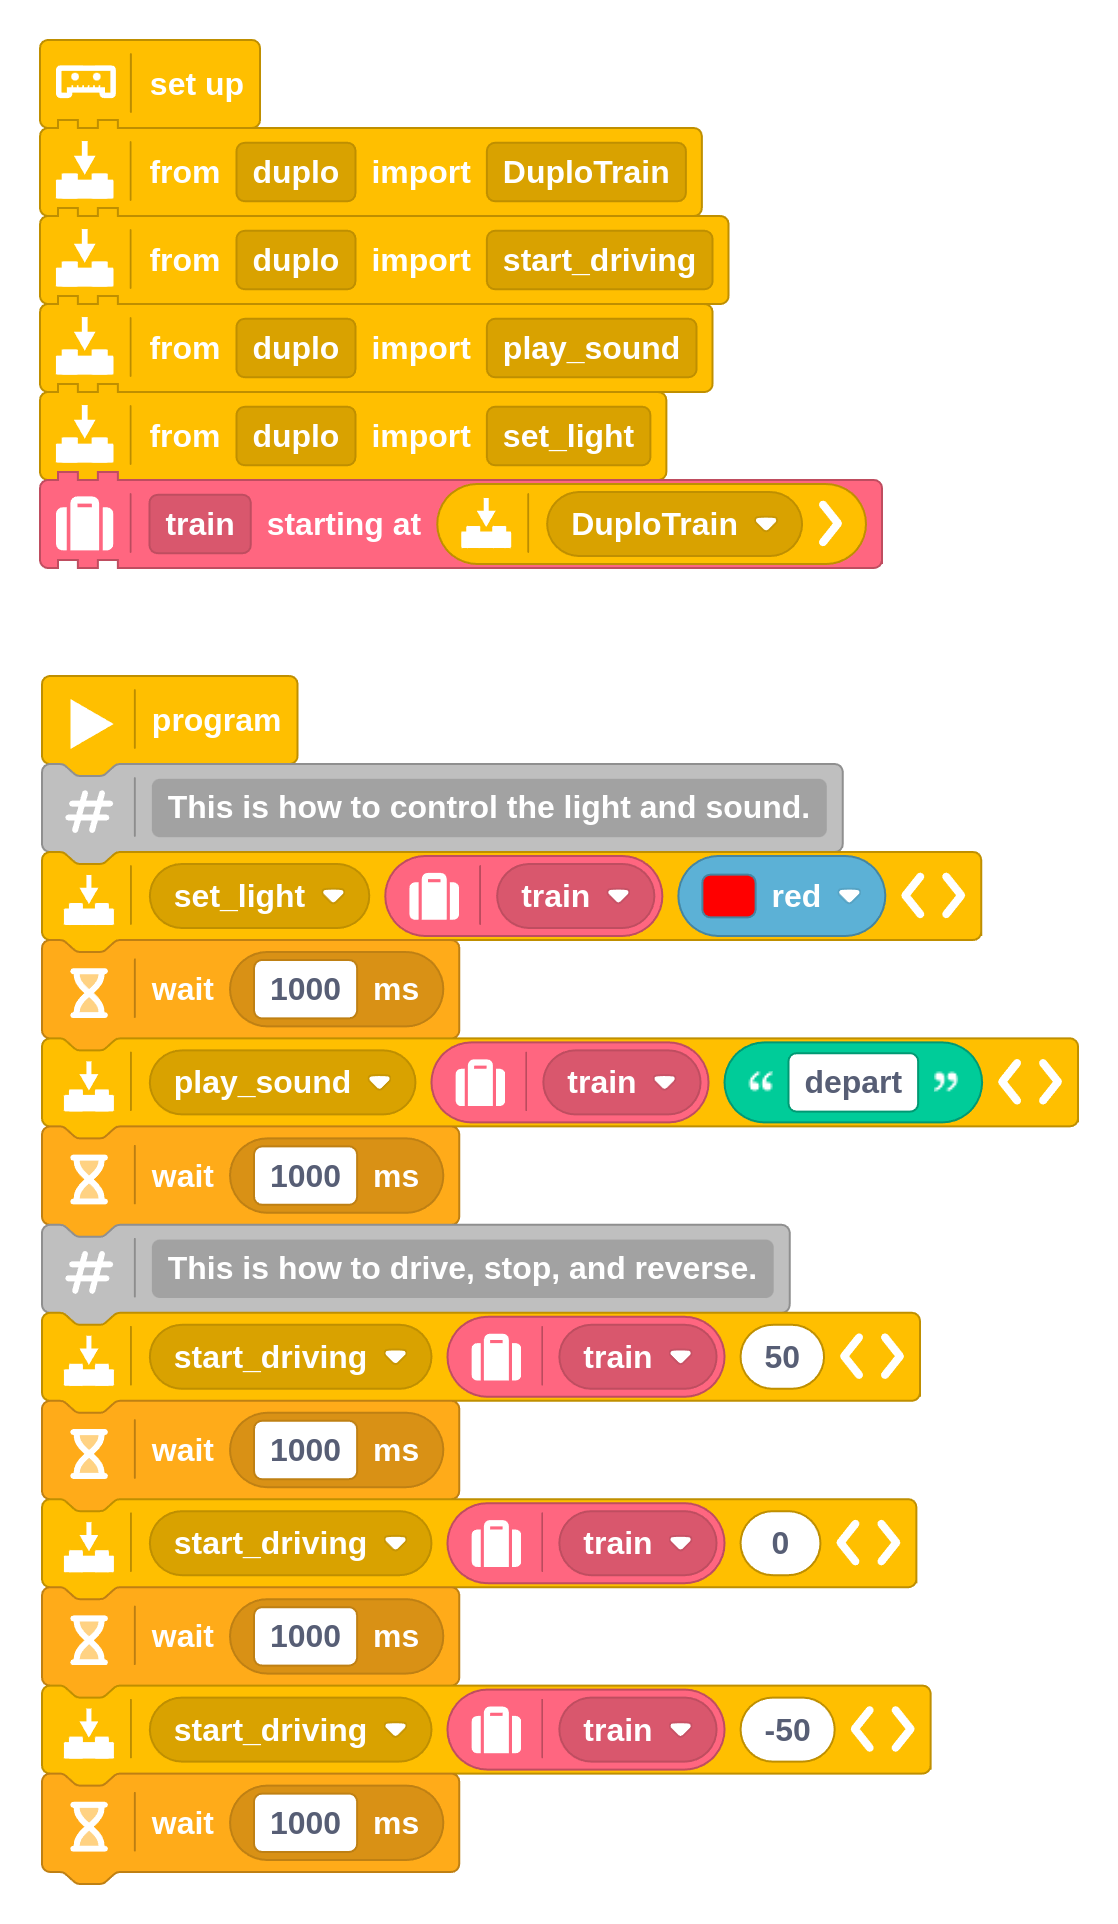
You can use these functions:
start_driving: Start the train motor at the given speed (-100% to 100%). Positive values go forward, and negative values go backward, and 0 stops the motor. Under 25%, it doesn’t move at all.play_sound: Play a sound on the train. You can pick one of these names:depart,brake,water,horn, orsteam. Thedepartsound is kind of fun and it isn’t normally available with the action bricks!set_light: Set the light color of the train. You can choose betweenmagenta,blue,green,yellow,orange, andred. Choosenoneto turn the light off.
If you’re not sure how to set up each of these blocks individually, you can start from the example given above and just copy, paste, and modify the blocks as needed.
Making the connection
Your LEGO hub will search for the train automatically when you start your program. Make sure the train is on.
The train is only connectable while the light is blinking white. It does this for about 30 seconds after you turn it on with the green button. If the light isn’t blinking, just turn it off and on again.
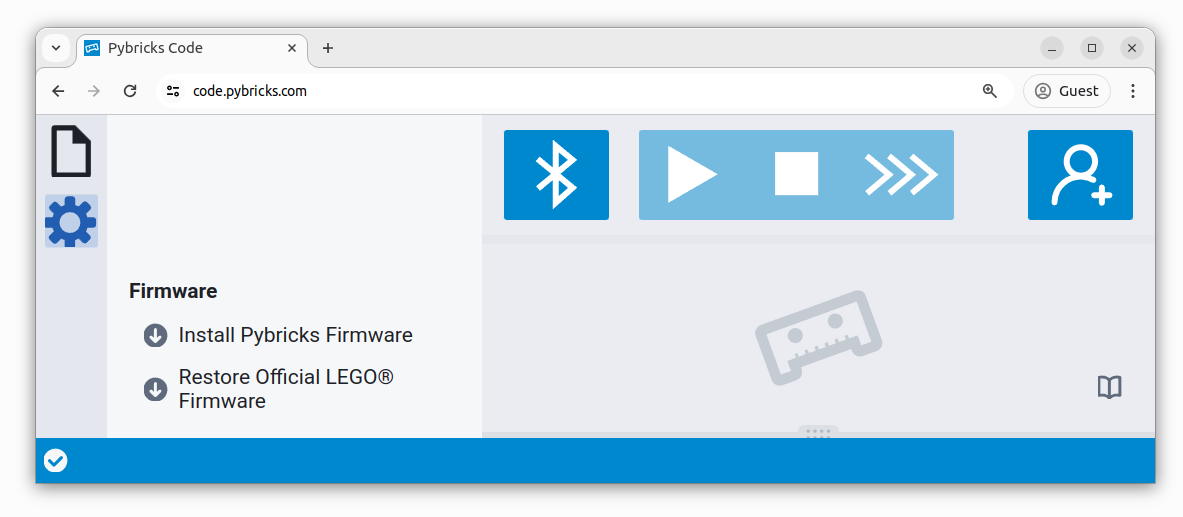
Running the Pybricks program
This project uses Pybricks on your LEGO hub. Pybricks makes your creations come alive and helps you unlock the full potential of your LEGO Technic, City, MINDSTORMS, BOOST, or Spike sets.
If you haven’t already, install Pybricks on your hub as shown below, or check out our getting started guide for more details. You can go back to the LEGO firmware and apps at any time.
Now import the program you downloaded earlier, as shown below. Click to connect your hub and ▶ to start!
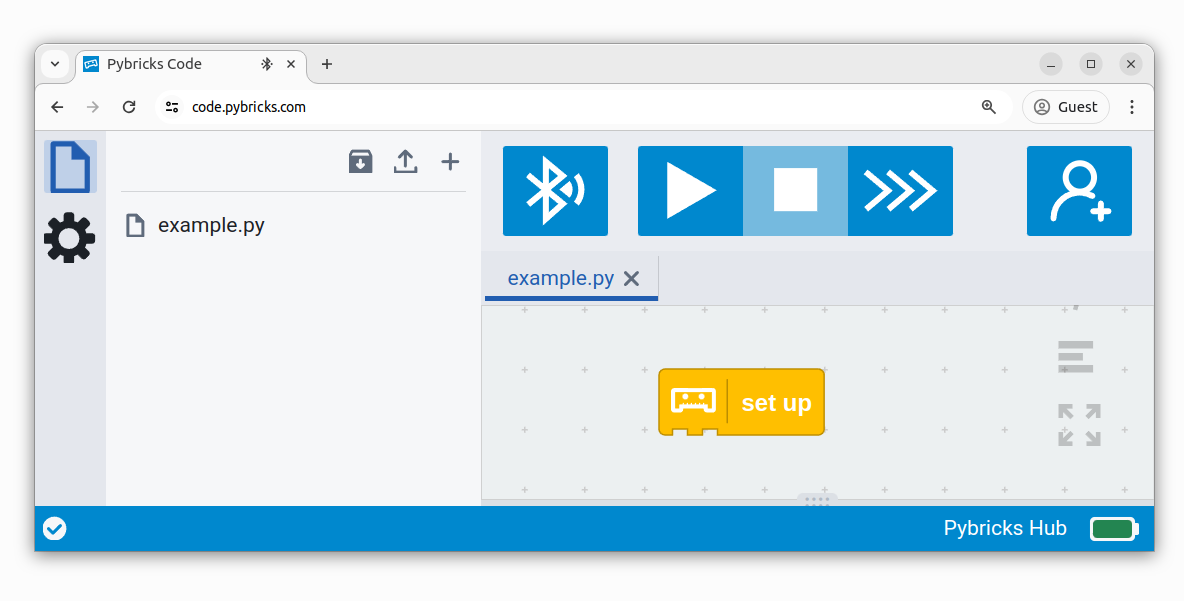
You can run imported block programs even if you’re not signed up. This is a great way to try out Pybricks and see how it works.
Making a speed control dial
With the basics out of the way, let’s build a simple controller for the train. You can use any motor with rotation sensors for this example.
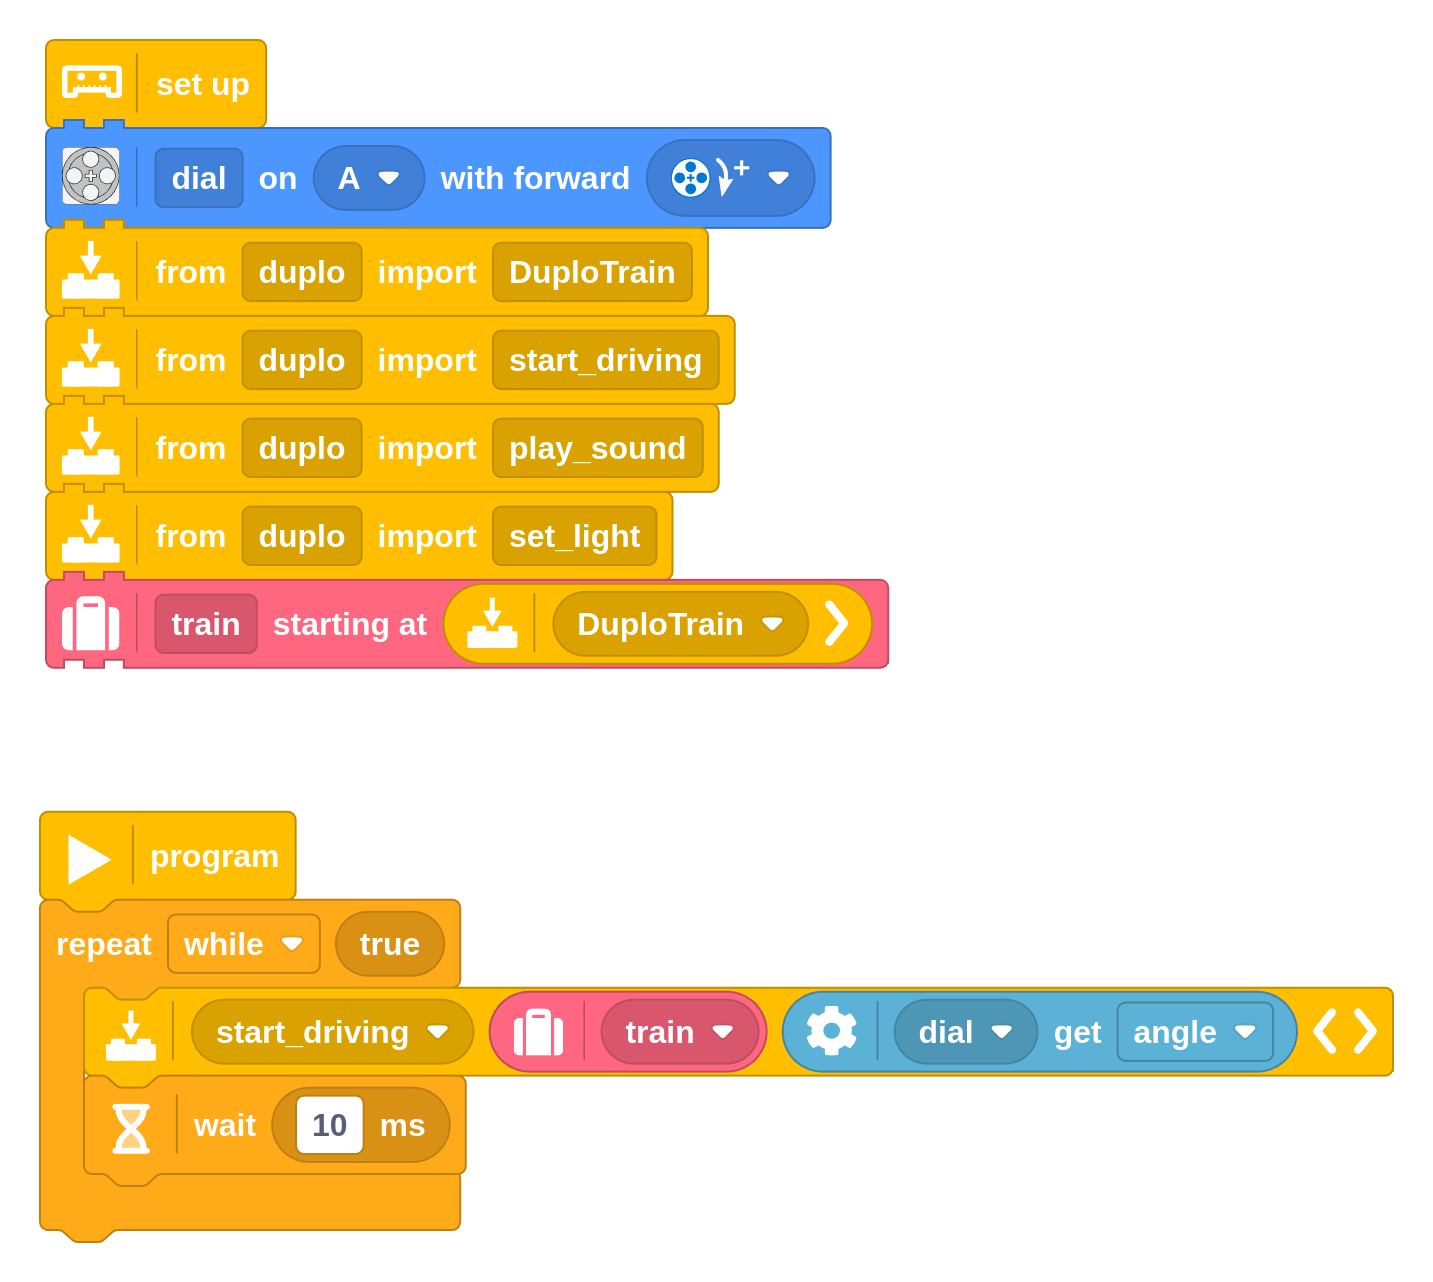
This program measures the angle of the motor and uses it to control the train speed.
So if you push the motor to +100 degrees (just over a quarter turn), the train will go full speed forward. If you push it to -100 degrees, the train will go full speed backward. And if you put the motor back to the middle, the train will stop.
Adding lights and sounds to the dashboard
Let’s take this a step further and add some interactive lights and sounds to the controller. For the kids, this will make it feel like a real train dashboard!
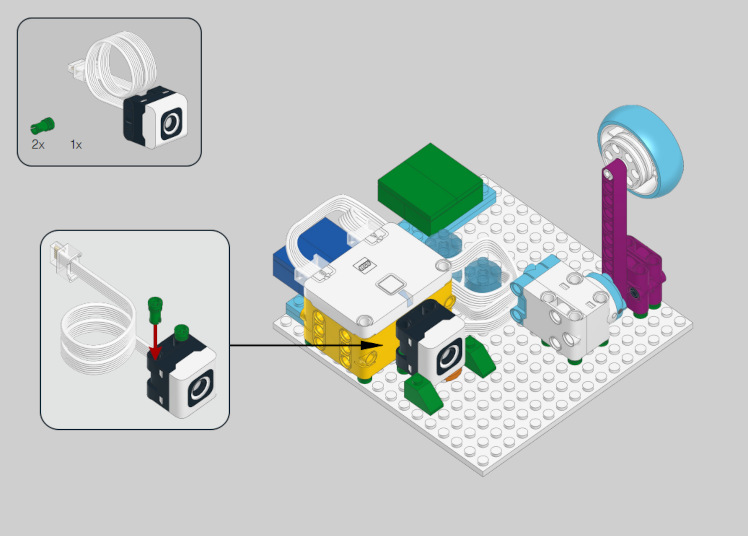
Building instructions
This example uses the LEGO Education Spike Essential (45345) set for inspiration, but you should be able to do this project with any LEGO set with similar motors and sensors.
Click the image below to download the instructions.
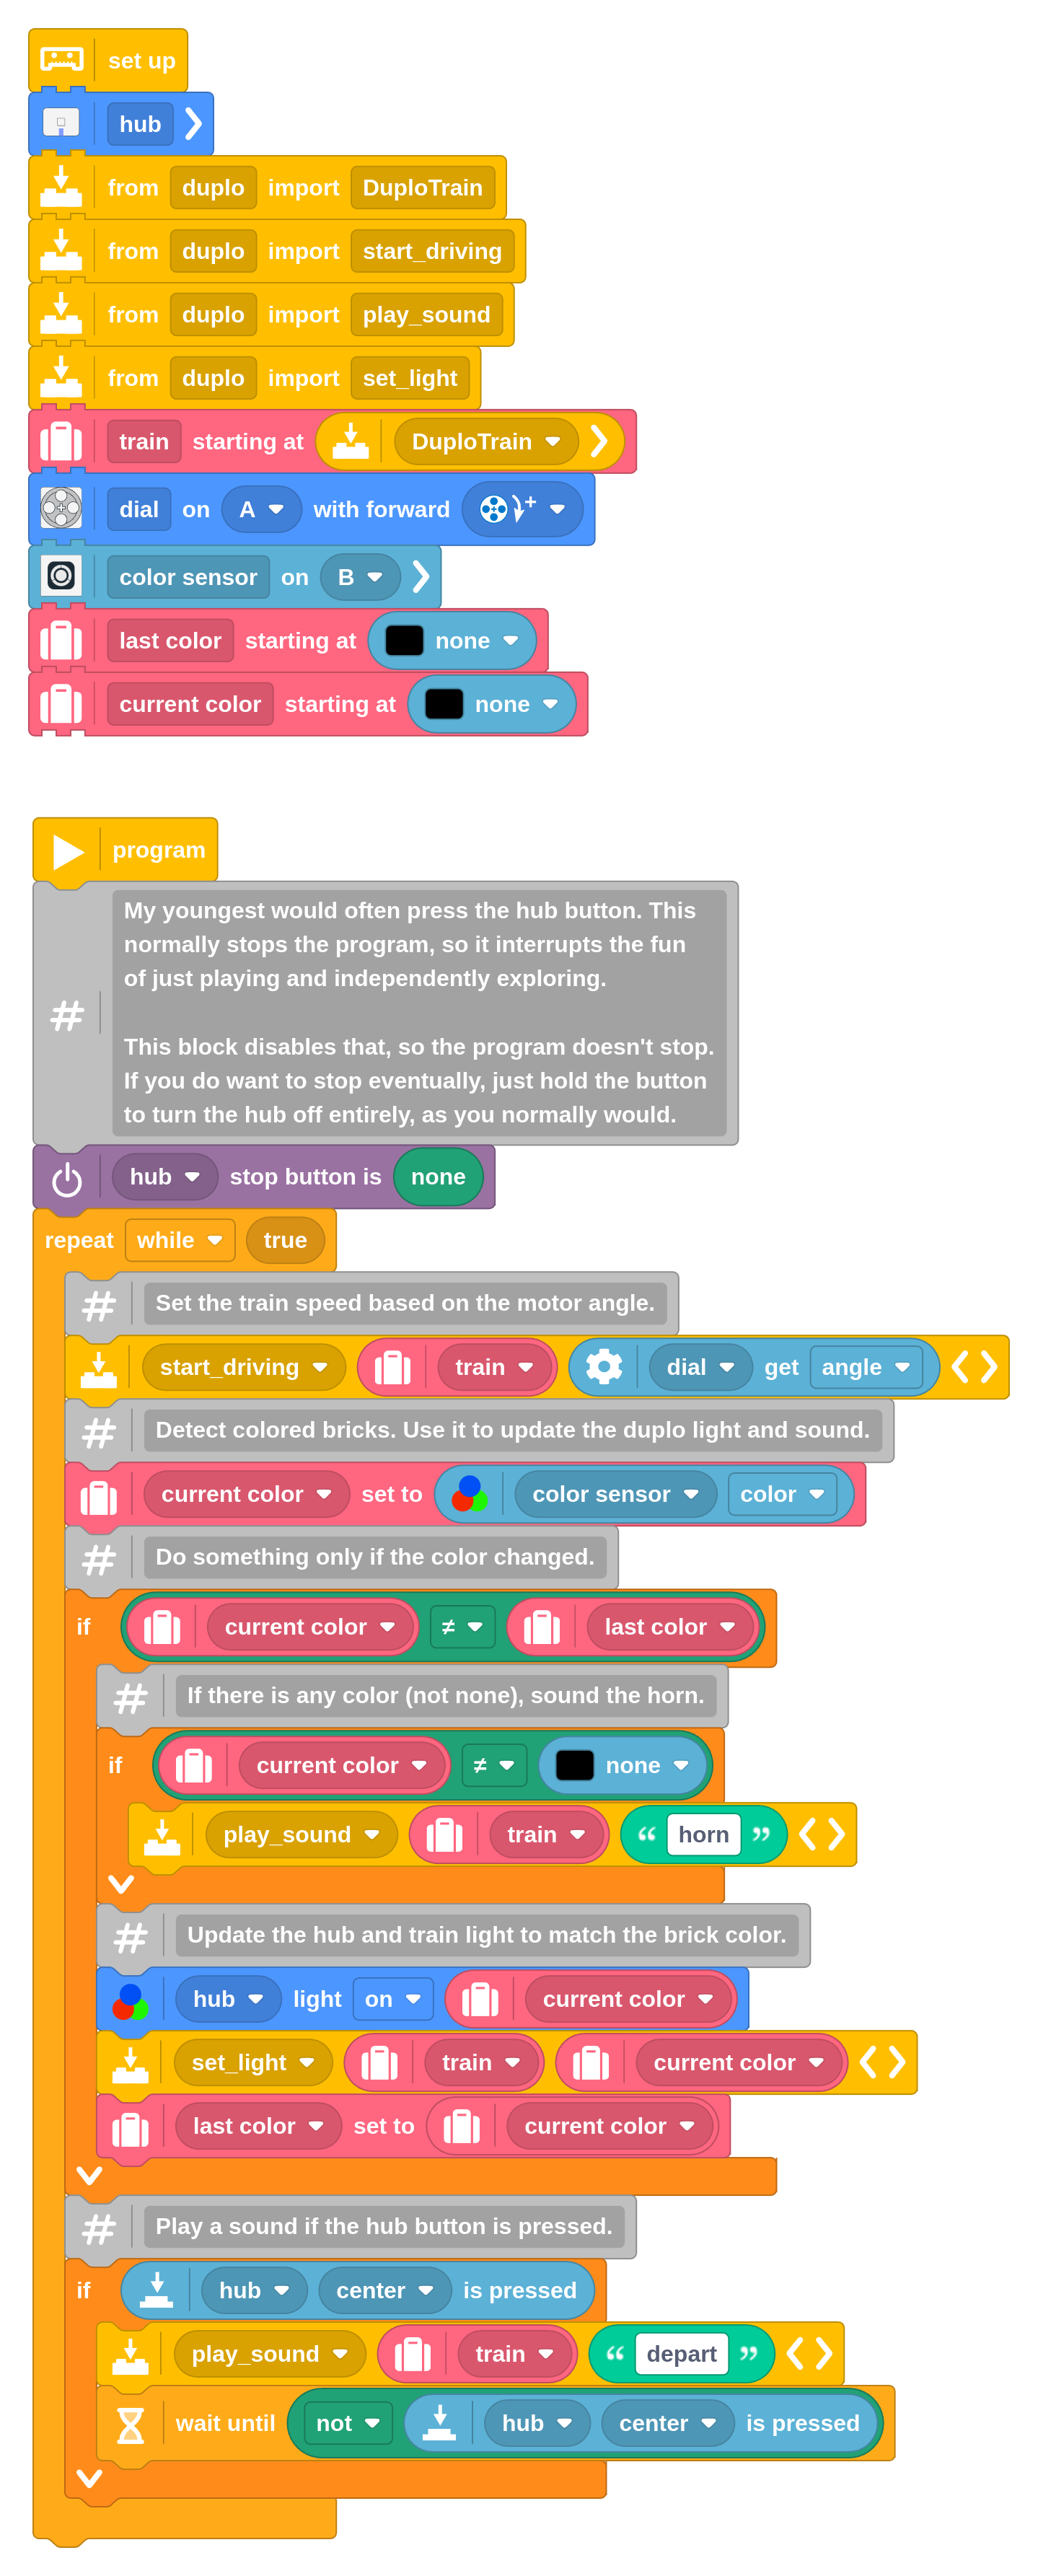
The full program
As in the video, the program implements the following actions:
- The train motor is controlled by the motor angle as in the previous example.
- The train light color is controlled by what the color sensor sees. You can put a colored duplo brick in front of it, for example.
- The hub light does the same. This made it easier to understand for the kids since at this point they are looking at the controller instead of the train.
- It plays a choo-choo sound when a new colored brick is detected.
- It plays the departure sound when the hub button is pressed.
If you have a different LEGO hub, just replace the hub setup block at the top with the one that matches yours.
Using Python instead
If you prefer to use Python instead of block coding, you can! Using that same imported module discussed above, you can write your main program in Python as well. Here’s an example to get you started.
from pybricks.parameters import Color
from pybricks.tools import wait

from duplo import DuploTrain

# Initialize and connect to the train.
train = DuploTrain()

# This is how to control the light.
train.set_light(Color.RED)
wait(1000)

# This is how to control the sound.
train.play_sound('depart')
wait(1000)

# This is how to drive, stop, and reverse.
train.start_driving(50)
wait(1000)
train.stop_driving()
wait(1000)
train.start_driving(-50)
wait(1000)
Digging deeper
If you take a closer look at the extra module,
you’ll see that it is based on
the LEGO Wireless 3.0 protocol,
or LWP3 for short. This is the same protocol used to connect with most LEGO hubs that run
the official firmware.
This lets you connect with hubs that aren’t directly supported by Pybricks. The Duplo train is a good example, but you could do something similar with the Mario hubs, for example.