How to download multiple Pybricks programs with your own menu
Normally, only one program is saved on the hub. This usually makes it easy to find and start your latest project. And it’s especially practical on hubs without a display.
But the SPIKE Prime Hub and the MINDSTORMS Robot Inventor hub have plenty of space for multiple programs. Downloading multiple programs is useful in competitions like FLL or WRO, where you might want to break down your programs into several missions.
This method differs from the conventional program “slots”, but it’s easy to set up and you have much more flexibility in how your mission programs work.
This article shows how you can download multiple programs, and add a simple menu that helps you start your selected program using the buttons on the hub.
You can use numbers in your menu, but also letters and symbols. This is often way easier to remember on competition day!
Multiple mission programs
For the purpose of this article, let’s assume we have three “mission” programs. These programs are very simple, but you can do this with programs of any size.
If you prefer to use Python for your missions, that’s fine too.


Adding a menu program
The next step is to add a “main program” that acts as your own menu. In this example, we’ll make a menu with the letters:
Hto start thehello_worldprogramSto start thesoundprogramLto start thelightprogram
To run it, create a new Python program. You can pick any name, such as menu
and paste the following code into it.
from pybricks.tools import hub_menu

# Make a menu to choose a letter. You can also use numbers.
selected = hub_menu("H", "S", "L")

# Based on the selection, run a program.
if selected == "H":
    import hello_world
elif selected == "S":
    import sound
elif selected == "L":
    import light
When you run it, you’ll see the letter H on the hub. You can toggle through
the other letters with the left and right buttons. Press the center button to
start one of them.
You can start this main menu again with the start button.
Although this main menu was made using Python, you’ll find that it is very easy to adapt. Just change the letters or program names to match your mission. You can also add extra programs or remove a few.
If you’d rather use a dedicated block for this menu instead of Python, feel free to let us know on the discussion forum.
How did it work?
The Python program you just ran has two main parts:
- The
hub_menufunction combines the display and the buttons to let you pick a symbol. - One of the
importstatements will run the respective mission program.
Whenever a Pybricks program contains an import statement, the respective file
is downloaded to the hub along with your main program. So, by downloading your
menu program to the hub, it also downloaded the hello_world, sound and
light programs along with it.
You can still download and run each program separately during testing. Just
remember to download the menu program to the hub again afterwards!
Caveats
This extra section is only needed if you want to write more advanced menus. If you’re happy with the menu technique above, just skip this section.
There is nothing inherently special about this “menu program”. It is a Python program like any other. Import statements work just like they normally do. This offers great flexibility, but it can result in some surprises if you’re new to Python.
The approach used above works great for a basic menu, but you might want to organize your code a bit differently in case you want to take this menu technique even further.
The import statement will run a program only the first time, even if you run
the same import again in the same program. This is why programmers would
usually write the “mission” as a function (a task) instead. You could import
that function and call it from your menu program as many times as you like.
Multiple programs on other hubs
You can use this same technique of using import statements to combine
multiple programs on any hub. The other hubs don’t have a display and multiple
buttons, however, so you may need to get creative to determine the selected
program.
For example, you could make the hub cycle through a set of colors with the hub button, and then choose a particular program by pressing the button a bit longer. You can also select the import dynamically based on what’s plugged in, as shown below.
Choose which program to run based on what is plugged in
As an alternative to selecting a program using a menu, you can use a similar technique to automatically choose which program to run based on what is plugged in. This is useful if you have a robot that can do different things based on what sensors or motors are connected.
To illustrate this, let’s add another example program. This simple program start a DC Motor if the Boost Color and Distance sensor sees green, and stops it if it sees red.
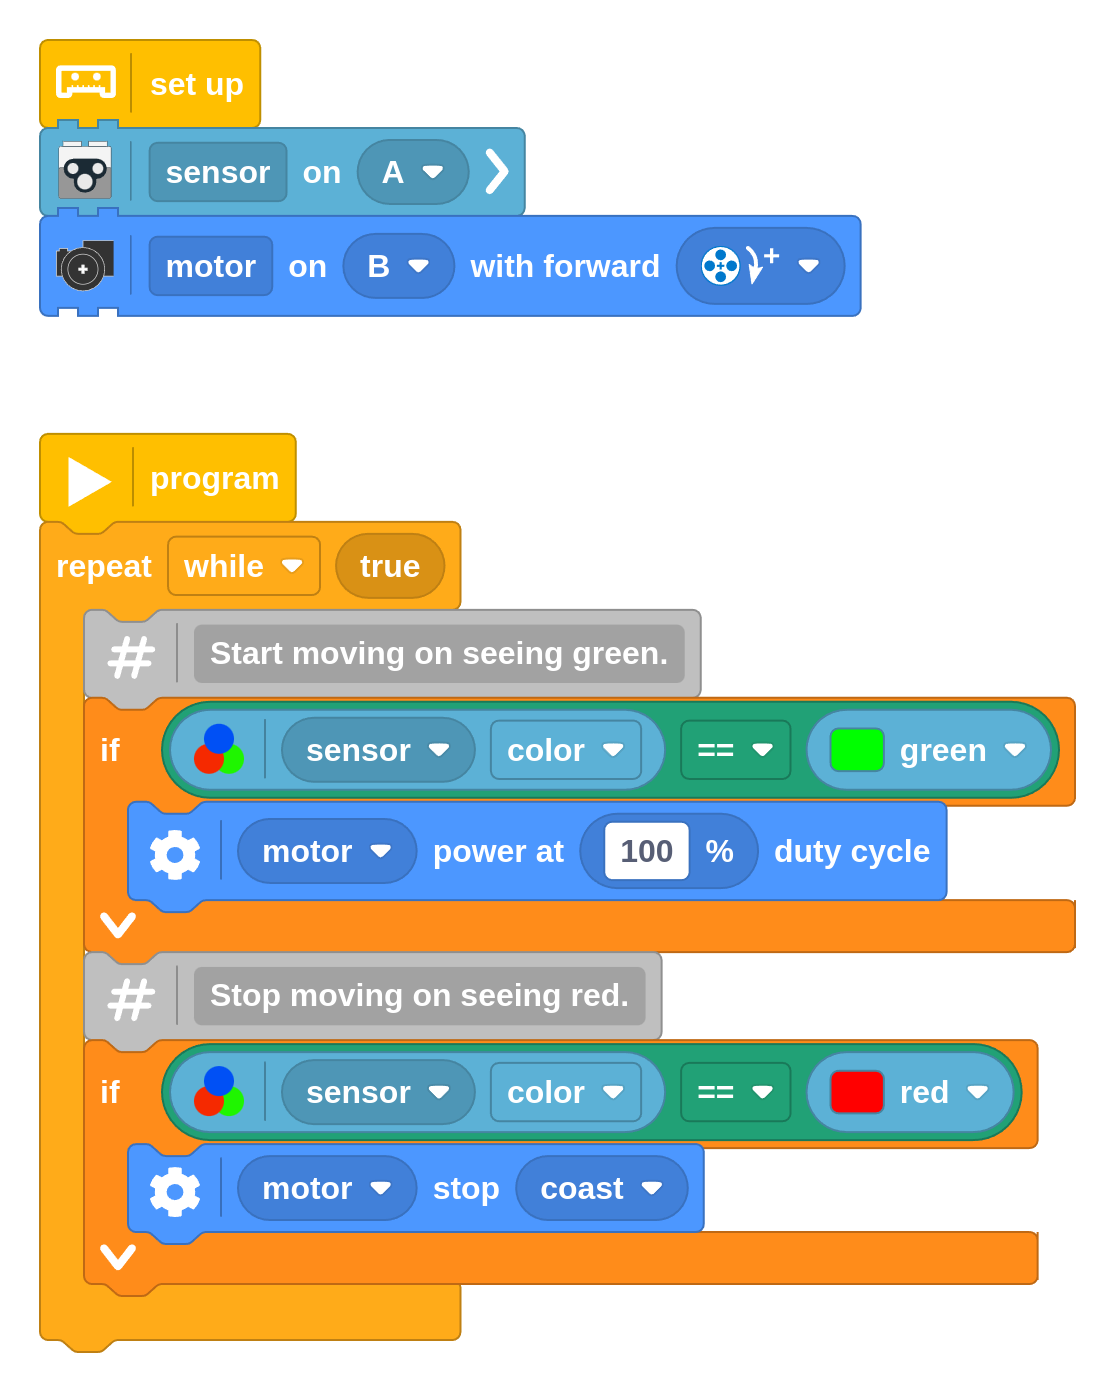
Now suppose we want to run that program if those devices are actually plugged
in, and otherwise run the hello_world program from before.
To do that, create a new Python program. You can pick any name, such as
choose_program and paste the following code into it.
try:
    import sensor_start
except OSError:
    import hello_world
This will try to run the sensor_start program. When the devices are not
plugged in, this raises OSError so it will run the hello_world program
instead.
You can adapt this to your own project, and even nest these checks to choose between more than two programs.

