Classification with machine learning
Computers can recognize objects with cameras by training on lots of example photos. On this page you’ll learn how to train your own model to distinguish objects of your choice. Your phone detects the object and sends this information to your robot, where you can make it respond in any way you like.
Using smart sensors: Be sure to check out the smart sensors introductory guide first. Once you know how to connect your phone and receive values, you’re ready to apply it to the machine learning examples on this page.
use the result, just
like a sensor value.
the best match
with your model.
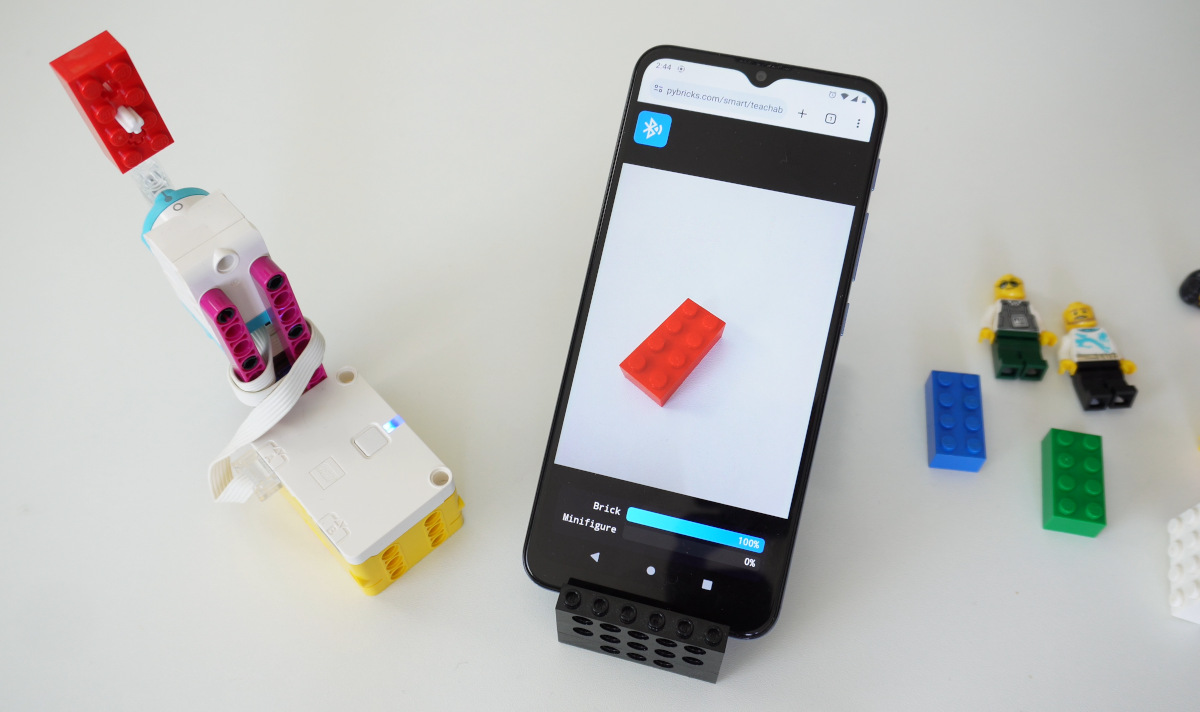
Is it a brick or a minifigure?
To get familiar with this technique, you’ll start with a model that is already trained to distinguish LEGO bricks from LEGO minifigures. The robot responds by moving a motor to point at the result, as shown below.
You don’t actually have to build this robot. Just connect one motor to port A and add a beam so you can easily see which way it points. You can use other hubs like SPIKE Prime too.
On your phone, go to pybricks.com/smart and choose the classification example. Connect it to your hub as before and run the following example.

The setup block for the smart sensor is configured with the classification
option. With it, your program receives a list of two numbers from your phone:
- The prediction. It is the number of the best matching category. In this
example, the brick is category
0and the minifigure is category1. If your model has more categories, the next would be number2, and so on. - The confidence of the prediction, between
0and100.
This example uses only the prediction value. If it is 0, it moves the brick
on top and otherwise it moves the minifigure on top by turning 180 degrees.
Training your own model
You can make your own models with Teachable Machines. No coding or technical skill required. If you’re new to Teachable Machines, check out this tutorial on testing how ripe a banana is. You could even replicate it to build a LEGO banana sorter!
Preparing your own images
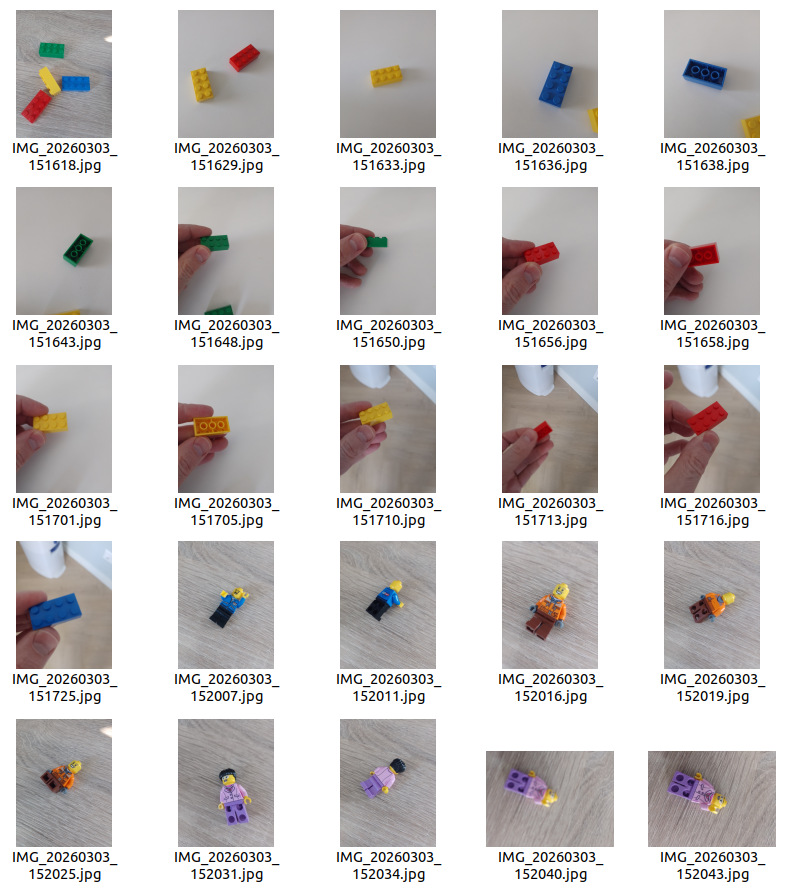
You train your model by making lots of example photos of anything that your robot may see in its final application. In this case, we need pictures of LEGO bricks and minifigures.
For best results, use the same camera that you’ll use on your robot later. You can transfer your photos to your computer using a USB cable or a file share app of your choice.
For this project, I took 26 pictures of various LEGO bricks and 45 pictures of different minifigures. Be sure to include variations in background. Also include pictures with and without your hands, and anything else that your robot could encounter.
Training the model
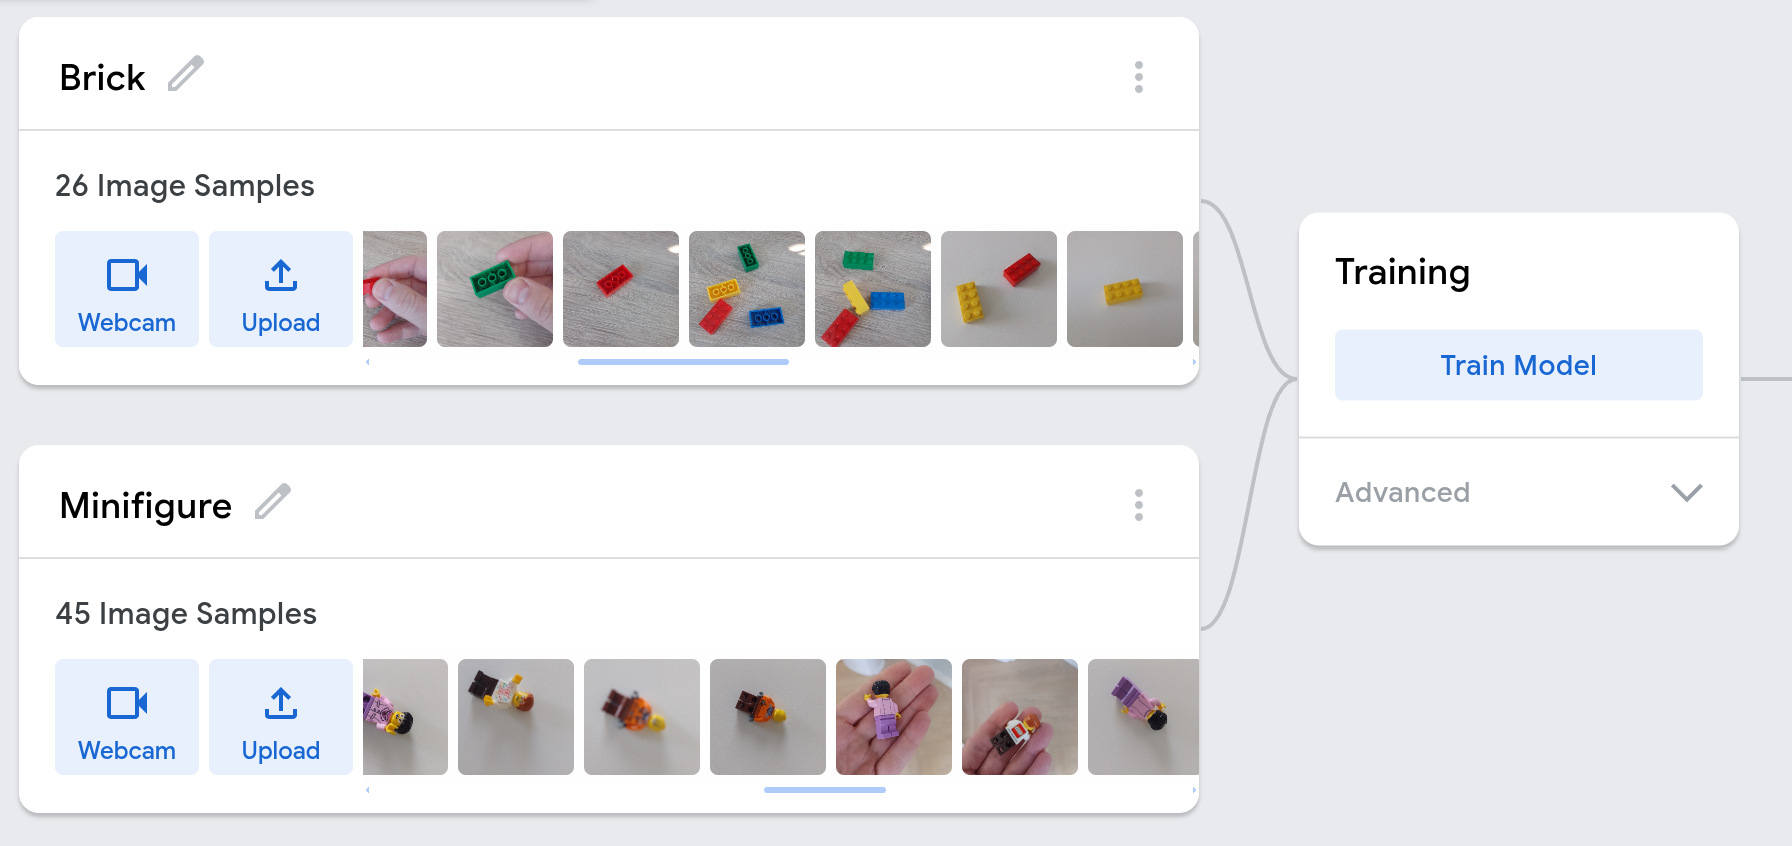
Now open Teachable Machines in image mode. Use the pencil icon to give each category a name. Then upload the pictures you took to the correct category. Click “Train Model” when ready, as shown below.
Getting the model code
Once trained, click “Export Model”. Leave all default options in place and click “Upload my model”. Once ready, you’ll see a shareable link.
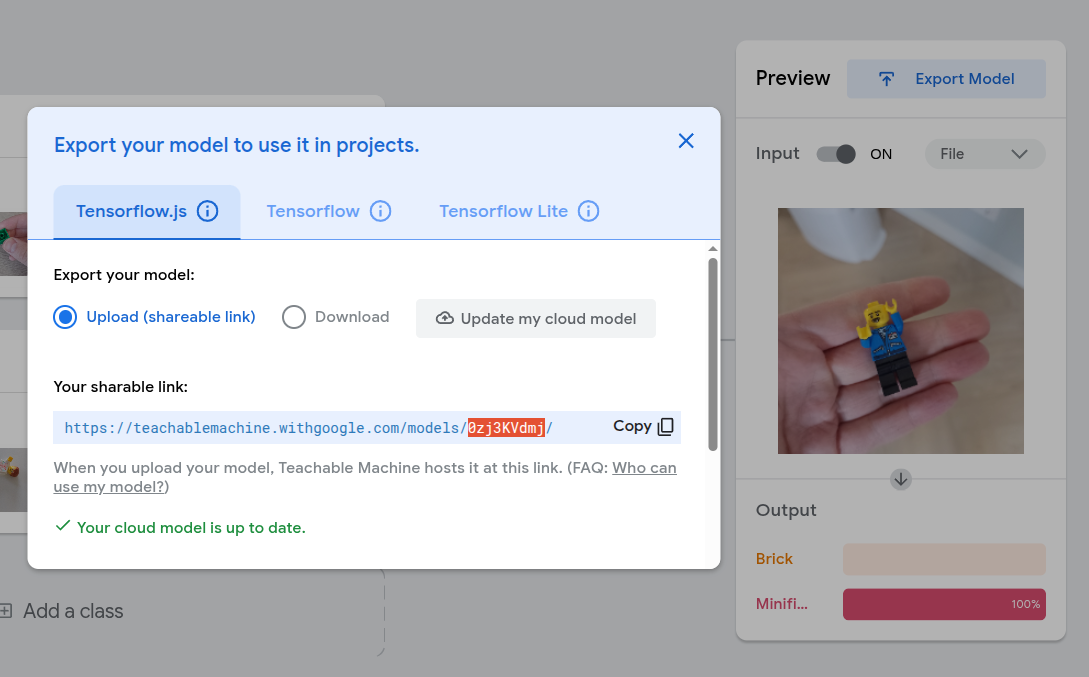
Copy the model code without the trailing slash, so 0zj3KVdmj in this case.
This is the code you enter in your program, as shown in the block program above.
When you run your program on the robot, the smart sensor on your phone will start using your own model.
Using Python (optional)
If you prefer to use Python, you can use the following example as a starting point. It’s the same as the block program.
from pybricks.parameters import Direction, Port, Stop
from pybricks.pupdevices import Motor
from pybricks.tools import AppData, wait

# Set up.
app = AppData('bb')
app.write_bytes('0zj3KVdmj')
prediction = 0
confidence = 0
motor = Motor(Port.A, Direction.CLOCKWISE)


# The main program starts here.
while True:
    prediction, confidence = app.get_values() or [0] * 2
    if prediction == 0:
        motor.run_target(200, 0)
    else:
        motor.run_target(200, 180)
    wait(10)