Use your phone as a smart sensor
The sensors that come with your LEGO set are simple and effective, but they are limited in what they can measure. Did you know there’s a perfectly good sensor in your pocket?
In this chapter you’ll learn to use your computer camera or your phone as a smart sensor to add vision and intelligence to your creations.
values
camera
like normal sensor values
This is a new feature: This project uses new beta features. Use Pybricks Beta to try it early. Just update the Pybricks firmware and create programs as usual!
Setting up a smart sensor
Smart sensors work quite like the regular sensors you’ve used in the previous chapters.In this case, you’ll use the Smart Sensor setup block. You’ll find it at the bottom of the setup palette, as shown below.
You can choose various smart sensors from the block’s dropdown menu. To get started, pick the default color tracker. You get its measurements with the Smart Sensor values block, found on the input tab.
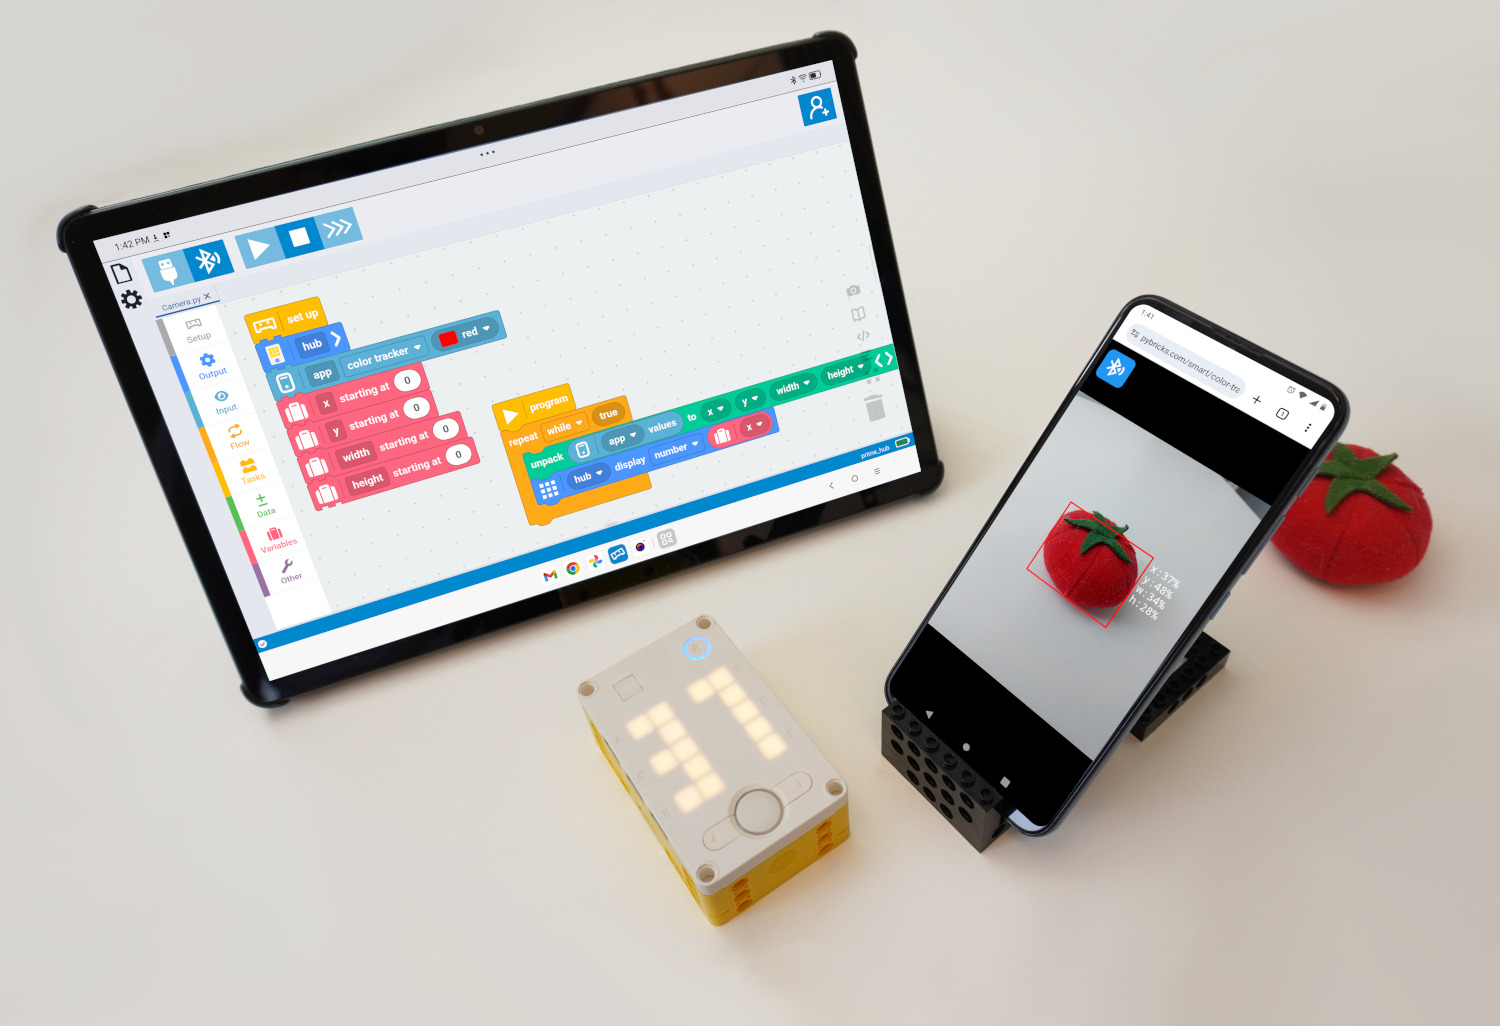
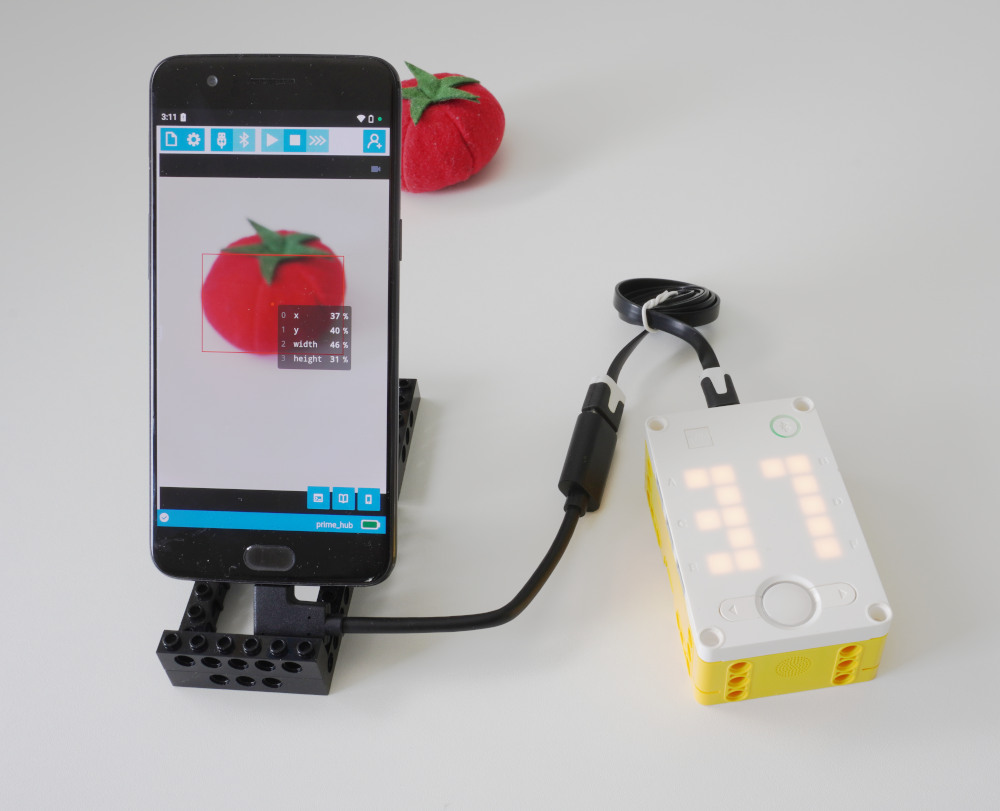
In Pybricks, click the phone icon in the lower right to turn on your camera. Now start your program. The camera view will automatically activate the sensor you picked.
If you hold a red object in front of your camere, your hub displays the horizontal (x) position, as demonstrated in the video.
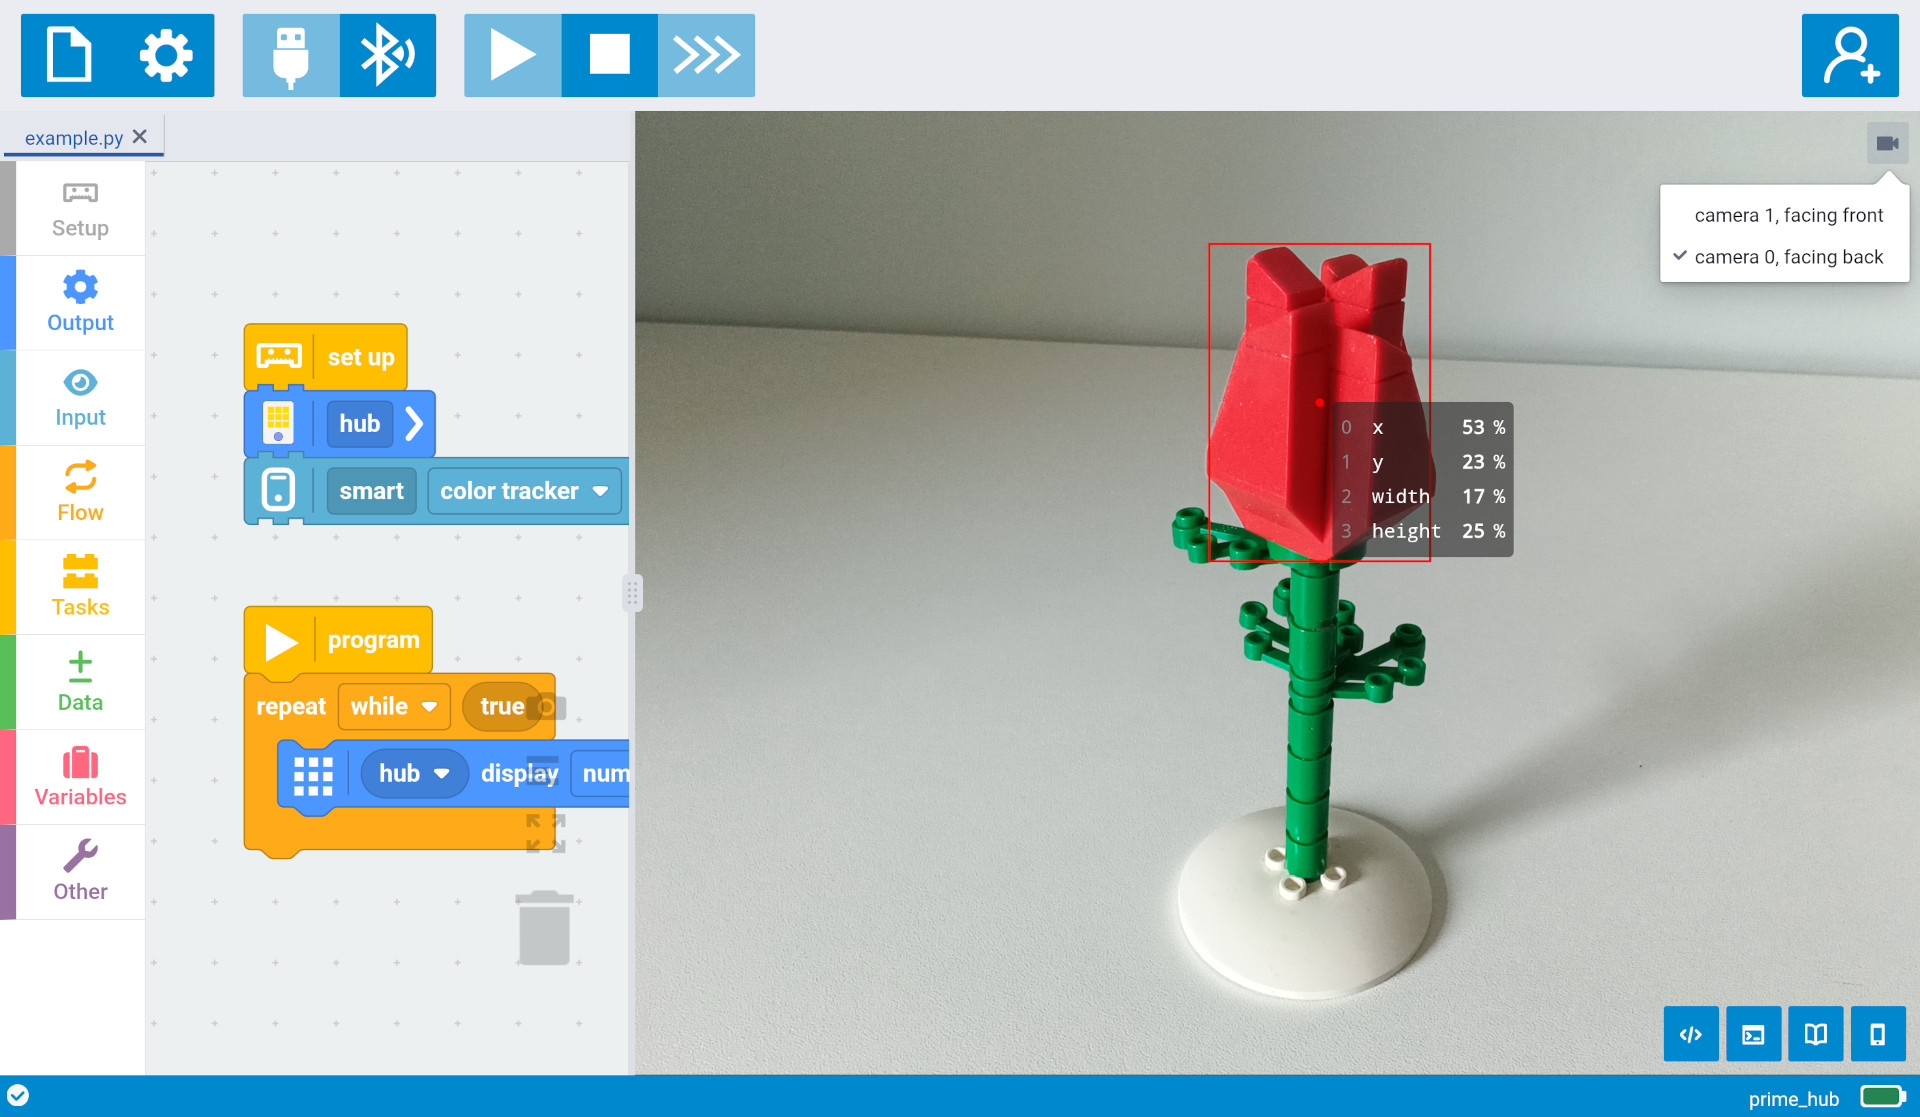
The Smart Sensor values block lets you choose which sensor value you want. In
this example, we chose 0 to get the horizontal position. Each smart sensor
reports its own set of values, which you can see displayed on the camera view.
camera
the longest side of the picture
value 1 is y: 23%
value 2 is width: 17%
value 3 is height: 25%
The color tracker that you just tried gives four values:
- x-coordinate: Horizontal position, from the left.
- y-coordinate: Vertical position, from the top.
- width of the bounding box.
- height of the bounding box.
All values are percentages (0 to 100%) of the longest side of the camera picture. If there isn’t any matching colored object, you’ll get all zeros. If there are more, you’ll get just the biggest object.
You can also get all values as a list. You can unpack this list into variables to make your program easier to read, as shown below.
Your phone as a wireless sensor
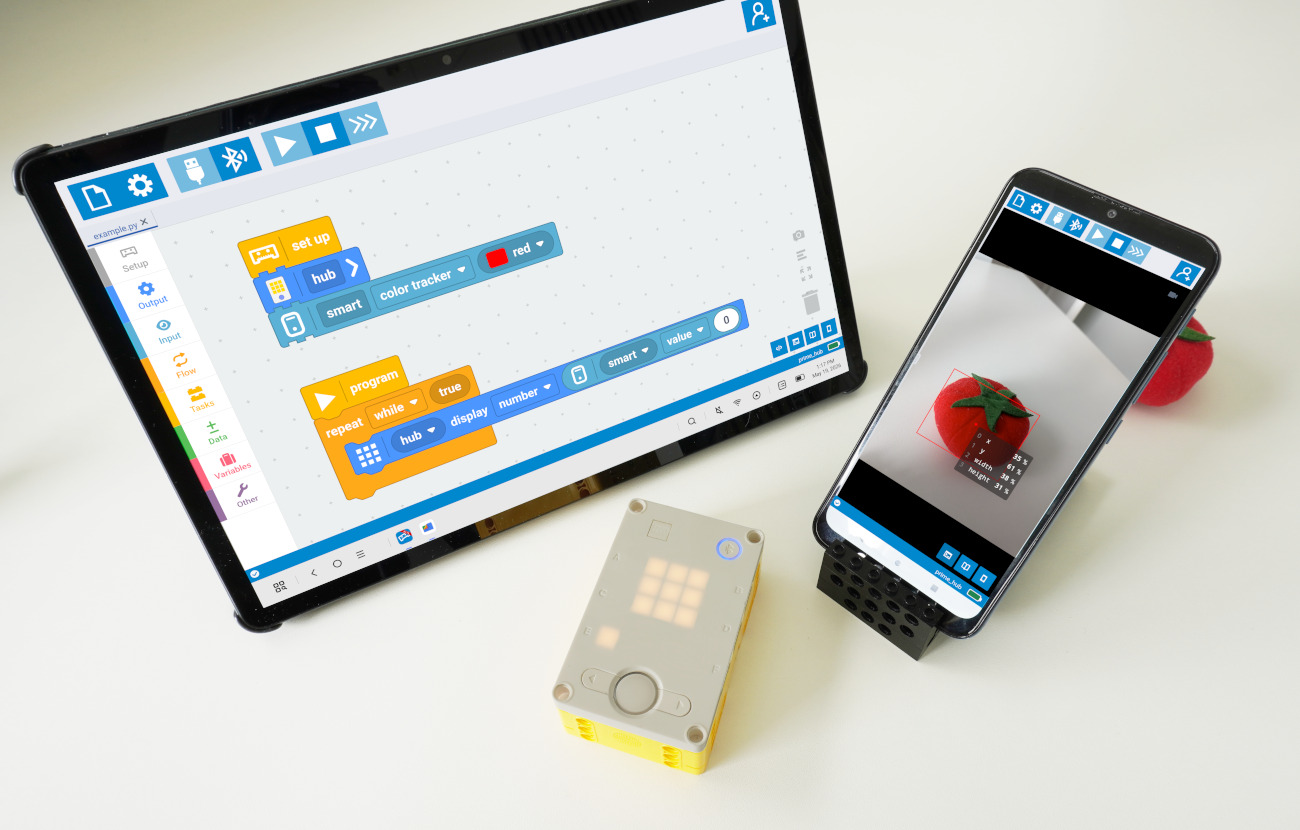
That was fun, but what about robots that move? Putting your laptop on your robot would be a bad idea! Instead, you can connect a second device to your robot, such as your phone.
like you normally do.
second connection.
Don't load any program.
Just open the camera.
on your phone.
You won’t need to open any Pybricks programs on that phone. Your phone is basically a wireless sensor. It converts camera pictures into useful values. Your robot still decides what to do.
Follow these steps to connect, as illustrated in the video:
- On your computer, connect your SPIKE Prime hub with Pybricks as usual. Leave the camera view closed and don’t start the program yet.
- Press the Bluetooth button on the SPIKE Prime hub to make it blink again.
- On your phone, open Pybricks and connect.
- On your phone, tap the phone icon to activate the camera.
You can now start the program with your computer. If your program is already on the hub, you can just start it with the hub button. This works even if your computer is off.
Android ⸺ This works well with Google Chrome on Android. You can install Pybricks as an app shortcut for extra convenience.
iPhone ⸺ Safari and Google Chrome for iOS don’t have Bluetooth. Instead, you can use a free browser app that supports Bluetooth, such as Bluefy.
Following a colored object
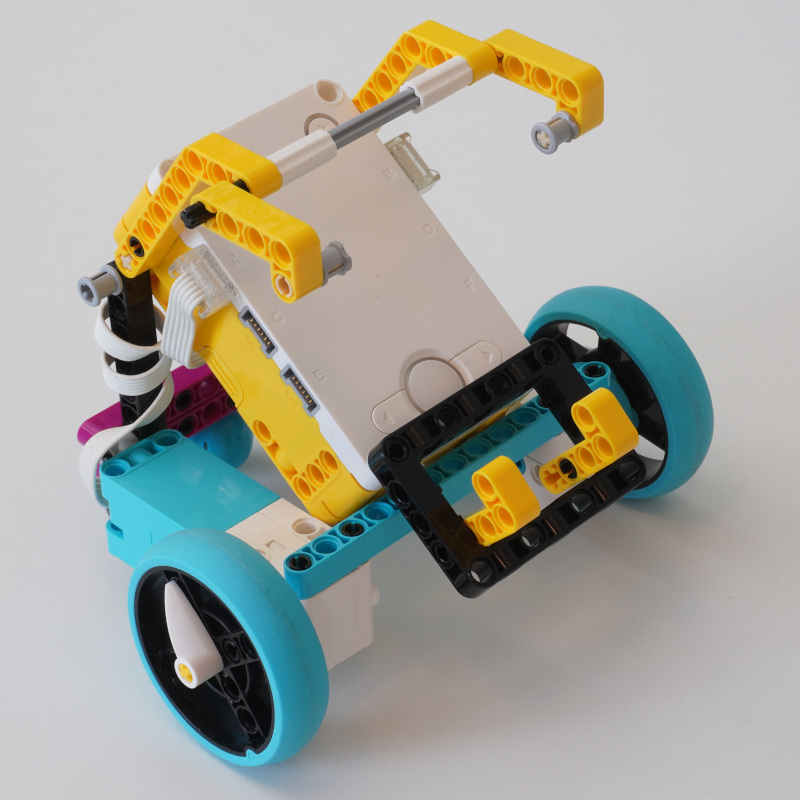
You can use the position and size information to follow a colored object by placing your phone on a robot:
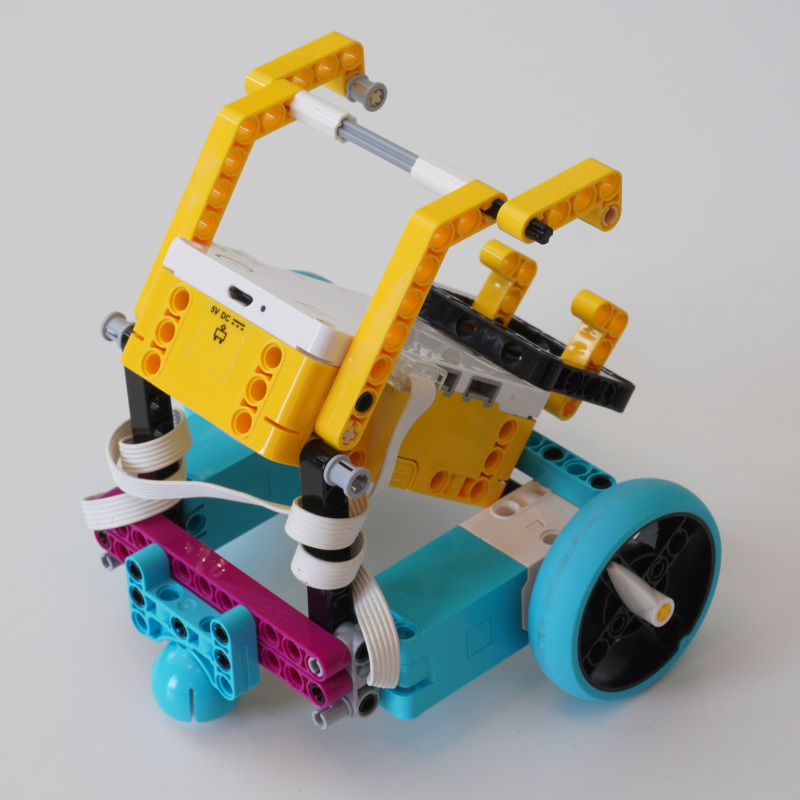
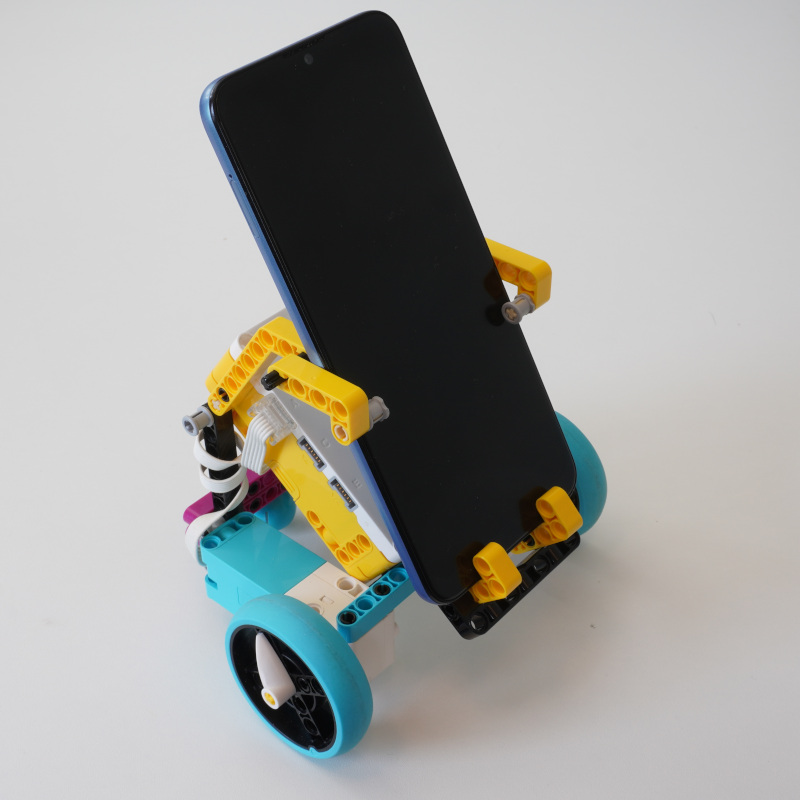
You can build your own robot or use the StarterBot and add a phone holder as shown below. If your phone is larger, use a longer axle at the center, and use the yellow angled beams to hold it in place.
The color tracking program is mostly the same as before, but we’ve added drive blocks for three behaviors:
- If we don’t see the colored object, rotate in place.
- If we see it up close, stop.
- Otherwise, drive at constant speed and adjust steering to steer towards it.
Because the camera faces the other way with this design, we’ll consider that the front of the robot. This is why the motor settings are reversed compared to the conventional StarterBot programs.
Connecting via USB (optional)
For extra performance and reliability, you can connect your Android phone to the hub via USB, as shown below. All you need is a USB-C to USB-A converter, which costs about $7. They are also known as on-the-go (OTG) adapters.
Some adapters have an angled shape, which takes up less space in your robot. You can use the standard programming cable that comes with SPIKE Prime, or you can use a shorter micro-USB cable to save space.
The connection steps are the same as before, but you choose the USB button in Pybricks for one of your devices.
standard micro-USB cable
Using other other hubs (optional)
The smart sensor technique works with any LEGO hub that runs Pybricks, as shown below.
SPIKE Essential
SPIKE Essential works almost the same as SPIKE Prime, but it doesn’t have a Bluetooth button on the hub to allow a second connection. You can still follow all the example projects where the camera is on your main device.
If you want to use a separate phone, one device must use Bluetooth and the other must use USB. Connect Bluetooth first.
Move Hub, Technic Hub, City Hub
The Smart Sensors work just the same with the BOOST Move Hub, the Technic Hub, and the City Hub. However, they support only one Bluetooth connection and they don’t have a USB port.
If you want to use a separate phone for mobile robots, you’ll have to create or open your program directly on that phone.
Alternatively, download it to your robot with your computer and then disconnect. Then connect your phone. Now you can start the previously saved program using the green button on the hub.
MINDSTORMS EV3
The Smart Sensors also work with EV3. At the moment, EV3 supports only USB, so you’ll have to use the Smart Sensors on the device that you’re coding with.
Using Python (optional)
If you prefer to use Python, you can use the following example as a starting point. It’s the same as the block programs above. You can also download and open any of the block programs and see the Python code inside.
First, initialize the AppData class from the pybricks.tools module.
You pass a list of (mode, size) pairs. The mode is 0 for the color
tracker and it returns 4 bytes.
You obtain the most recently received values using the get_bytes() method.
As the first argument, specify the mode. The second argument is an optional
index for the byte value. If omitted, you get all bytes for that mode.
Some smart sensors allow you to send a configuration command. For the color tracker, you can send a single byte representing half of the hue of the requested color. For dark blue (hue = 220 degrees), you would send 110.
from pybricks.hubs import PrimeHub
from pybricks.messaging import AppData
from pybricks.parameters import Color

# Set up.
hub = PrimeHub()
app = AppData([(0, 4)])
app.configure(0, 0, bytes([Color.RED.h // 2]))


# The main program starts here.
while True:
    # Display the x position, which is value 0.
    hub.display.number(app.get_bytes(0, 0))