Using Pybricks with Visual Studio Code and other editors
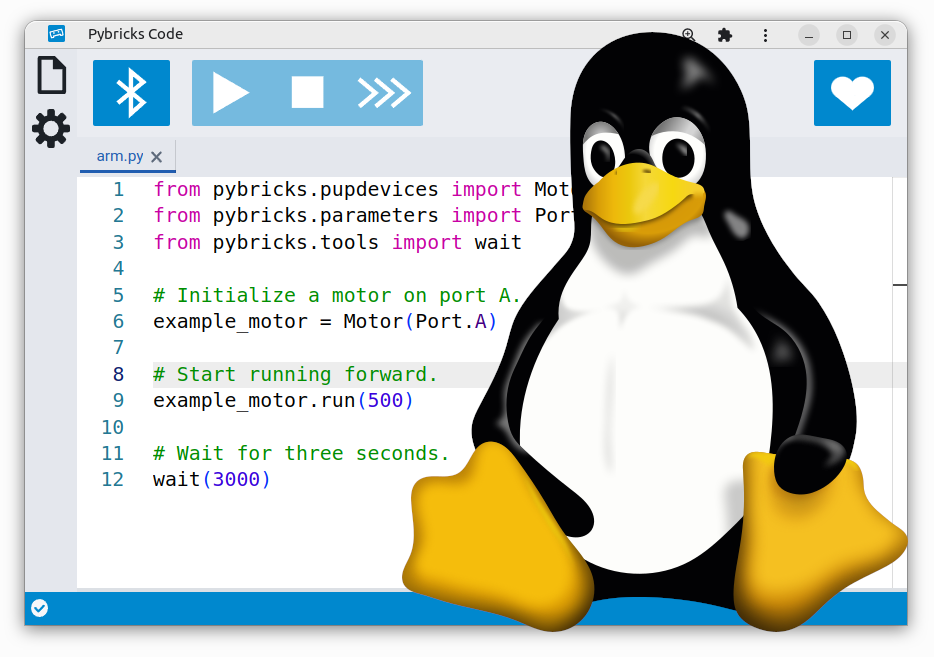
You can create programs on Windows 10 or 11, macOS, Linux, Android, or ChromeOS. The simplest way to get started is to use the web-based Pybricks Code editor at code.pybricks.com.
You can also use your preferred local editor. On this page, we’ll show you how.
This guide is for Powered Up hubs. If you are using Pybricks on LEGO® MINDSTORMS® EV3, we recommend using the official LEGO® MINDSTORMS® EV3 MicroPython extension for Visual Studio Code. Everything you need to know from how to install the extension to how to create a new project is detailed in the official docs.
Running Pybricks scripts from the command line
Instead of a full-fledged extension for a specific editor, we’ve created a
generic command line utility called pybricksdev that you can use to run
programs on the LEGO hubs. In turn, you can integrate this tool with your
favorite editor.
If you plan to use Visual Studio Code or a similar editor, skip this manual approach. We’ll do it as part of a bigger installation later in this article.
Since pybricksdev is just a Python package, you can install it with
your favorite Python package manager. If you have
pipx
for example, you can do:
pipx install pybricksdev
Once installed, you can run programs from the command line as follows. Replace
my_program with the actual name of the program you want to run.
pybricksdev run ble my_program.py
If you have more than one active hub, you can specify a specific hub by name:
pybricksdev run ble --name "my hub" my_program.py
Pybricksdev will try to connect to the hub, download the program, and start it. It disconnects when the code completes. This approach has some minor inconveniences that you should be aware of:
- Since it doesn’t stay connected, the hub will turn off after being idle for a few minutes. Just turn it on again with the button.
- You cannot stop the program from within Visual Studio Code, so you’ll have to use the hub button to stop it.
Using Pybricks with Visual Studio Code
The pybricksdev command line tool does not require that you use any
particular editor, but you can set up an editor to make running code more
convenient. We’ll show you how to do it for Visual Studio Code, but the steps
may be similar for other editors.
First, make sure Python is installed. You can install Python from the official
site, or using your favorite package manager. On Linux, Python is most
likely already installed, but you will also need the venv package:
sudo apt install python3-venv
Now install the Pylance extension. Search for Pylance on the Extensions
tab in Visual Studio Code and click Install to install.
Setting up a virtual environment
Once Python and Pylance are installed, you can use Visual Studio Code to set up an isolated virtual environment.
- Create a new project by simply creating a new, empty folder on your computer and opening that folder in Visual Studio Code.
- Use F1 or (⌘+⇧+P on macOS) to open the command palette in Visual Studio Code.
- Type in
py create envto search for Python: Create Environment and select that option. - It will ask you to “Select and environment type”. Choose Venv.
- It will ask you to “Select Interpreter”. Choose the one that says
*Global*. - There will now be a new subfolder in your project named
.venvthat contains the virtual environment and Visual Studio Code should set it as the interpreter to use for your project. - To use the virtual environment, open the command pallette again and search
for
py create termand select Python: Create Terminal. - This should open a new terminal and present a prompt that starts with
(.venv), if all went well.
Instead of following the steps above, you can also do it on the command line using:
# macOS/Linux
python3 -m venv .venv
. .venv/bin/activate
On Windows, that would be:
# Windows PowerShell
py -3 -m venv .venv
.venv/scripts/activate
Installing the pybricks package
Once you have a (.venv) prompt as described in the previous section, you can
install the pybricks package by typing the following in the terminal with the
(.venv) prompt:
pip install pybricks
Then you need to restart the Python language server to pick up the new package. In the command pallette, search for “py restart” and select Python: Restart Language Server.
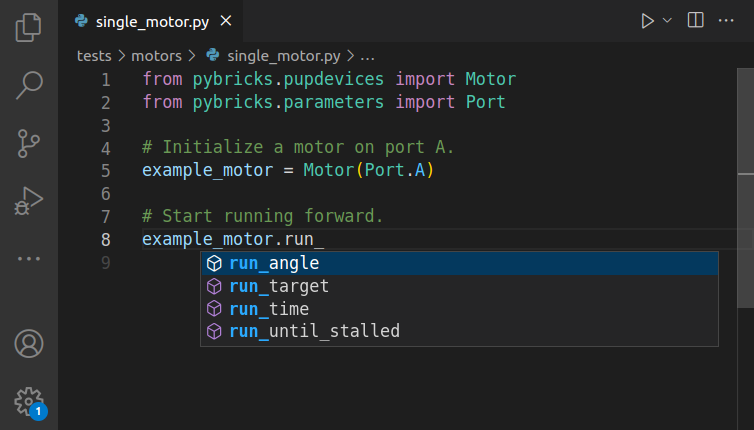
Now code completion and intellisense should be working. You can try it by
opening an existing file and hovering over text to see the relative
documentation or you can create a new .py file and start typing from
pybricks. and see suggestions on what comes next.
Downloading and running programs
Install the pybricksdev package in the virtual environment:
pip install pybricksdev
You can test that it works using the commands described earlier. It works the same, but now it runs from within your virtual environment.
To get your program started with F5 or CTRL+F5, create a run configuration.
Create a folder called .vscode and add a file called launch.json with the
following contents:
{
    "version": "0.2.0",
    "configurations": [
        {
            "name": "Python Debugger: Module",
            "type": "debugpy",
            "request": "launch",
            "module": "pybricksdev",
            "args": ["run", "ble", "${file}"],
        }
    ]
}
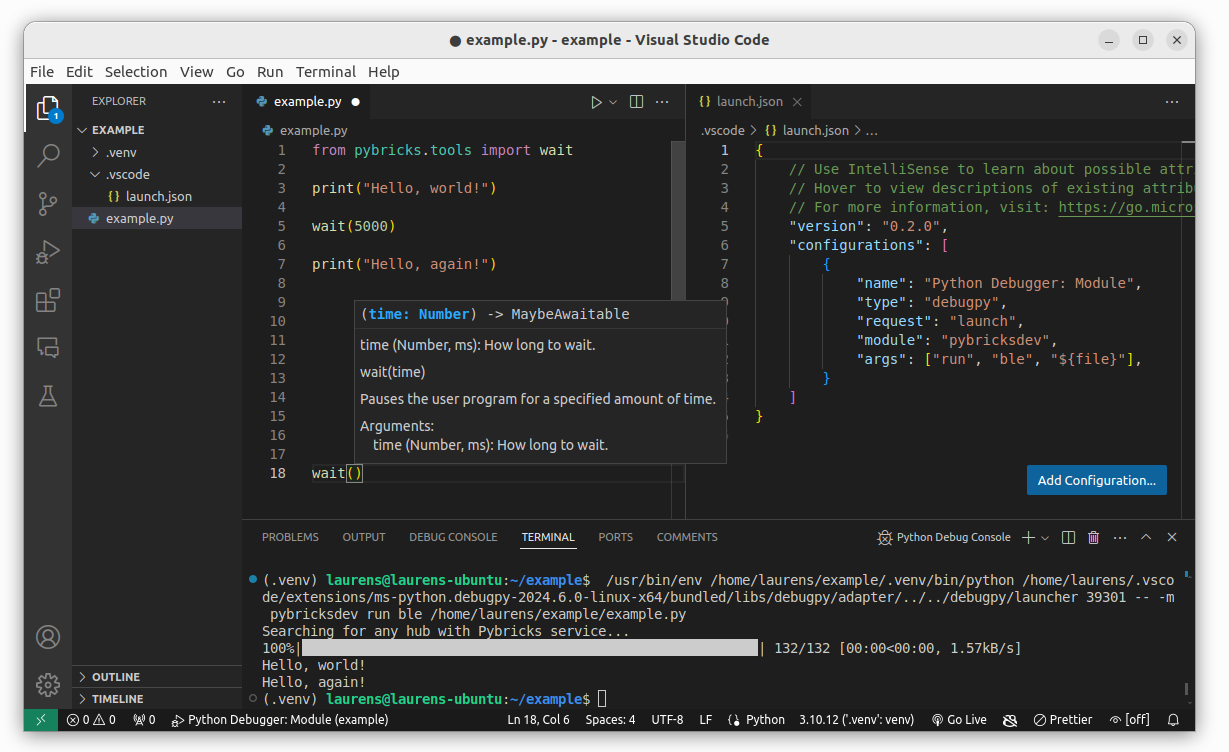
You can now run an opened Python program with F5. The full setup, including
an example with code highlighting of Pybricks commands is shown below.
Common mistakes
Clicking any of the “run” buttons in Visual Studio Code will try to run the
program on your computer instead of downloading and running it on the hub. When
you do this, it may appear as nothing happened or if you didn’t install the
pybricks package, you might get an error that the pybricks package could
not be found. Be sure that you follow the steps above to download and run a
program with F5 or the green play button on the debug tab.