Combining sensor values
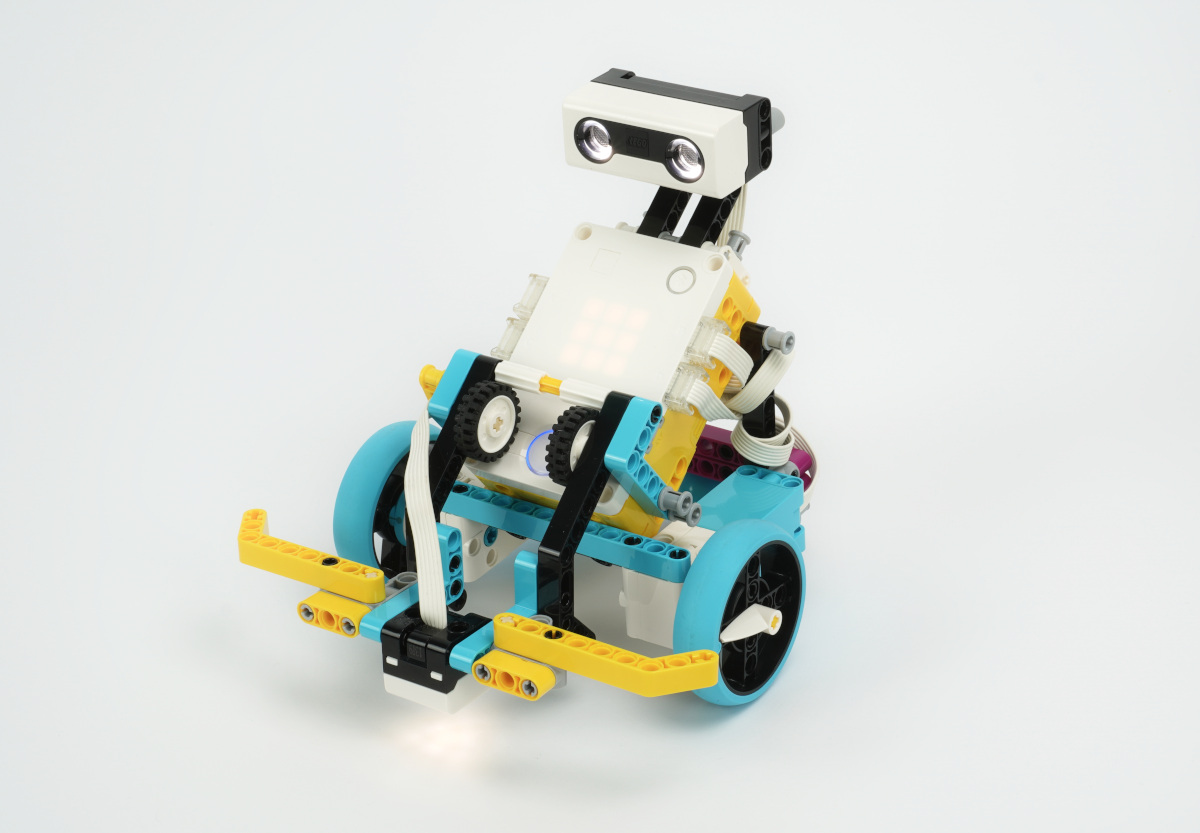
Robots are more reliable when they combine information from multiple sources. For example, if the Ultrasonic Sensor on the InventorBot fails to detect a small obstacle, you can use the hub buttons, pressed by the bumpers, as a backup.
In this section, you’ll learn how to monitor multiple sensors at once and choose the right response with the following blocks. You’ll also learn how to choose values conditionally without If-else blocks.

Value block
Due to the robot’s design, the right bumper of the robot presses the left button on the hub. The left bumper presses the right button. This can be a bit confusing, so we’ll only talk about the buttons throughout this chapter.
Combining True/False values
You can combine two sensor conditions with the Binary Logic block. It combines two condition values, each of which may be True or False, into a single condition value.
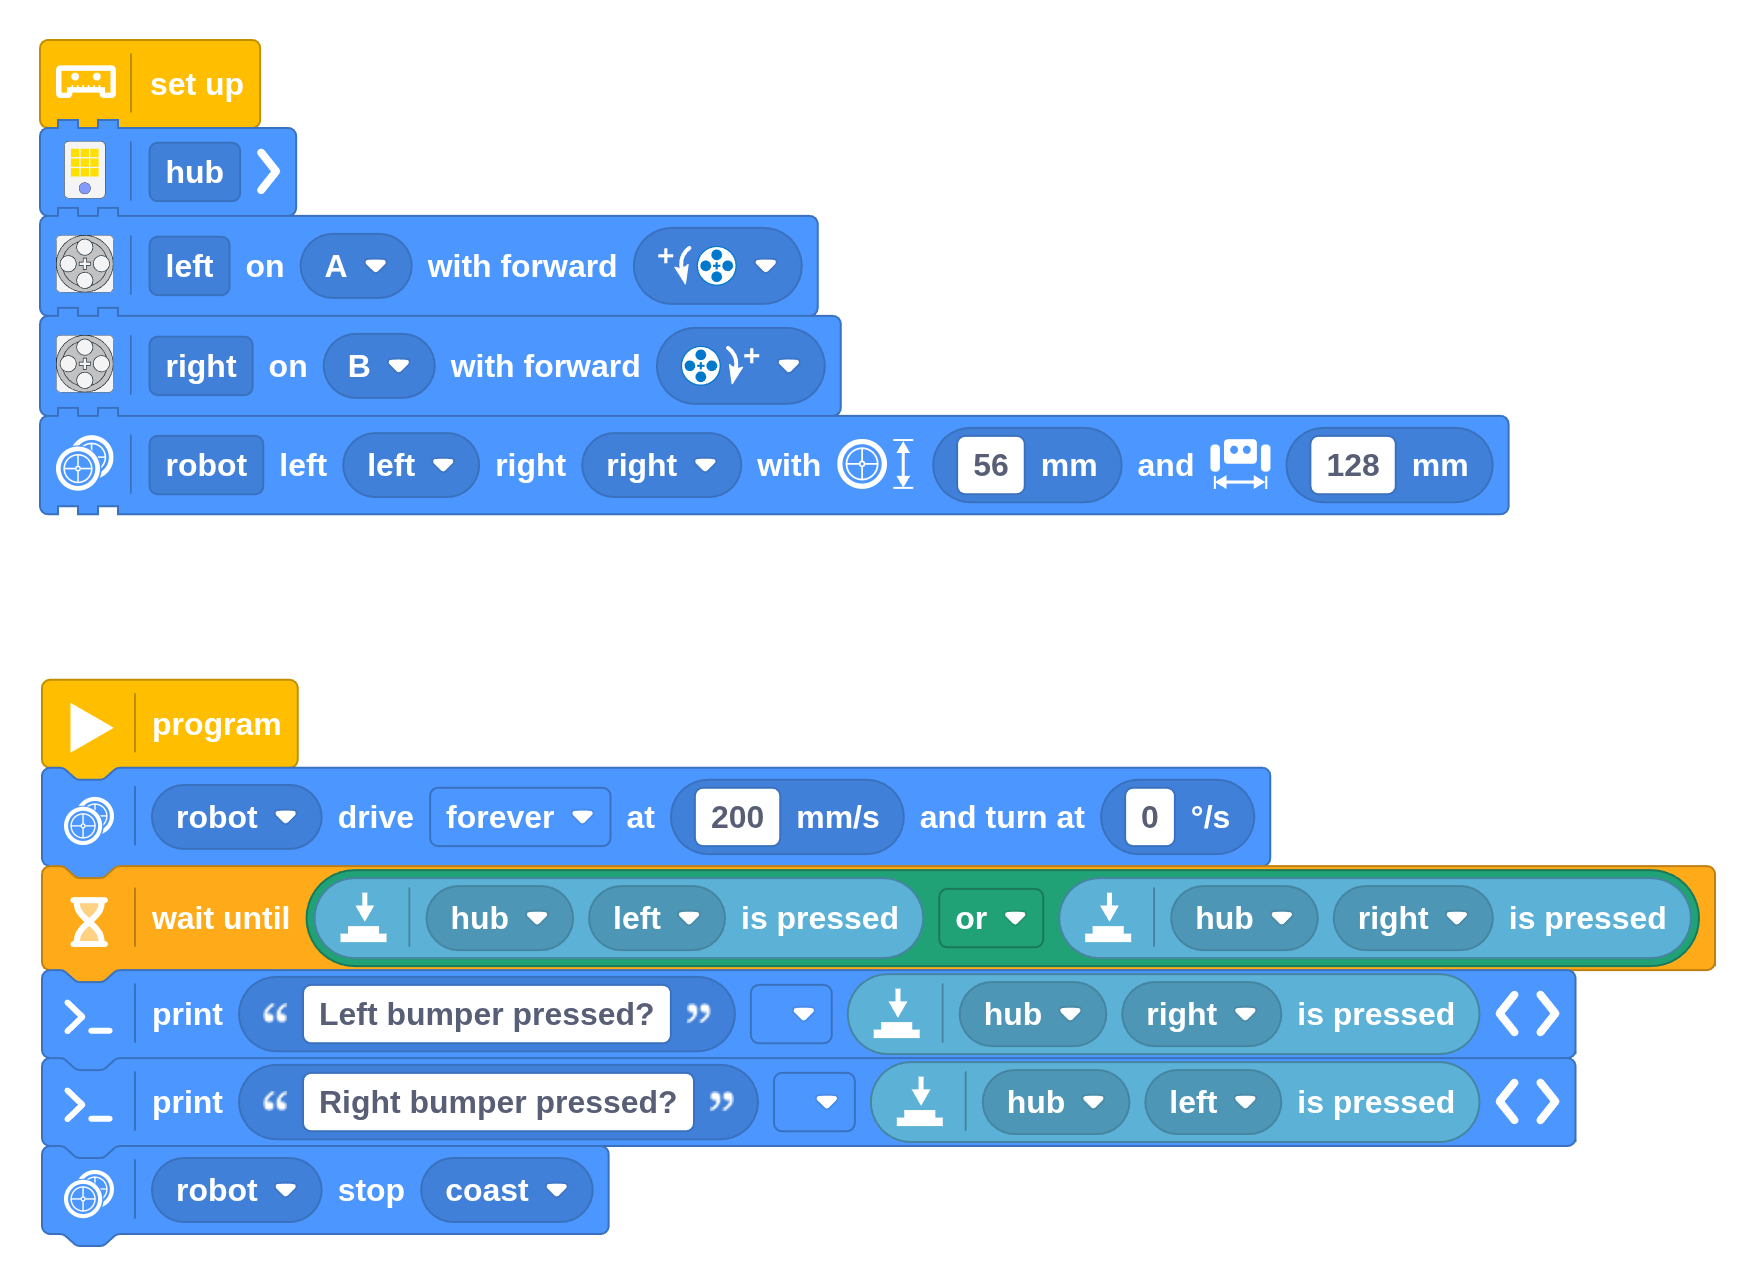
Let’s explore this with the following example, which combines values from two Button Pressed blocks. Each of these blocks gives True if the selected button is pressed, or False if not. The Value Compare block combines them to give True if one or both buttons are pressed. It is False if neither is pressed. You can use the resulting value to make the robot drive forward until it bumps into an obstacle, as shown below.
In or mode, the Binary Logic block gives True if at least one condition is True. In and mode, it only gives True if both conditions are True, as summarized in the following table.
| A | B | (A or B) | (A and B) | ||
|---|---|---|---|---|---|
| False | False | False | False | ||
| False | True | True | False | ||
| True | False | True | False | ||
| True | True | True | True |
To see the difference, change the or option to and in the previous example. Now the robot will stop only once both bumpers are pressed at the same time (not very useful in this case).
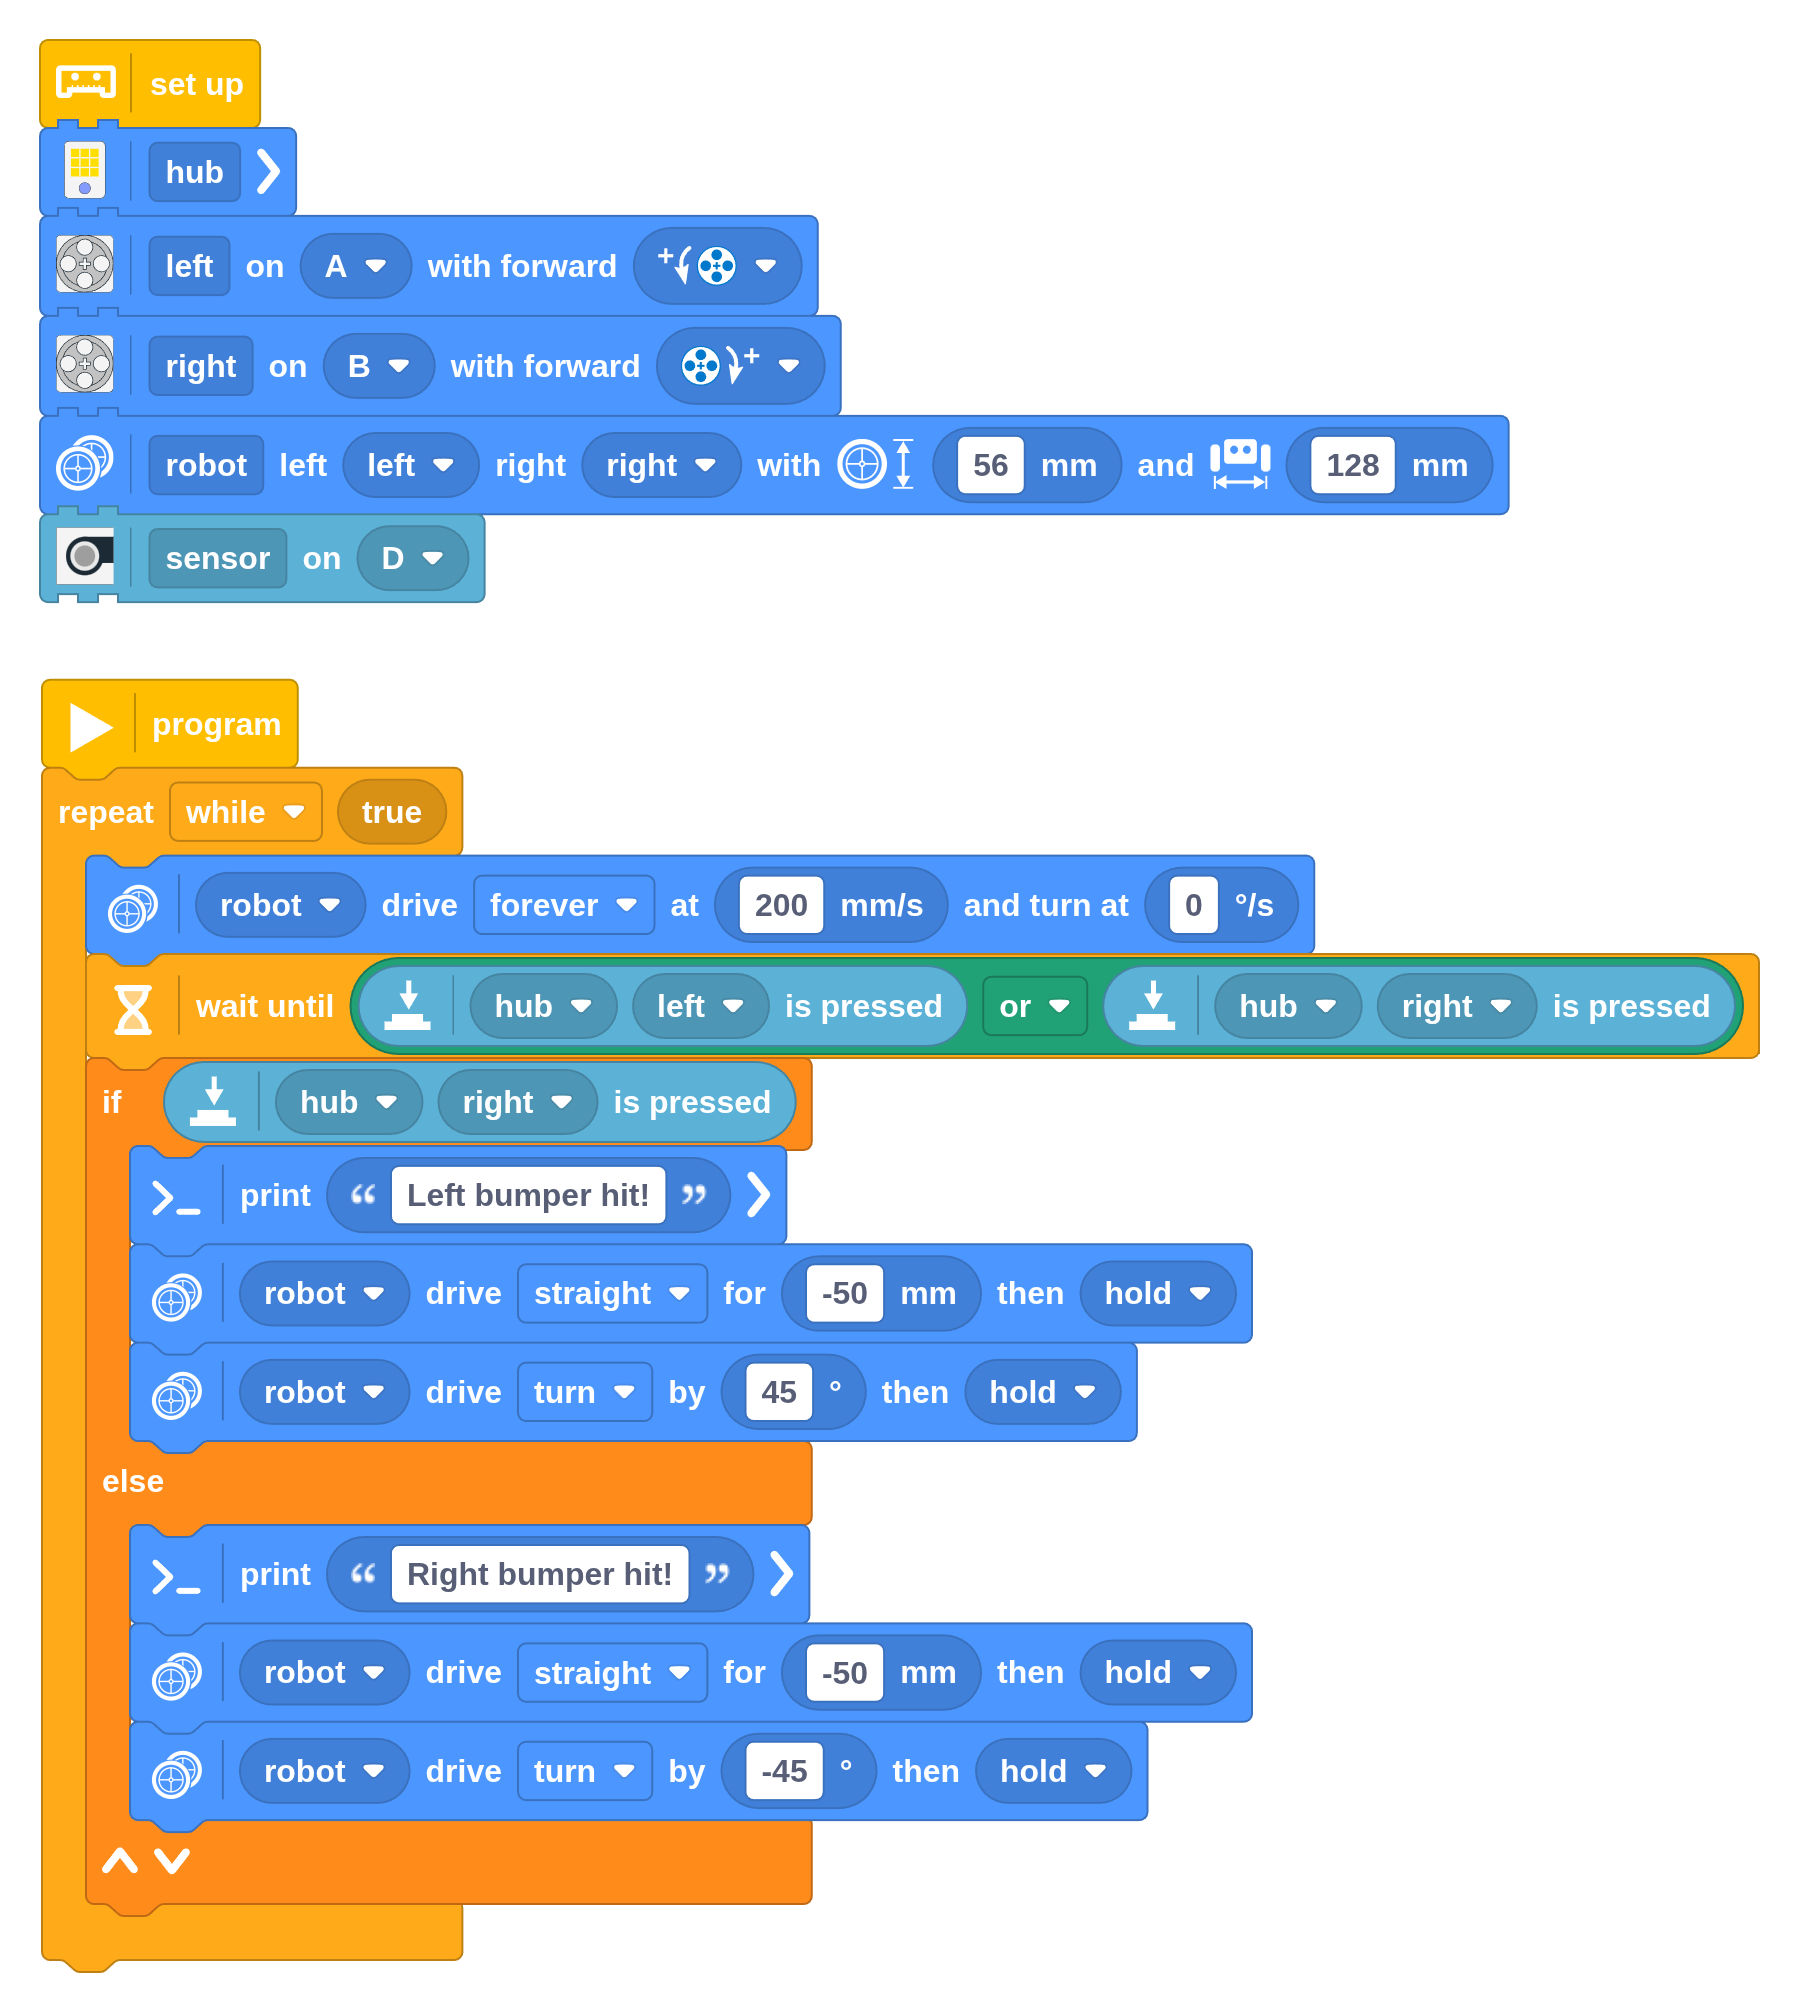
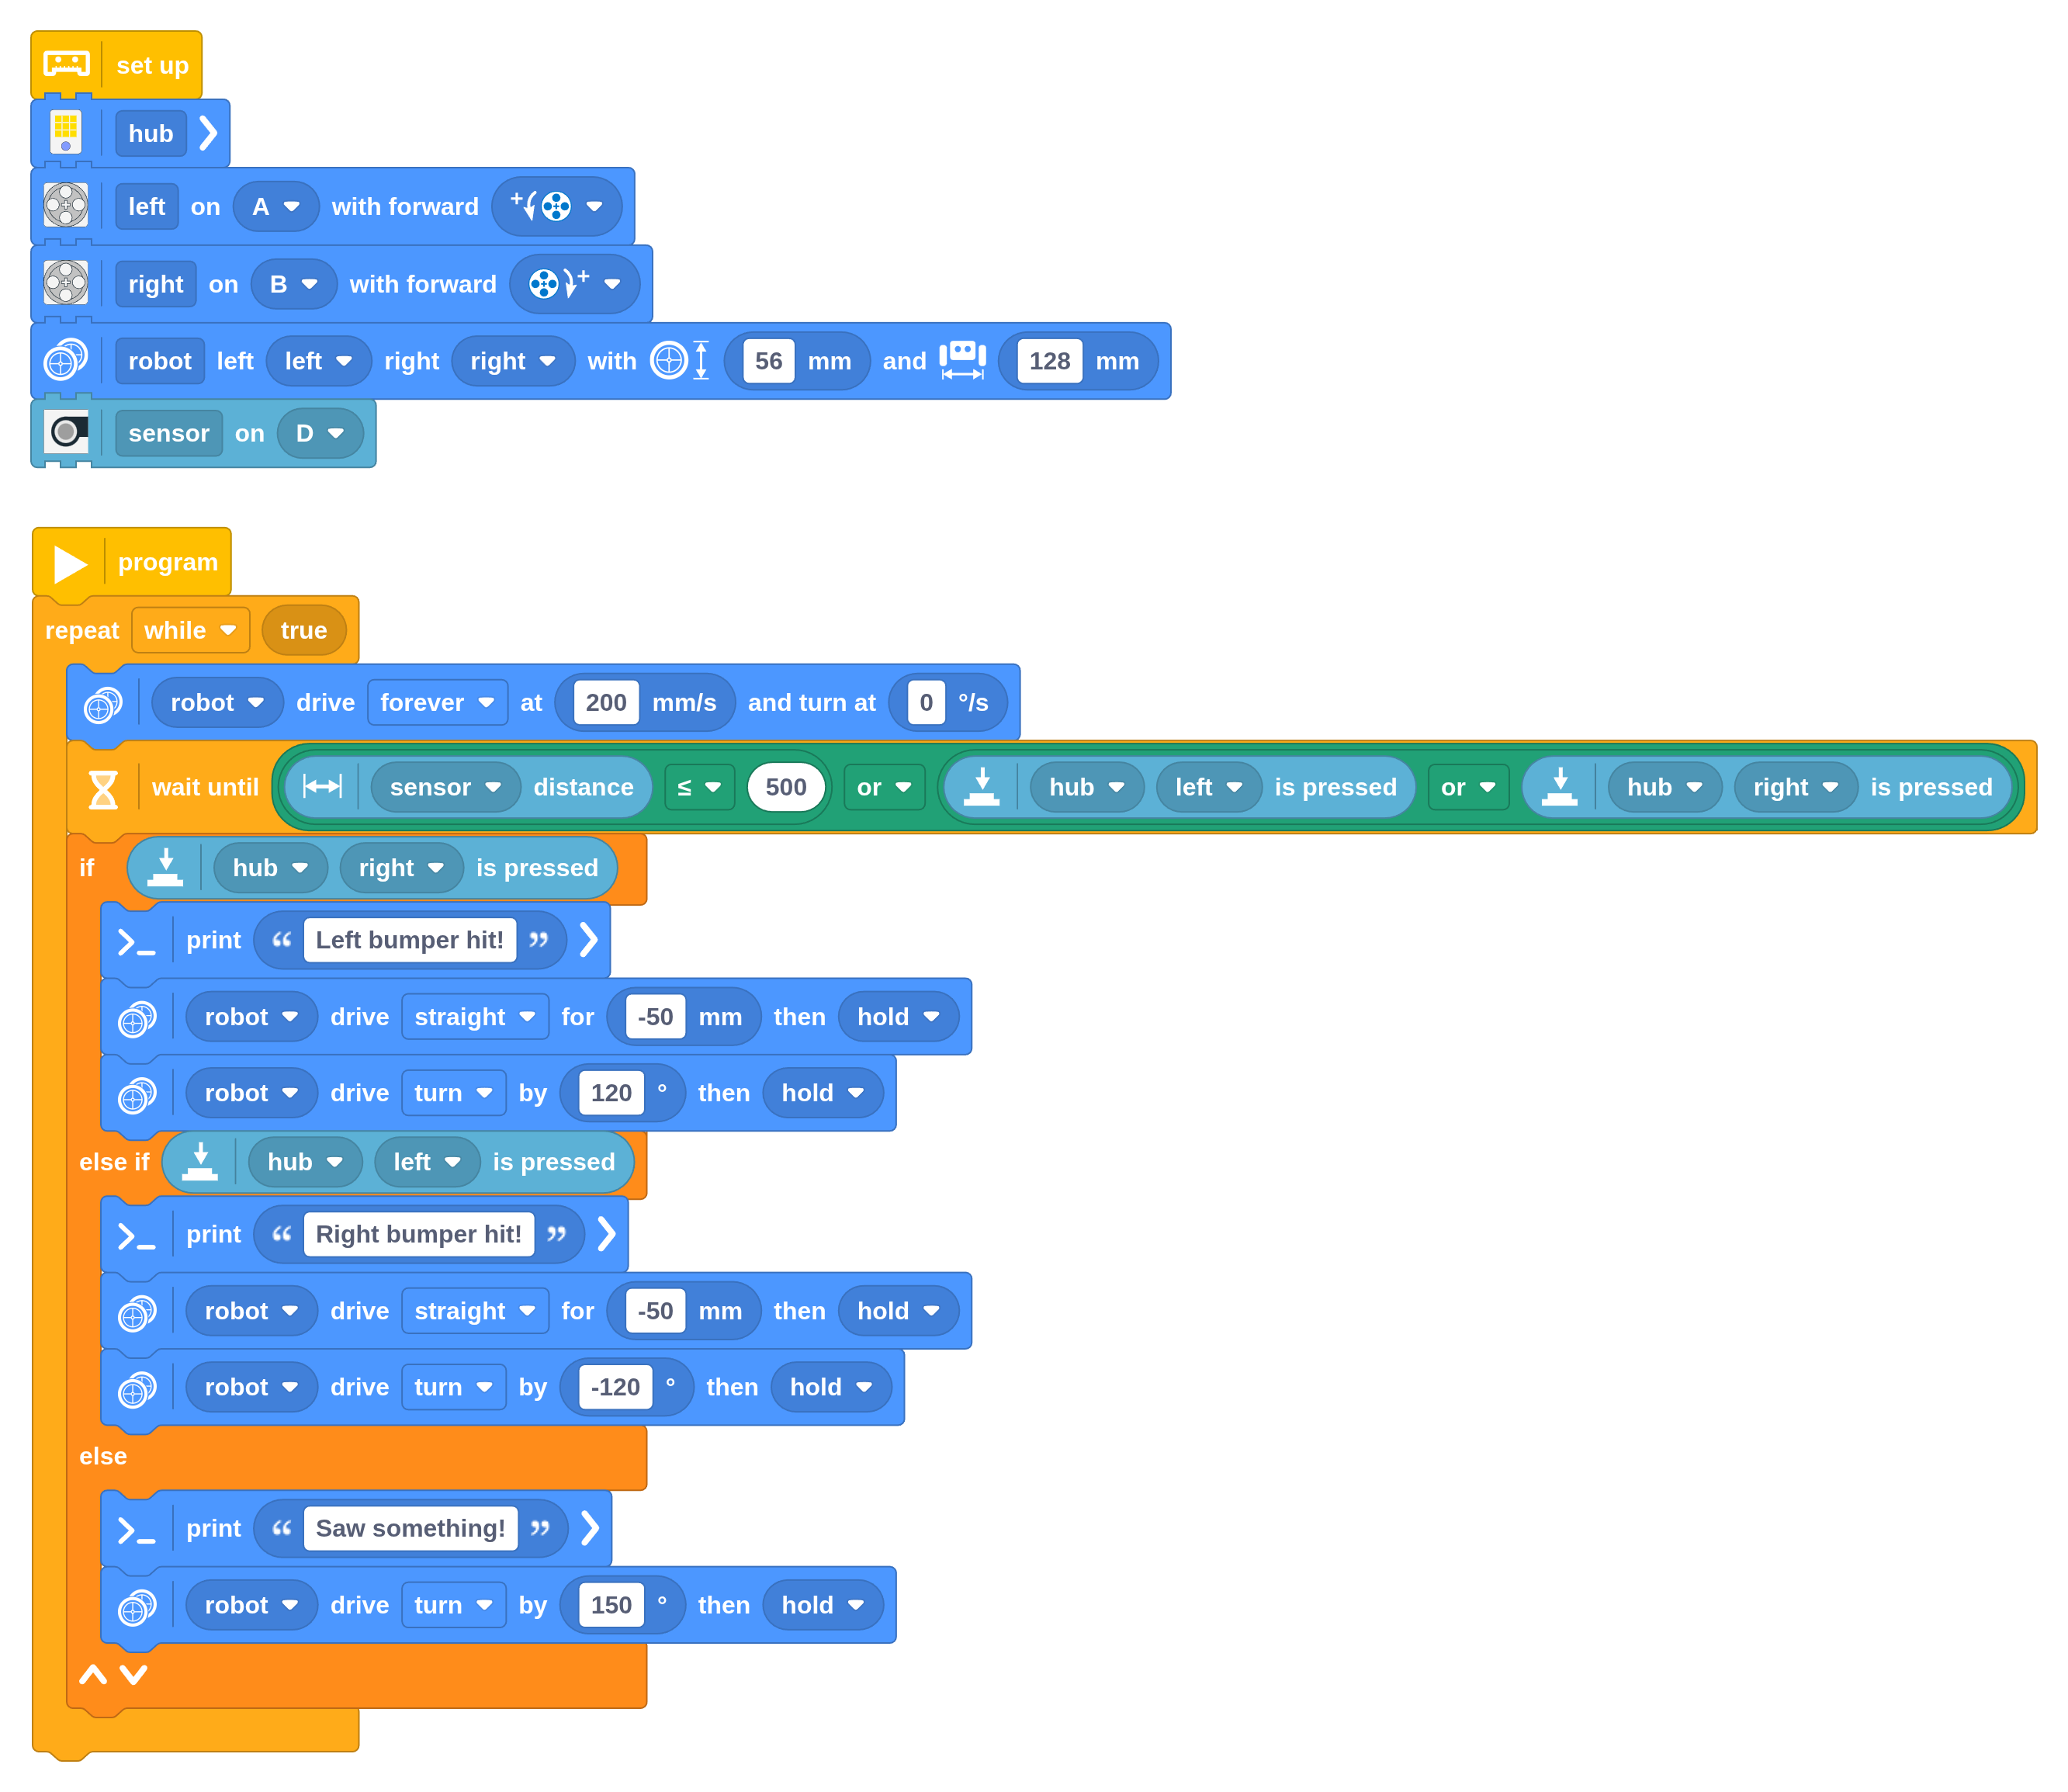
When the Wait Until block completes, you know that at least one button is pressed. You can use the If-else block introduced previously to find out which one is pressed and decide what to do. This is shown in the following example, which makes the robot drive away from objects that it runs into.

Challenge #5.3.A: Stuck in a corner ⸺ With the program above, the robot has a tendency to get stuck in corners. When does this happen? Can you change a single setting in this program to ensure it finds a way out with fewer attempts?
Challenge #5.3.B: In range ⸺ Create a program that makes the robot play sounds while the Ultrasonic Sensor distance is between 300 mm and 600 mm. Hint ⸺ Use two Value Compare blocks. One should check the upper bound and one should check the lower bound. Use the Binary Logic block to combine both conditions. It is also possible to do this with just a single Double Value Compare block. How should you choose its settings to achieve the same result?
Combining more than two sensors
Since the Binary Logic block produces a single True/False value, you can use its result inside another Binary Logic block. This lets you combine sensor conditions to best suit your application. For example, you could make the robot wait until it sees an obstacle with the Ultrasonic Sensor or at least one button is pressed, as shown below.

Waiting in parallel
Using the Binary Logic block to combine sensors works well if all you want to do is wait on the same condition. If you want to change what you wait on or what you do along the way, the Multitask block is more flexible.
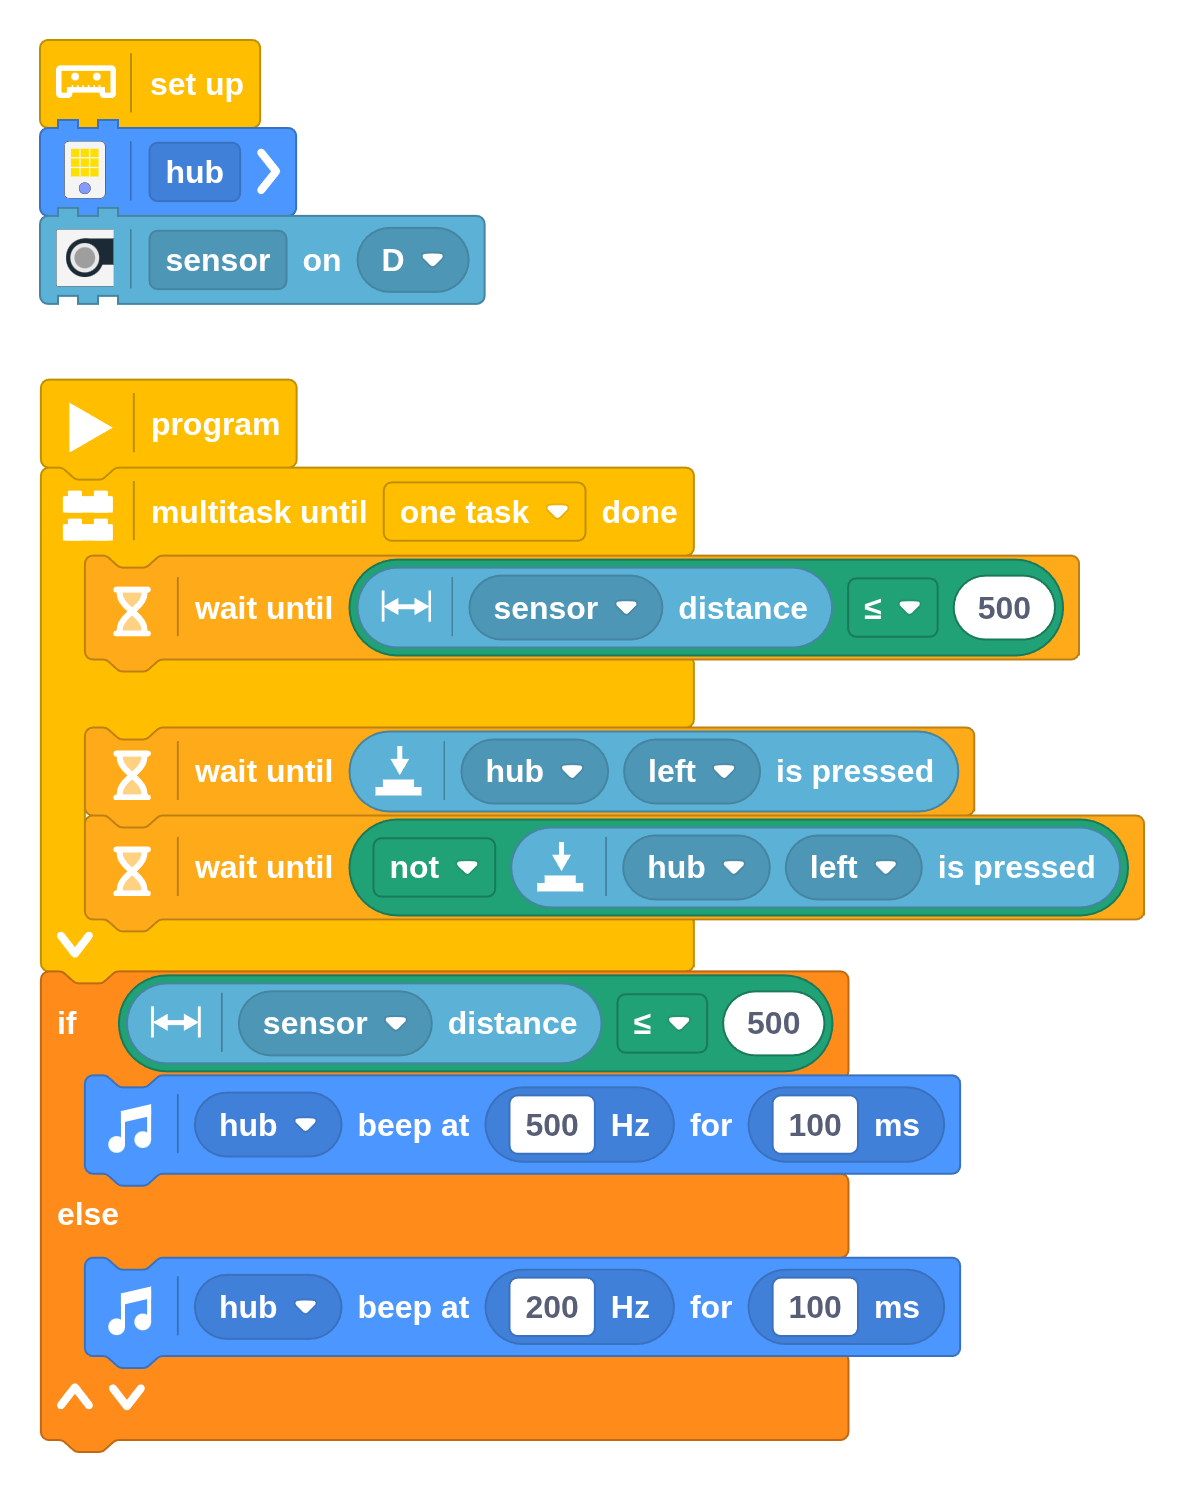
Let’s say you want to wait until the distance sensor sees something or a button is clicked. There isn’t a way to measure clicks directly, but you can wait until the button is pressed and then until it is released. You can monitor the distance at the same time using multitasking. By choosing to run until one task completes (see Chapter 4.4), it will stop waiting as soon as an object is detected or the left button is clicked, as shown in the following example.
Challenge #5.3.C: Eyes on the road ⸺ Create a program that makes the robot drive forward for 500 mm unless it runs into an obstacle sooner. Create a solution with the Wait Until block and multiple Binary Logic blocks. Also create a solution with the Multitask block. Presentation ⸺ Split the two approaches between team members and present your solutions to each other. Discuss the pros and cons of both methods.
Challenge #5.3.D: Wave to turn ⸺ Modify the obstacle-avoidance program in the previous section to respond to you waving in front of the sensor instead of any approaching object. Hint ⸺ When you wave your hand in front of the sensor, it detects a low value and then a high value. You could wait for these conditions just like waiting for the button click in the example above.
Deciding on a value
Sometimes you end up using an If-else block with two nearly identical stacks of blocks in them, except for one value that is different. In the previous section, for example, you’ve used an If-else block to make the robot drive at 100 mm/s if the distance is greater than 300 mm and otherwise drive at -100 mm/s.
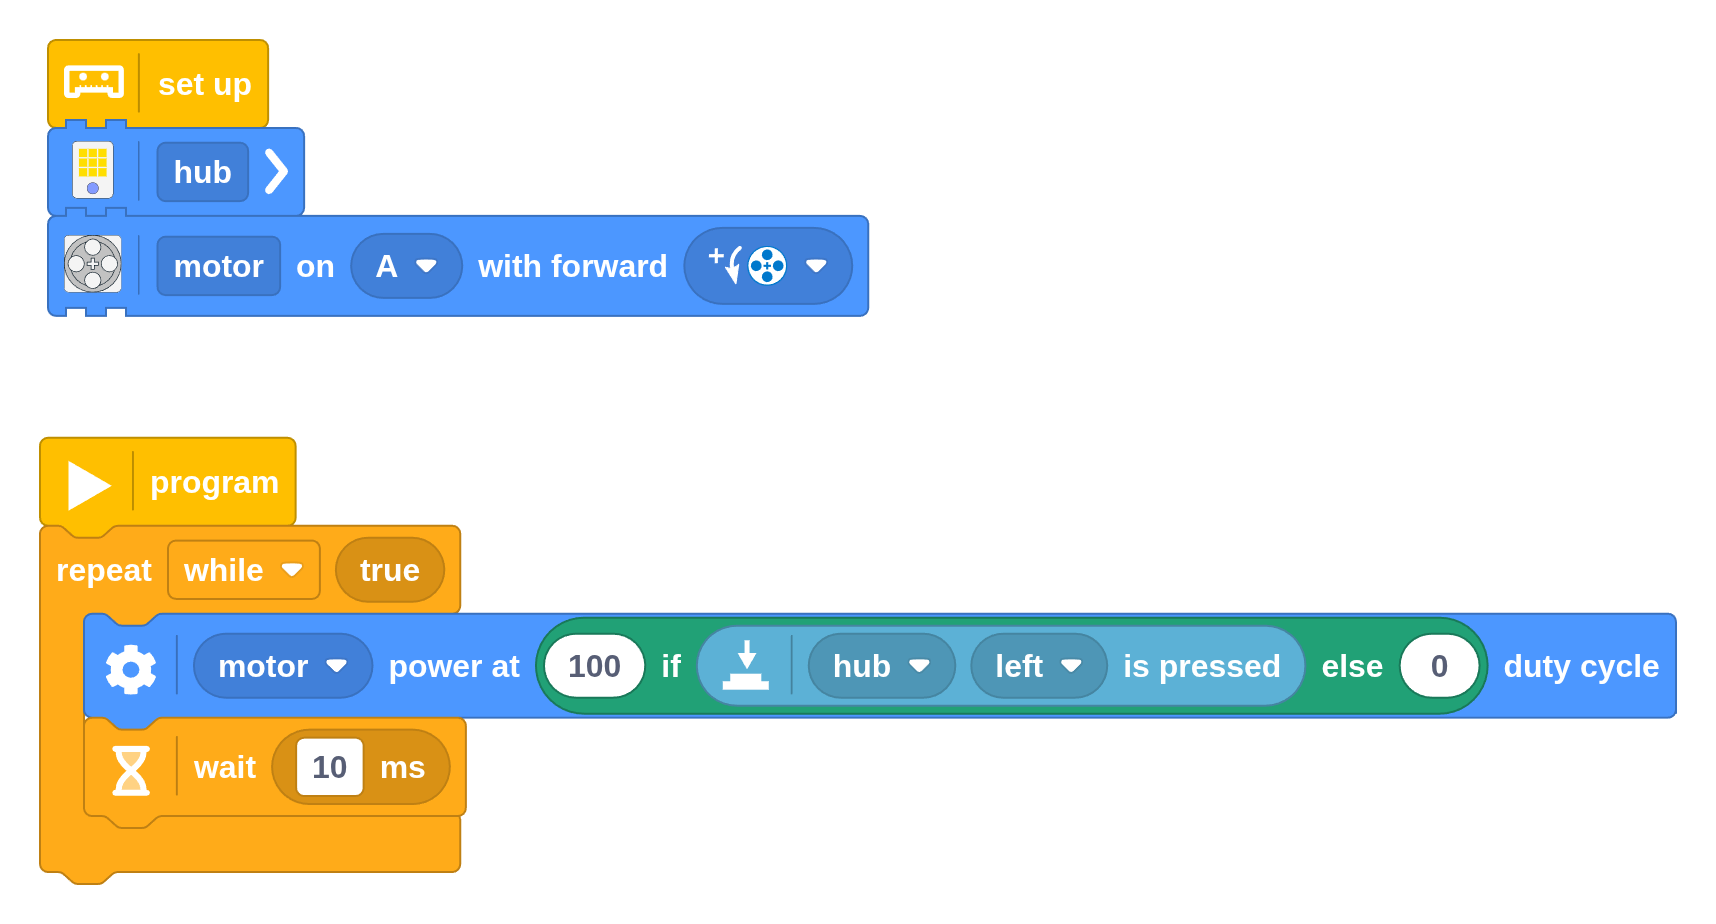
There is nothing wrong with using an If-else block like that, but it can make some programs harder to follow as they get bigger. In this case, you can use the Conditional Value block. It gives one value if the condition is True and another value if it is False, as shown in the updated example below.
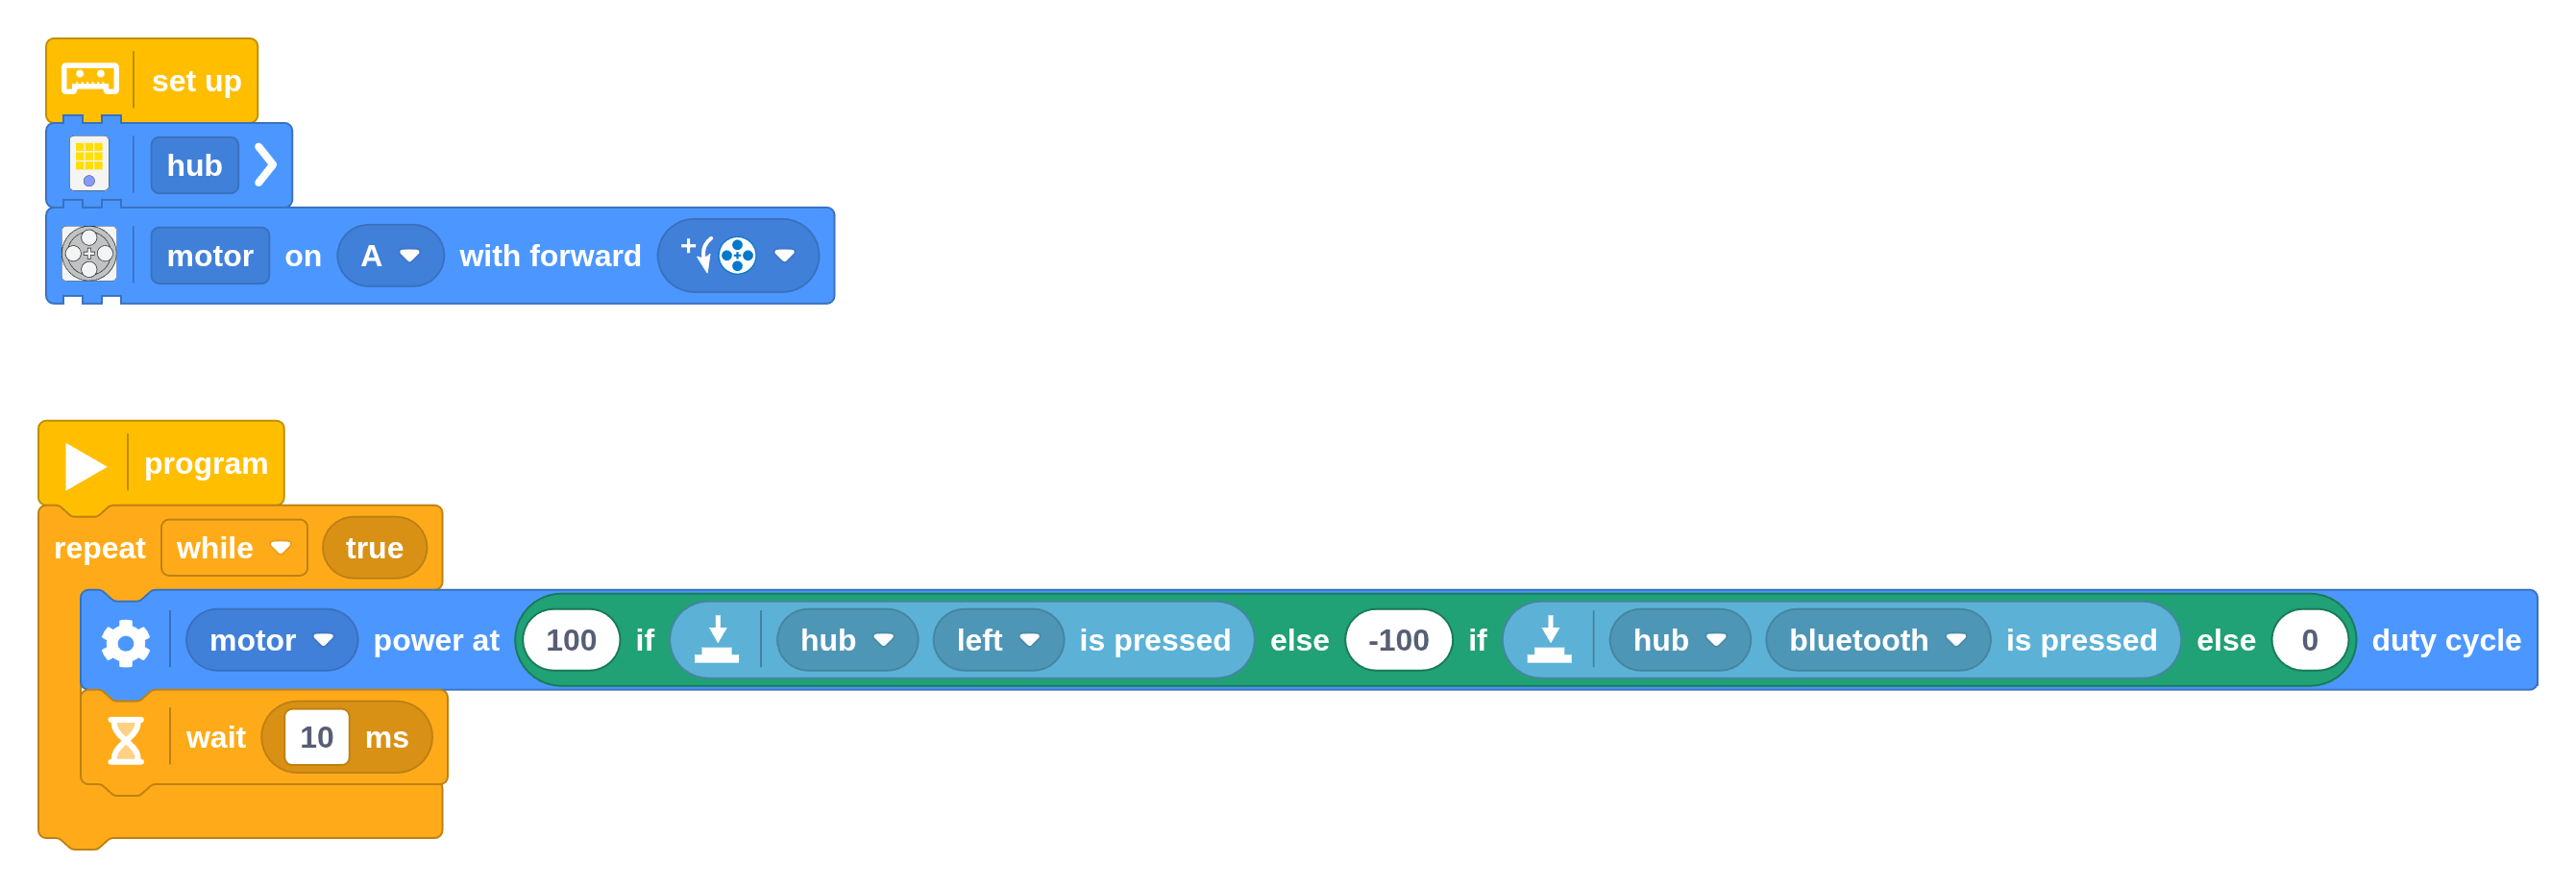
In programs related to remote control, you’ll find the Double Conditional Value block useful as well. It has two conditions and three values. It gets value A if one condition is true, otherwise it gets value B if a second condition is true, and otherwise it gets value C.
Let’s illustrate why this is useful with the following example. The motor runs backward (A = -50% power) if the left button is pressed, otherwise forward (B = 50% power) if the right button is pressed, and otherwise it stops (C = 0% power).
This is a useful test program when you design mechanisms. You can manually check if your mechanism does what you want, and whether it is sturdy enough.