Making basic programs
In this chapter, you’ll learn how to set up your programs for the StarterBot you’ve just built. You’ll also experiment with basic movements and learn to verify the results.
Setup and the main program
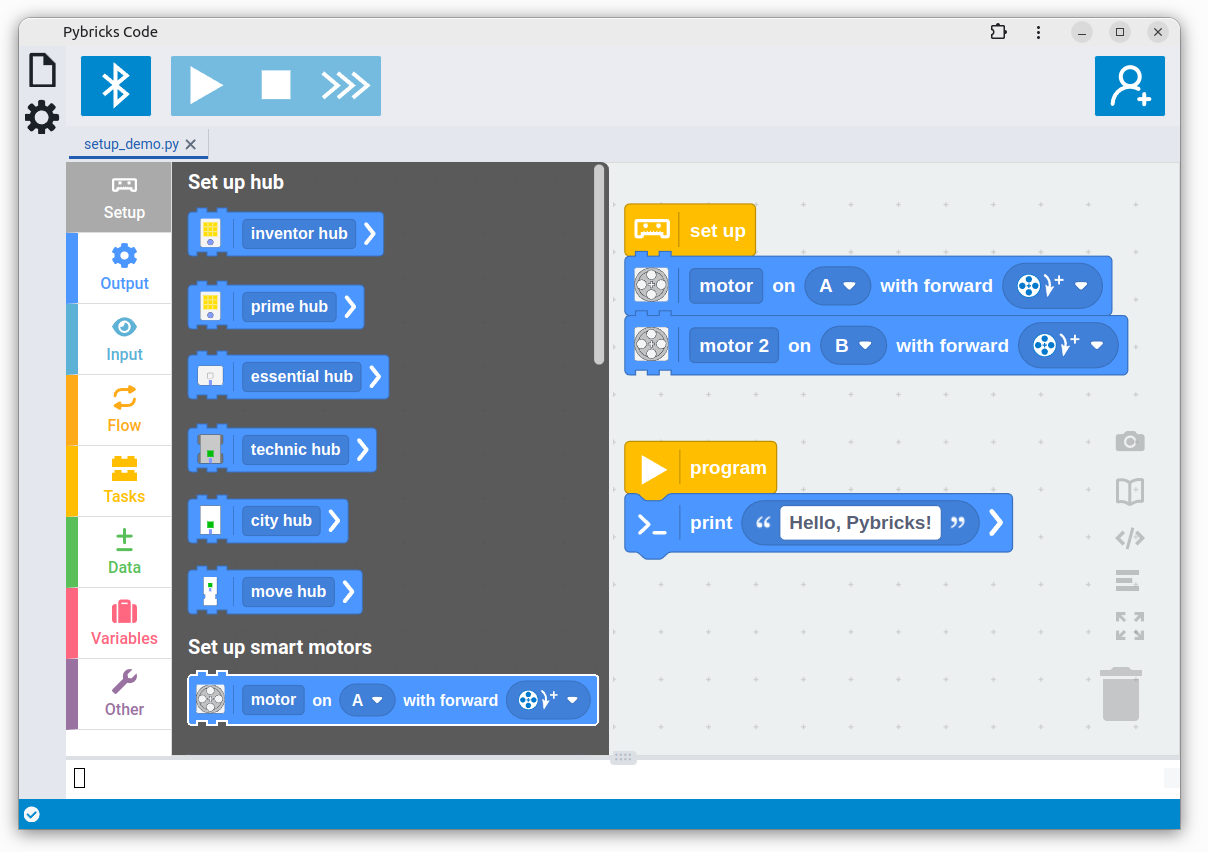
Each Pybricks programs consists two two parts:
- Device setup: Here you describe how your robot is built and how the devices are connected to the hub.
- Program: Here you describe what the robot should do.
To better understand how this works, let’s build an example program using the steps below. Connect to your robot, and run the finished program.
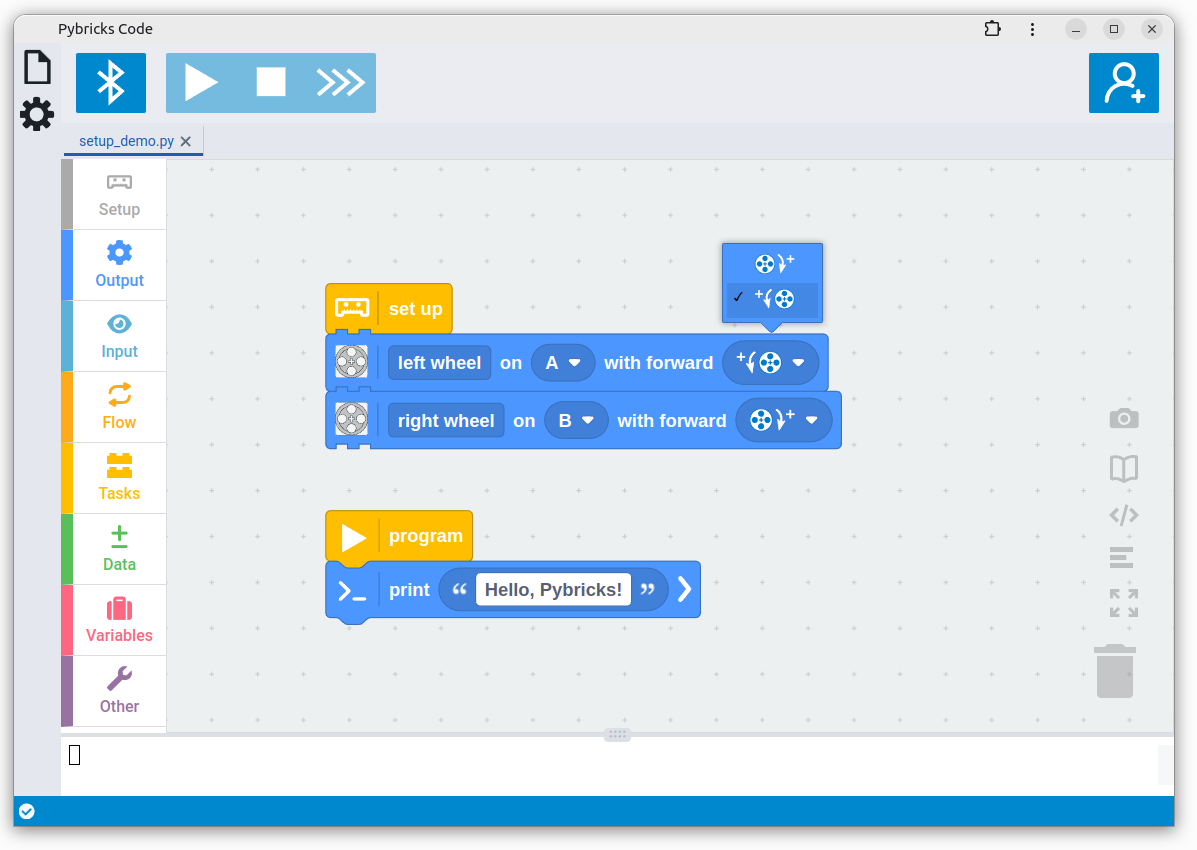
motor a name.
counterclockwise
to make the robot
drive forward.
the Print block.
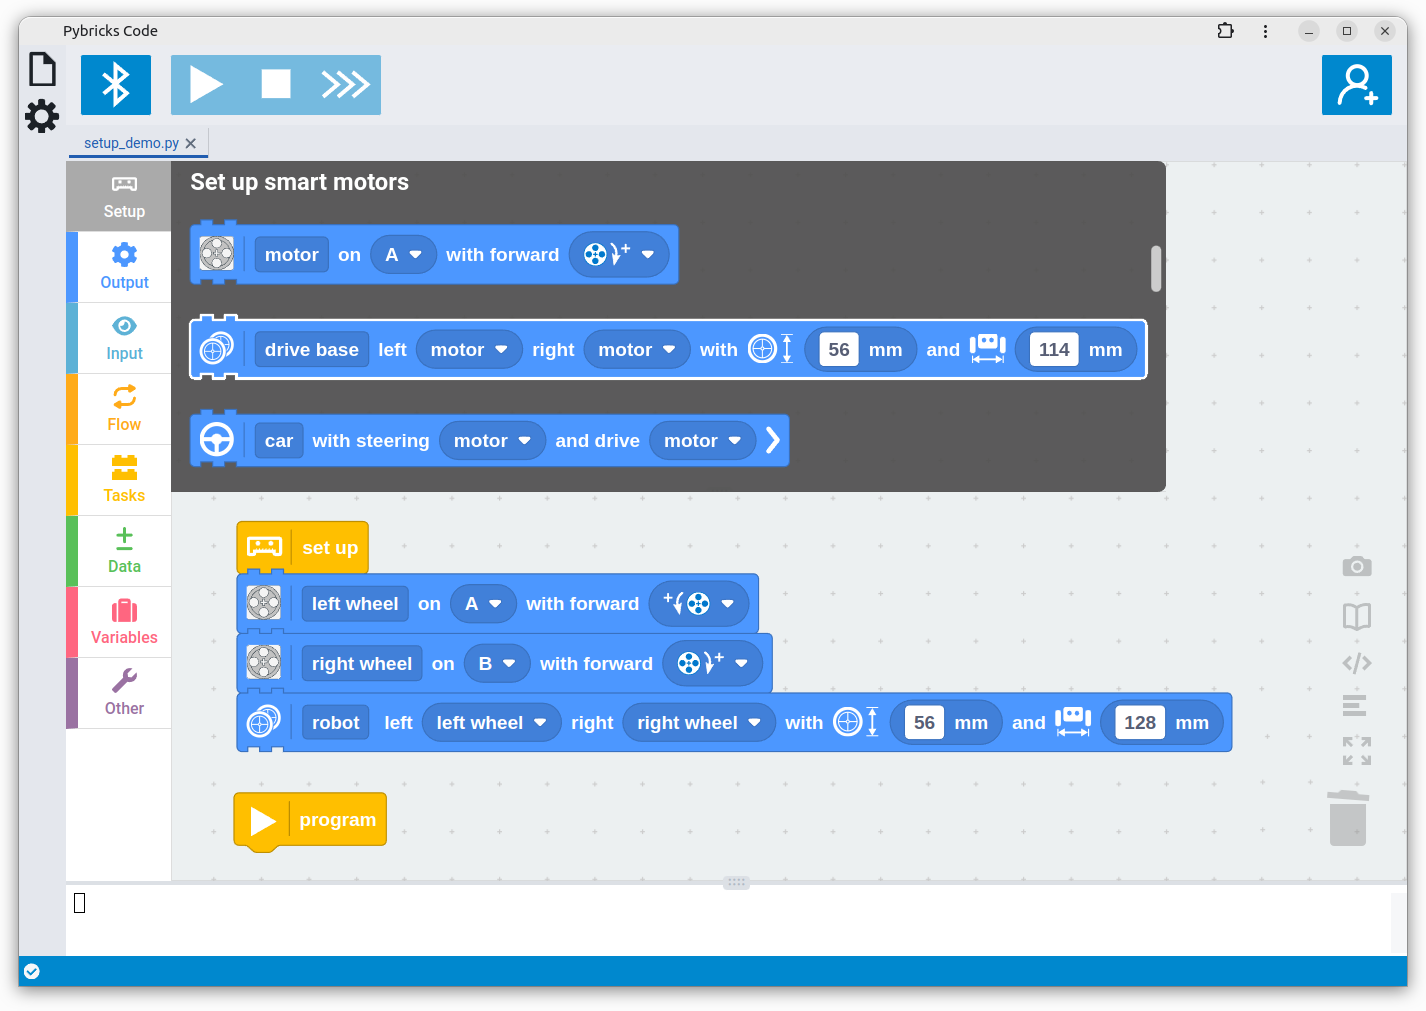
between wheel ground contacts.
Verifying and troubleshooting
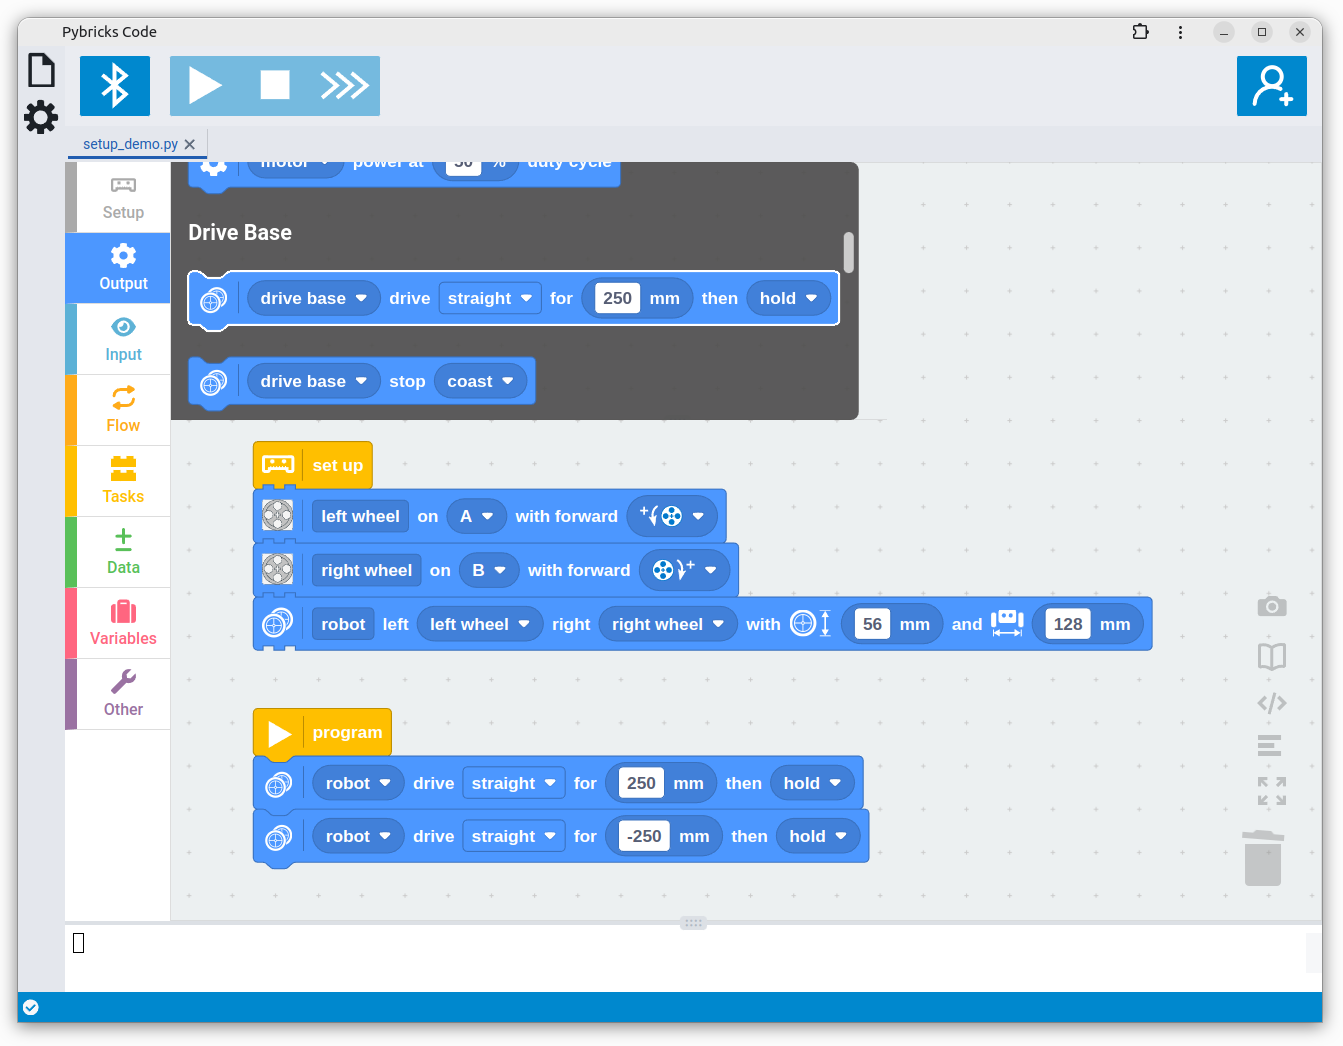
Connect to the robot and run your program. Your robot should drive forward by 250 mm (about 10”) and then reverse, ending up where it started. Otherwise:
- If it didn’t move at all, be sure to check the cables and the ports you selected, as shown below.
- If it started by turning or reversing instead of moving straight forward and back, check the directions in step 2 above.
- Place a ruler next to the robot. If it drove too far or not far enough, measure the wheel diameter again.

connected correctly
Running a very basic program with just a few movements is a good way to check that your setup is configured properly.
This setup will be a big time saver when you create larger programs later on. If you change your design including the cables, all you have to do is change one port in the setup, rather than changing it throughout your entire program.
Changing parameters
The blocks you’ve placed under the yellow program block run one by one, from top to bottom. Each block is one command for the robot to execute. Different blocks make the robot do different things. Each block has parameters that change how it executes that command. For example, you can change how far it drives and use a negative value to reverse.
We’ll get to each of these settings in the chapters to come, but this is a good time to give some of the other options a try. For example, you can change the Drive block to make a turn, as shown below.
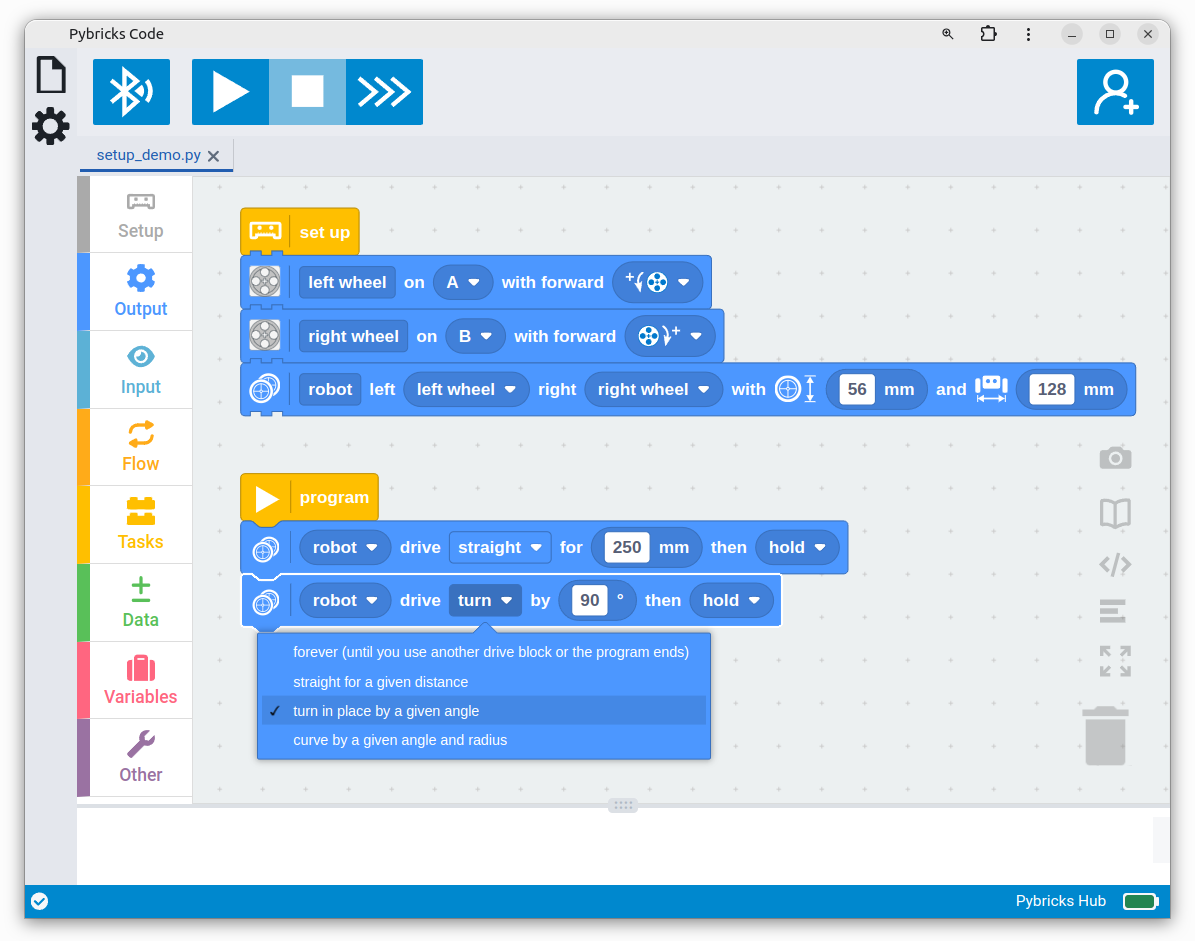
drive methods
Once you’ve changed settings, you can see what that block does by reading it
from left to right: The robot (that you’ve set up) drives straight (your
choice) for 250 mm (your distance value) and then actively holds the
motors in place (your choice).
When changing the settings, it’s best to do so from left to right as well, because other settings may change when you do. For example, if you select straight, an option appears to choose how many millimeters. But if you select turn, an option appears to choose how many degrees.
The comment block
No matter how simple your program is, it is always a good idea to document your work. Code comments help you document your work for yourself and others. Even if a design choice appears obvious today, a comment will help you remember a few weeks later.
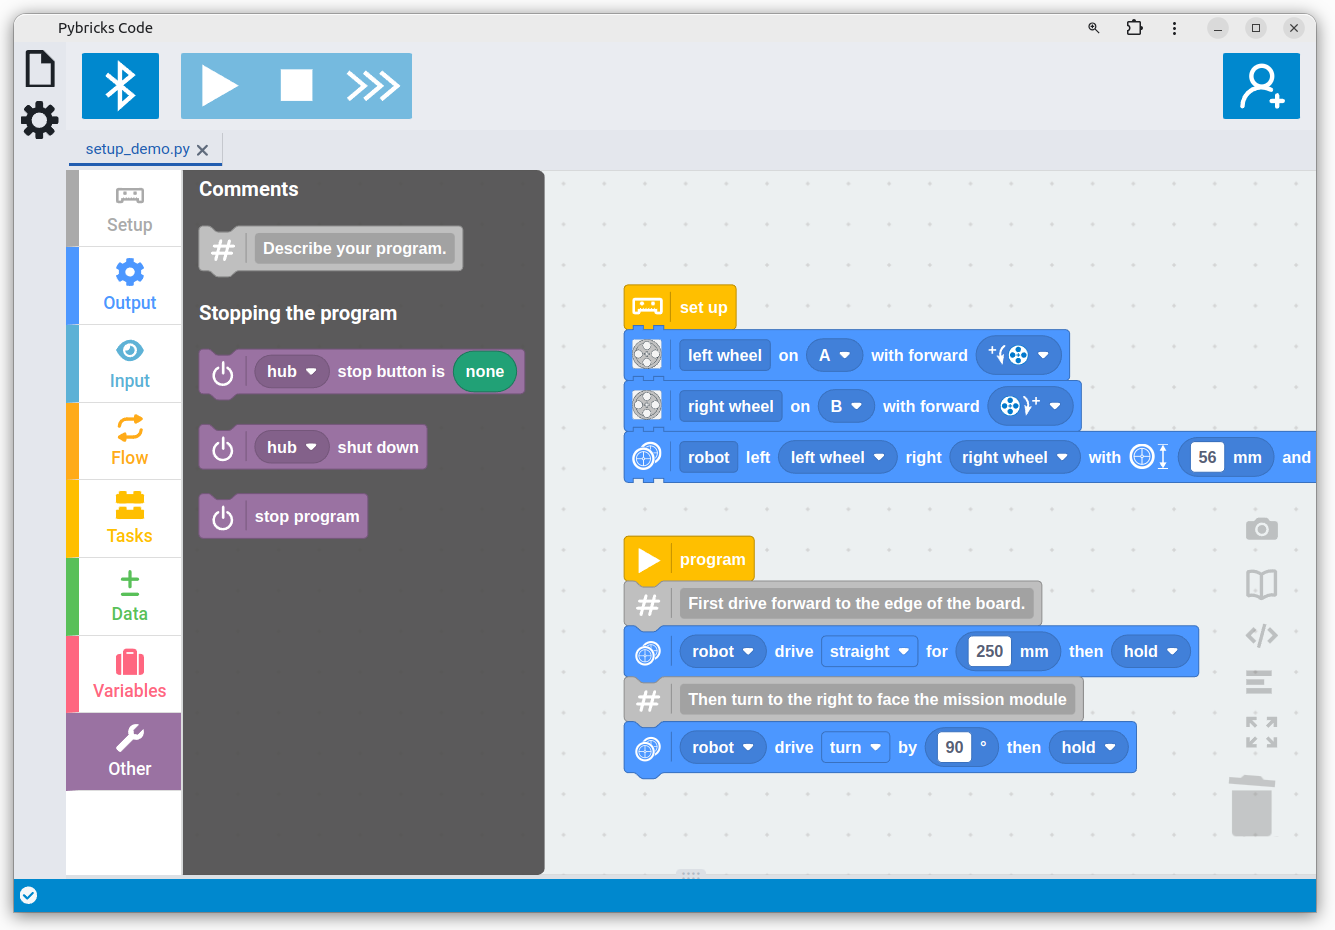
Some comments can be descriptive. They might summarize what a sequence of blocks do. Other comments can describe why you’ve done it in a particular way. You can also describe the required conditions that are needed to run your program. Comments are filtered out before your code is sent to the robot, so comments have no impact on performance or robot code size.
It is possible to leave a comment block floating on the canvas if you need to, but it is best practice to attach it like a normal block. This way, it moves along with your code automatically when you add other blocks above or below it.
Further exploration
In this chapter, you’ve learned to build a program to make your robot move. You’ve learned how to change settings and to document your work with comments. The following challenge will help you practice your skills.
Challenge #3A: Living on the edge ⸺ Pick a fixed starting point on your desk and measure the distance to the edge of your desk. Tell the robot to drive exactly that distance and back again. Tip: On your first try, to reduce the value slightly. Be prepared to catch you robot if it falls. Safety first! When you’re away from the computer, you can stop the program using the hub button.
Challenge #3B: Spell your name ⸺ Can you put together a sequence of Drive blocks so that it drives along the first letter of your name? What about your whole name? Hint: Besides in-place turns, you can also choose a curve with a given angle and radius. When you’re satisfied with the result, try attaching a pen to the robot so it draws your name as it moves.
Challenge #3C: Satnav subtitles ⸺ Previously, you’ve experimented with the Print block. Add print blocks to your program to make the robot indicate exactly what it will do. For example, make it say “Turning 90 degrees!” Where do you put these Print blocks? Should they go before or after each Drive block?