Adding sound and light
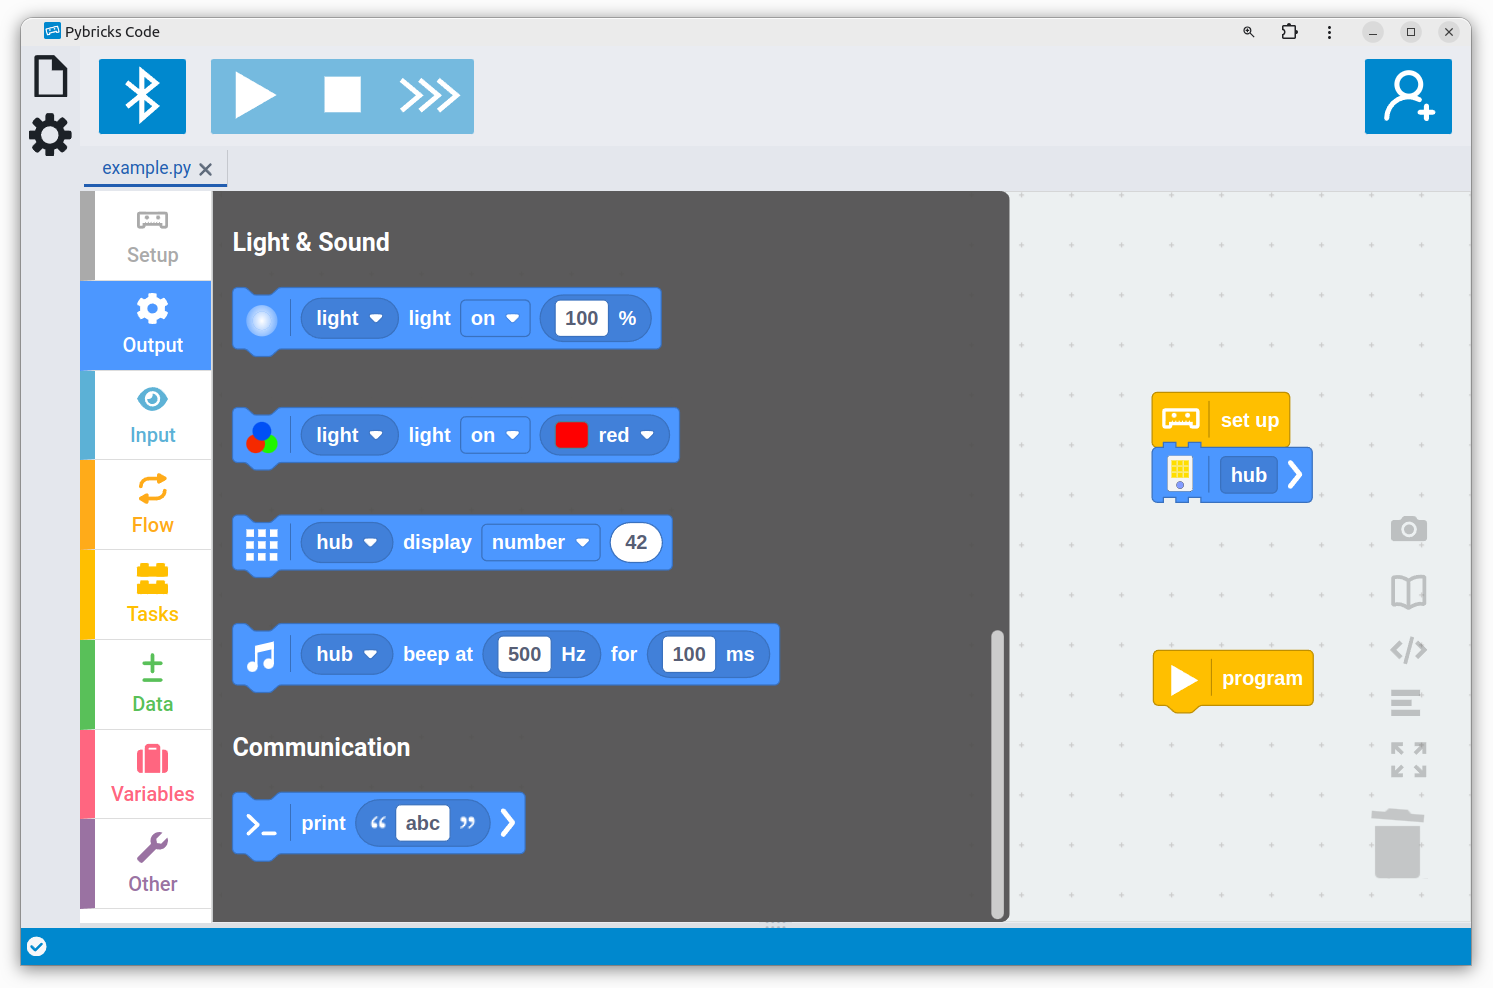
Now that you’ve learned to make your robot move, you’ll explore the other blocks in the output category. Output blocks make your robot do something, like moving, playing sounds, printing text, or shining a light:
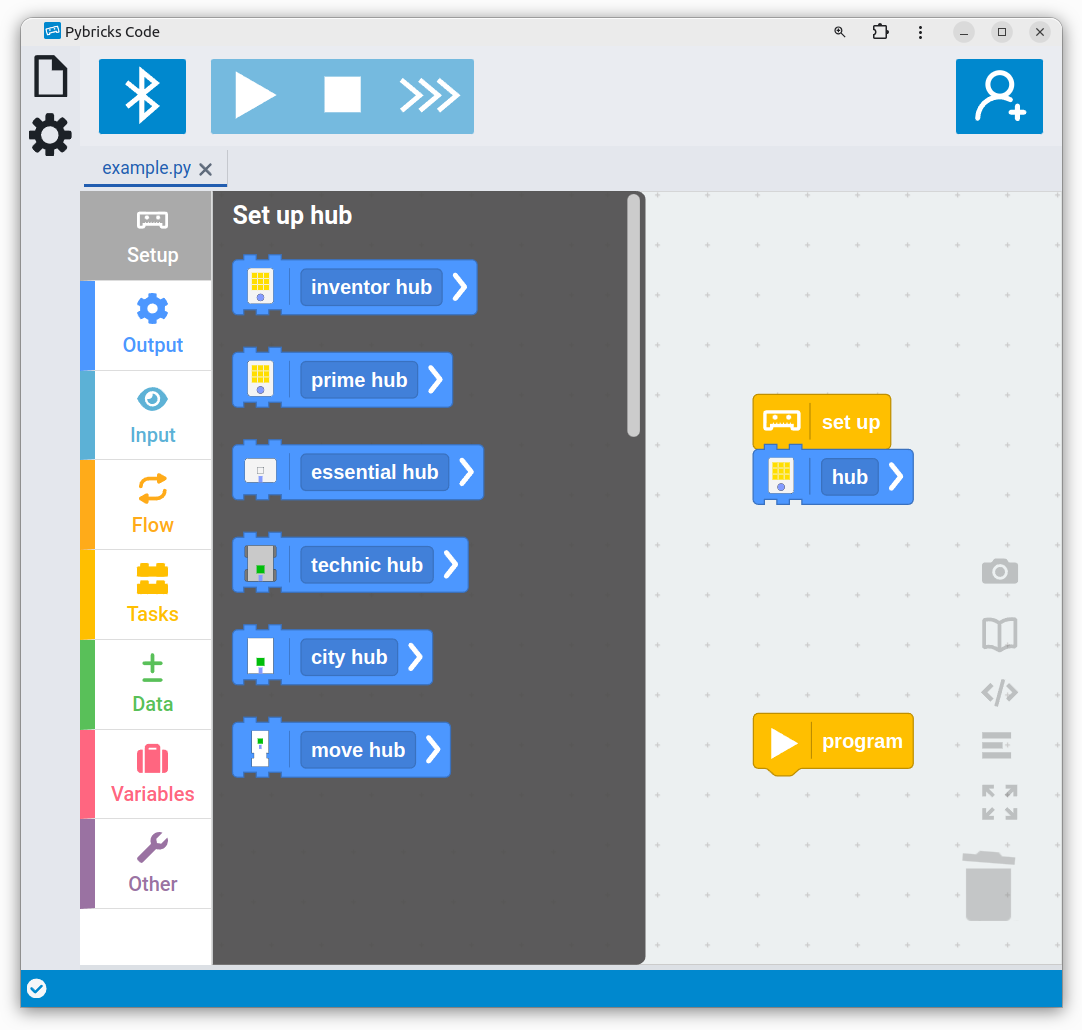
Most sounds and lights are made using the hub, so you’ll need to add your hub to the setup section as shown below.
See this page for an overview of what each hub can do. If you have a SPIKE Prime Hub, you can use all blocks and try all examples. If you have another hub, just skip the sections that don’t apply. You may still want to glance through them for generic tips, such as the ones about debugging below.
Using the hub status light
Most hubs have a light near the power button. When no program is running, it is used to convey the status of the hub. When a program is running, you can change the color as you like.
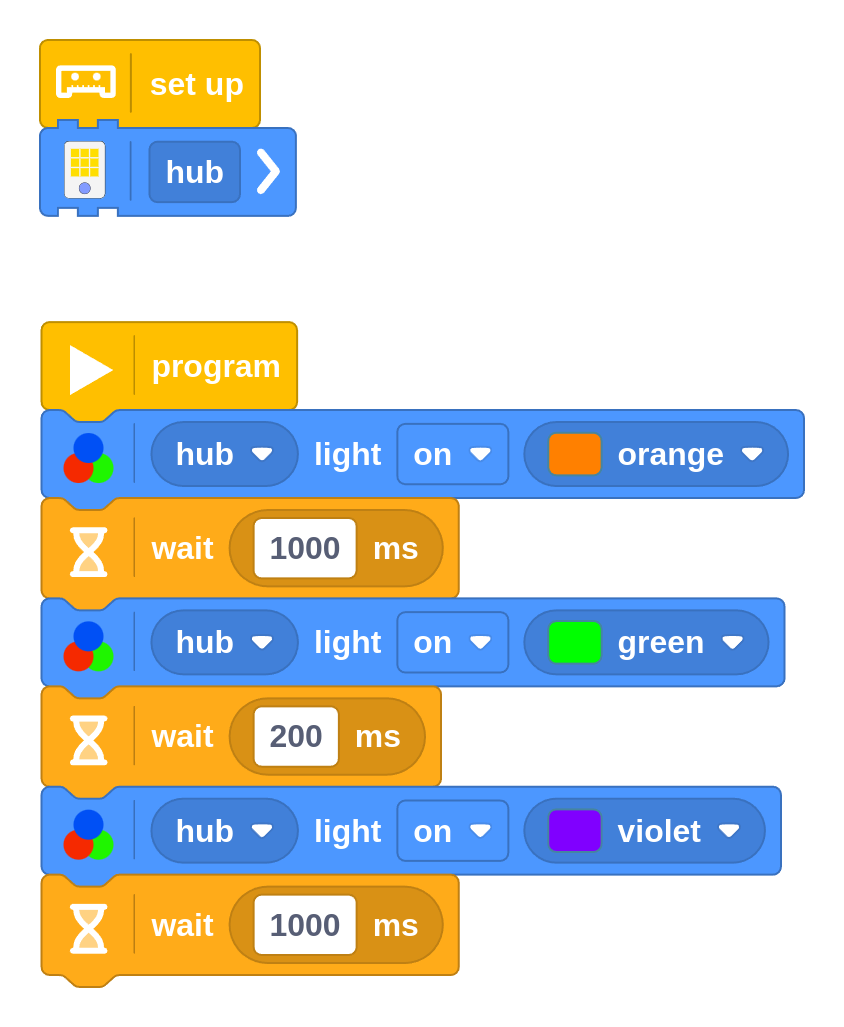
Challenge #3.4.A: Guess the flag ⸺ Create a program that shows different colors on the status light. Use Wait Time blocks to show each color briefly. Take turns to make a light pattern that represents a country flag, and have your friend guess the country. Discuss ⸺ Many countries have flags with similar colors. How could you distinguish them? Perhaps you can show colors in a particular order. Or use the duration of the light to indicate how much space that color takes up.
Challenge #3.4.B: Simon says ⸺ Take your code from Challenge #3.4.A a bit further. Create a sequence of four (or more!) colors. Ask your friend to memorize your pattern. How short can the pauses be? Discuss ⸺ How could you visually separate two identical colors in a row?
Playing sounds
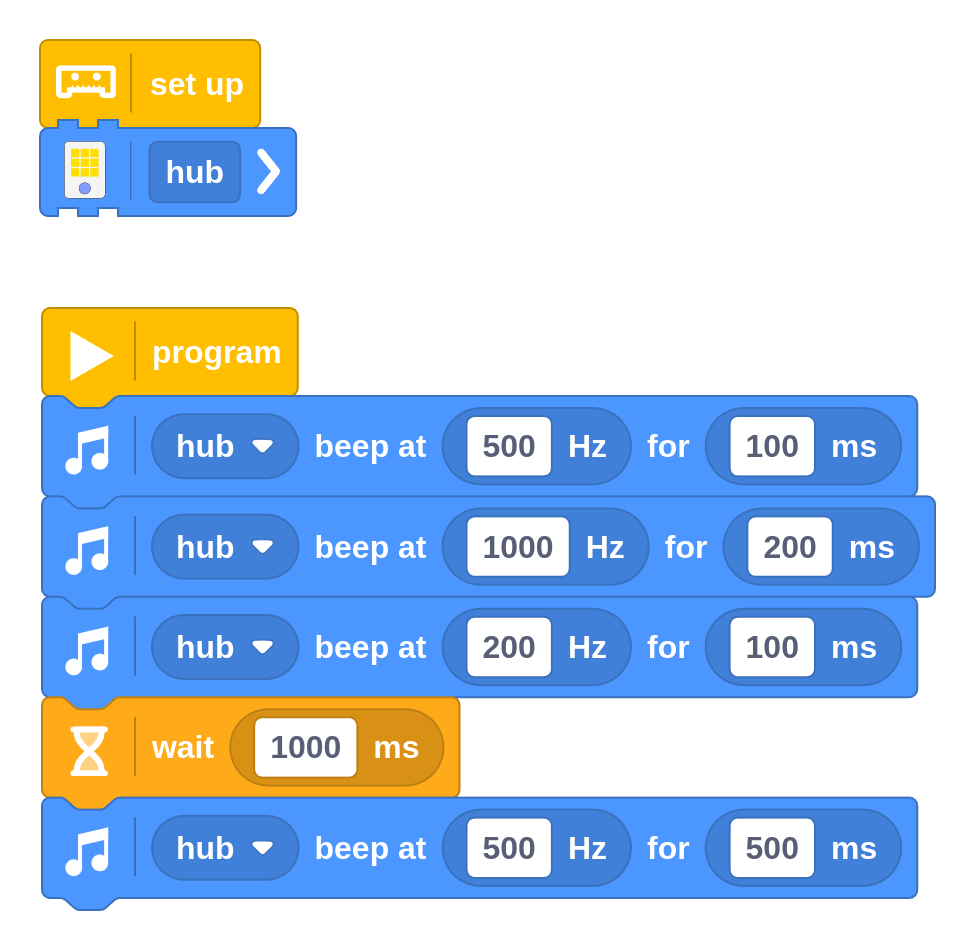
Some hubs have a built-in speaker that can play beeps of different frequencies and durations. A typical and clearly audible beep is 500 Hertz (Hz). Higher values result in higher tones. The duration of a beep is specified in milliseconds. Create the program below to try it out.
Challenge #3.4.C: Für Elise ⸺ If you are musically inclined, you must have thought that the example tune wasn’t very good. Can you use a sequence of beeps to play a well-known tune? Use Wait Time blocks for breaks between notes as needed. Research ⸺ Find which frequencies correspond to the notes you need.
Challenge #3.4.D: Morse code ⸺ Search online for Morse code. Use short and long beeps to encode a message. Ask your friend to record it on paper and decode your message. Research ⸺ Instead of using long and short beeps, can you think of other ways to convey your message? Search for on-off keying or frequency modulation. Both of these can be done with just the Sound block and the Wait Time block, without any math. Can you describe one of these techniques in words, and apply it to this problem?
Using sound and light to find bugs
Changing the color, playing sounds, and printing text can be good ways to indicate what your program is doing. This lets you quickly see “where the code is at”. This can help you find mistakes more quickly. Mistakes in programs are often called bugs. Finding and fixing them is called debugging.
For example, you could change the color for each new mission that your robot executes and keep an eye on the color as it moves. If the robot does something you didn’t intend to happen, you can quickly see which part of the code you need to look at.
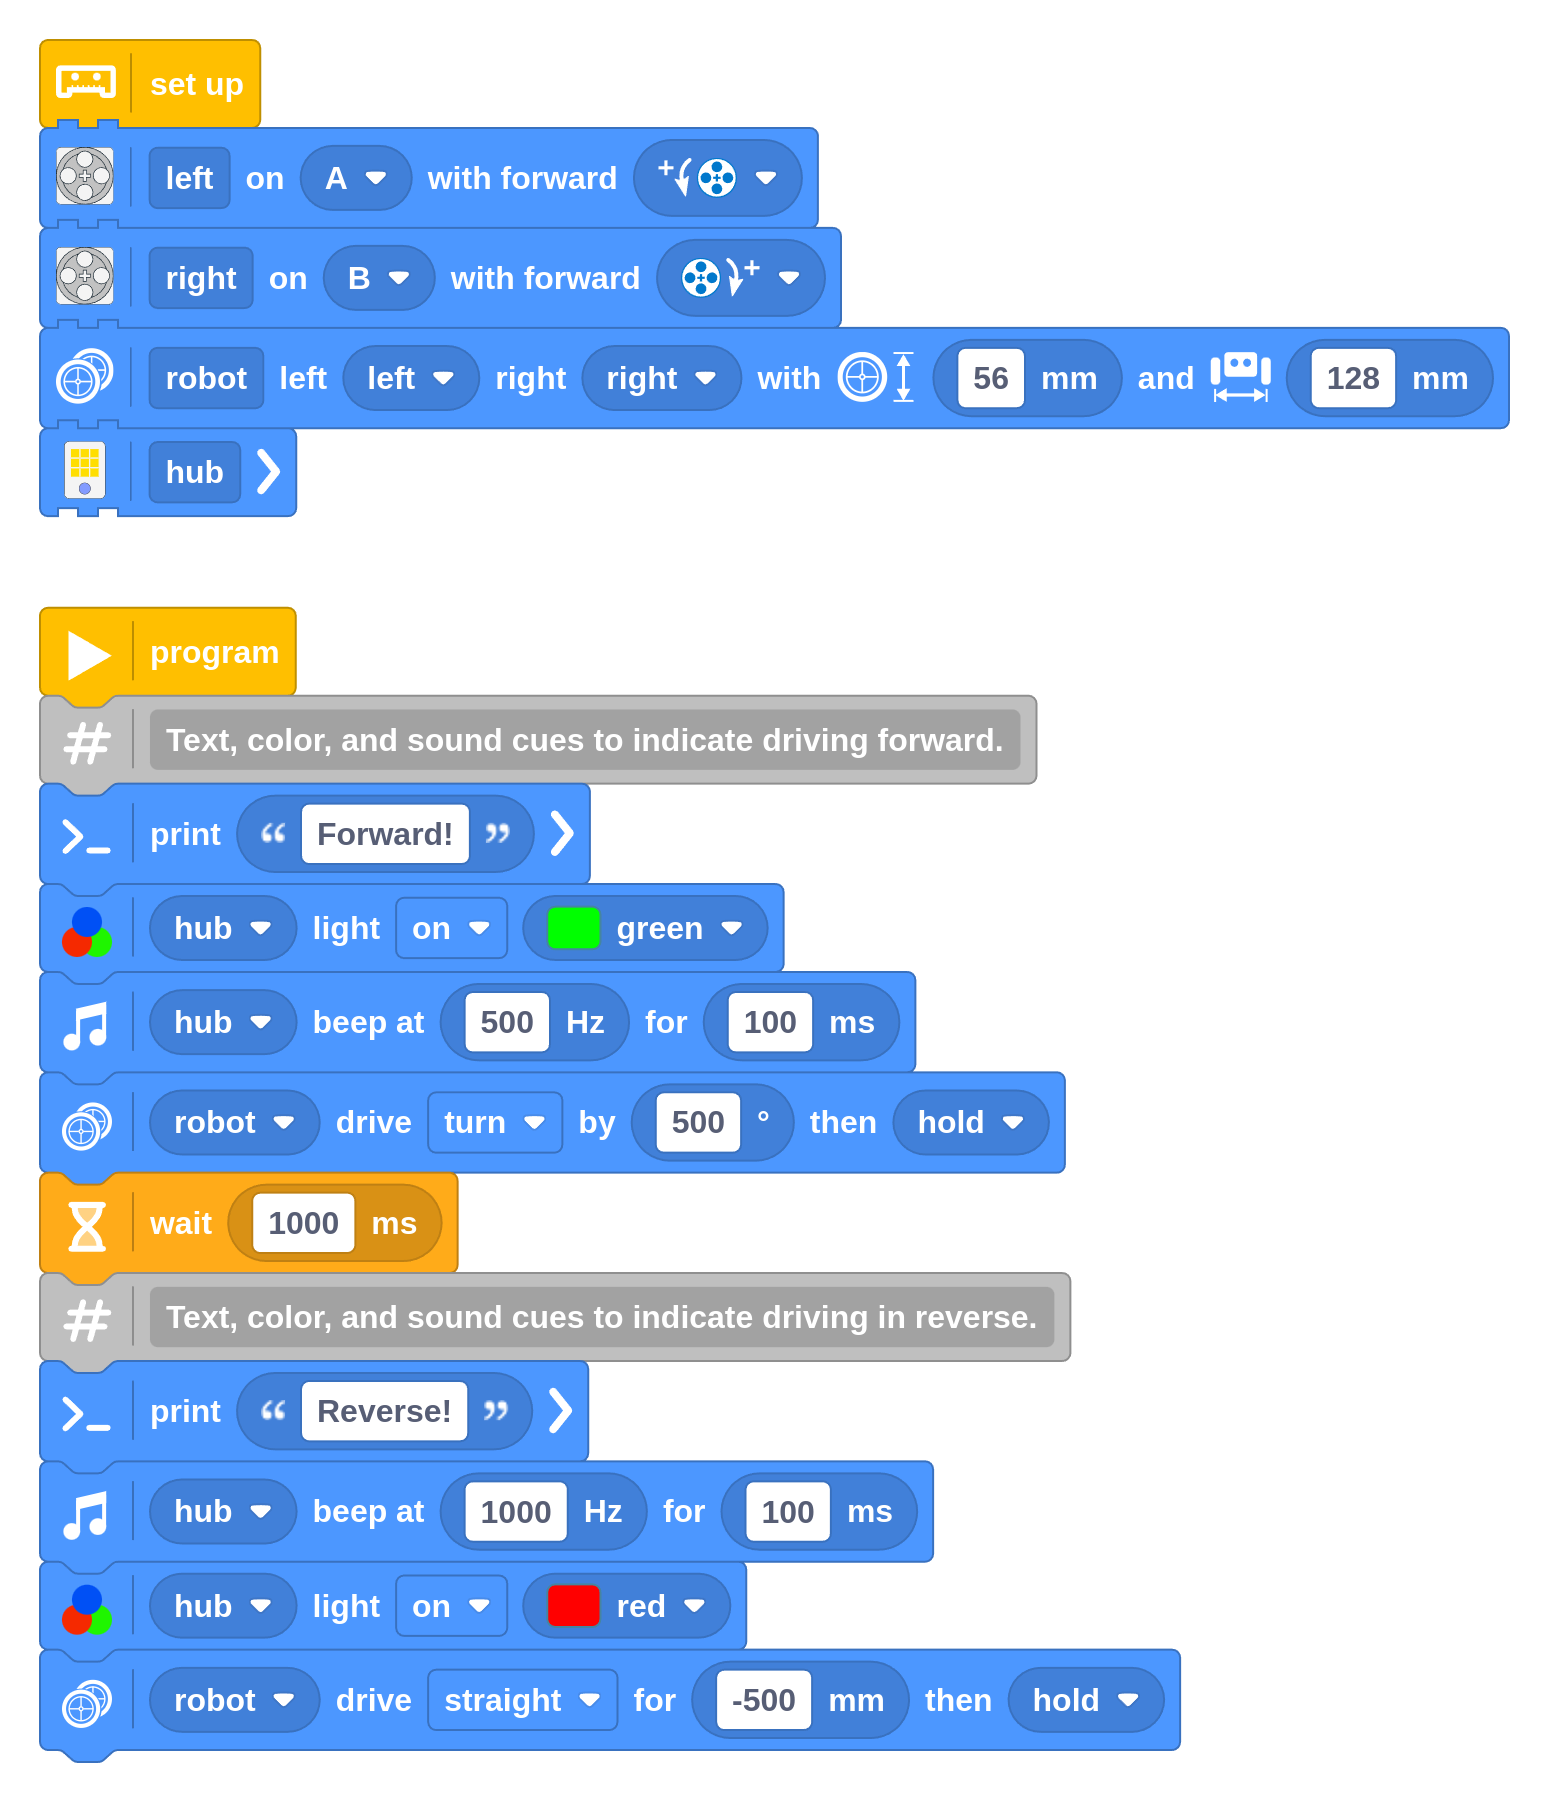
The following example makes the light green and plays a beep when the robot goes forward. It plays a higher note and makes the light red when it reverses.
Download and run this program without manually recreating it or looking at the code. Can you tell from the light, sound, or prints which of the two movements is wrong?
Challenge #3.4.E: To debug or not to debug ⸺ The print, sound, and light blocks can all be used to indicate the status of a program. Each can be useful in its own way. What are the pros and cons of each method? Discuss ⸺ Make three groups, each digging deeper into debugging with sound, light, or printing. Come up with 3 pros and 3 cons for your method and present it to the other groups. To get started: Think about light and sound in your surroundings. Is your method always available? How much information can you convey? Does it affect how fast your program runs, and does that matter? Which method is the most popular in software development? What about robotics development?
Tip ⸺ Don’t get discouraged if your programs don’t work on the first run. Learn from your findings, improve, and try again. Use a journal to write down what you tried. Write down what worked and what did not. If this feels like too much, at least write it in your group chat so you can find it later. Avoid the temptation to make endless small changes like tweaking numbers. When it gets frustrating, take a walk around the block alone or with your team and enjoy some fresh air.
Using the matrix display
The SPIKE Prime Hub (and the identical Robot Inventor Hub) has a grid of lights that you can control. Such a grid is sometimes called a matrix display. It has 5 horizontal rows and 5 vertical columns of pixels, which is 25 pixels in total.
You can display the letters a–z and A–Z and the symbols
()#$%&<=>?@! using the letter option as shown below.
You can display the values (-99 to 99) using the number option. There isn’t any space for a minus sign, so we’ve added a faint dot between the two digits for negative numbers.
With letters and numbers, the screen will be cleared before you display something new.
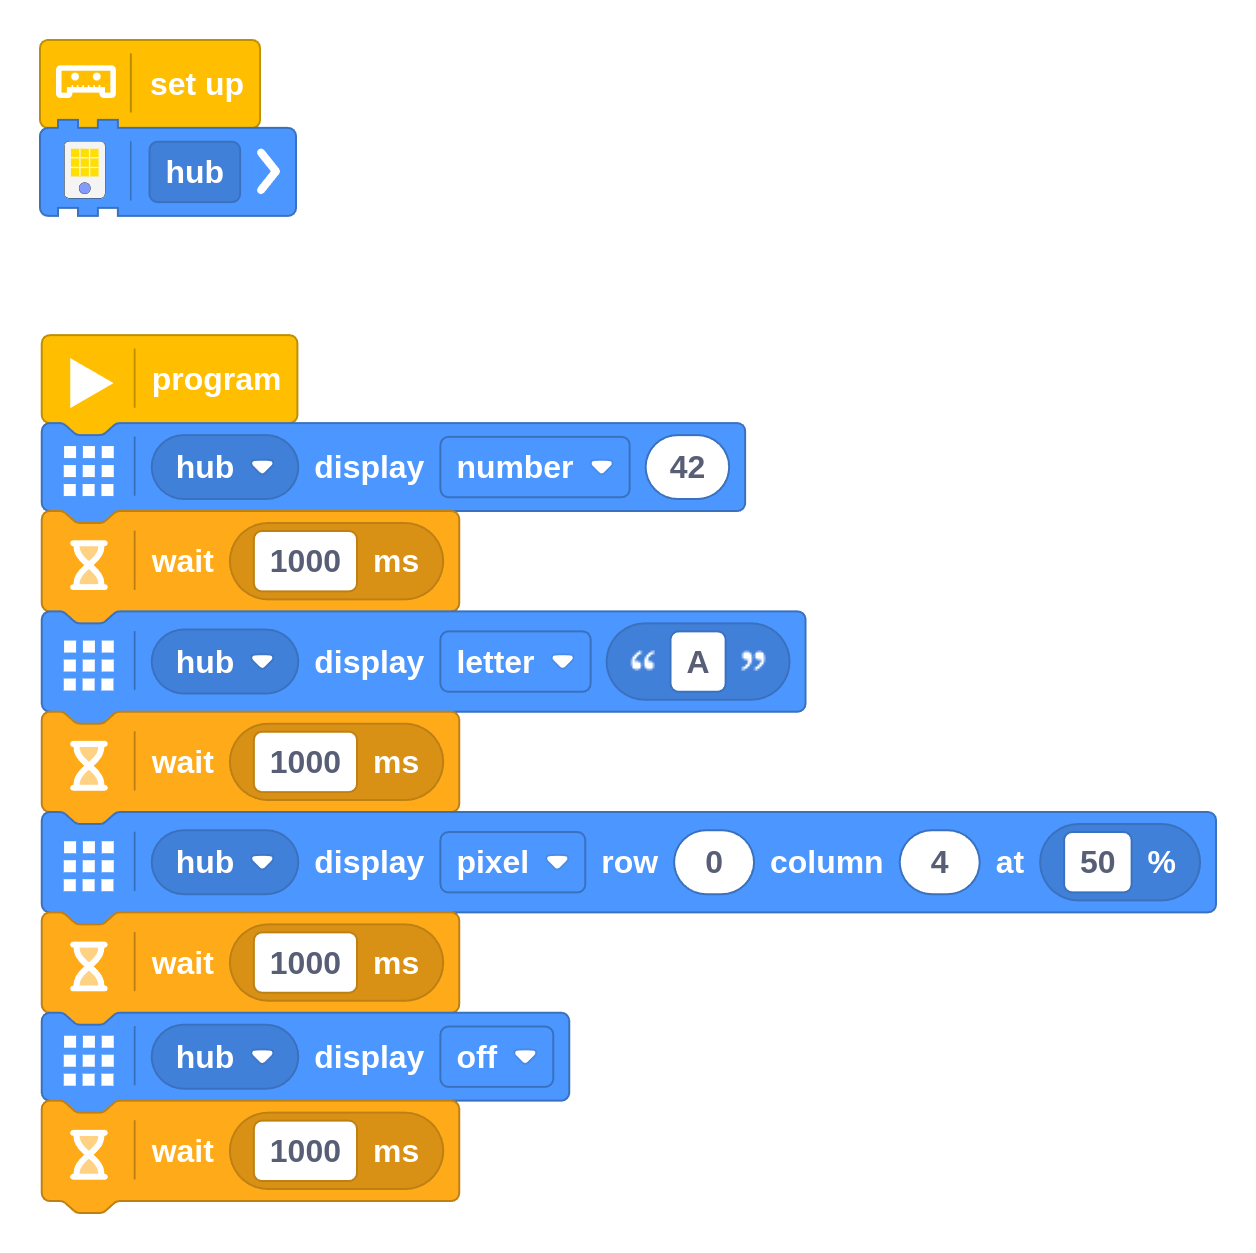
You can also set the pixels one at a time, and choose the brightness from 0% (off) to 100% (fully on). The display isn’t cleared when you do this, so you can build your own image or animations with multiple pixels. To clear a pixel, set its brightness to 0%.
Using external lights
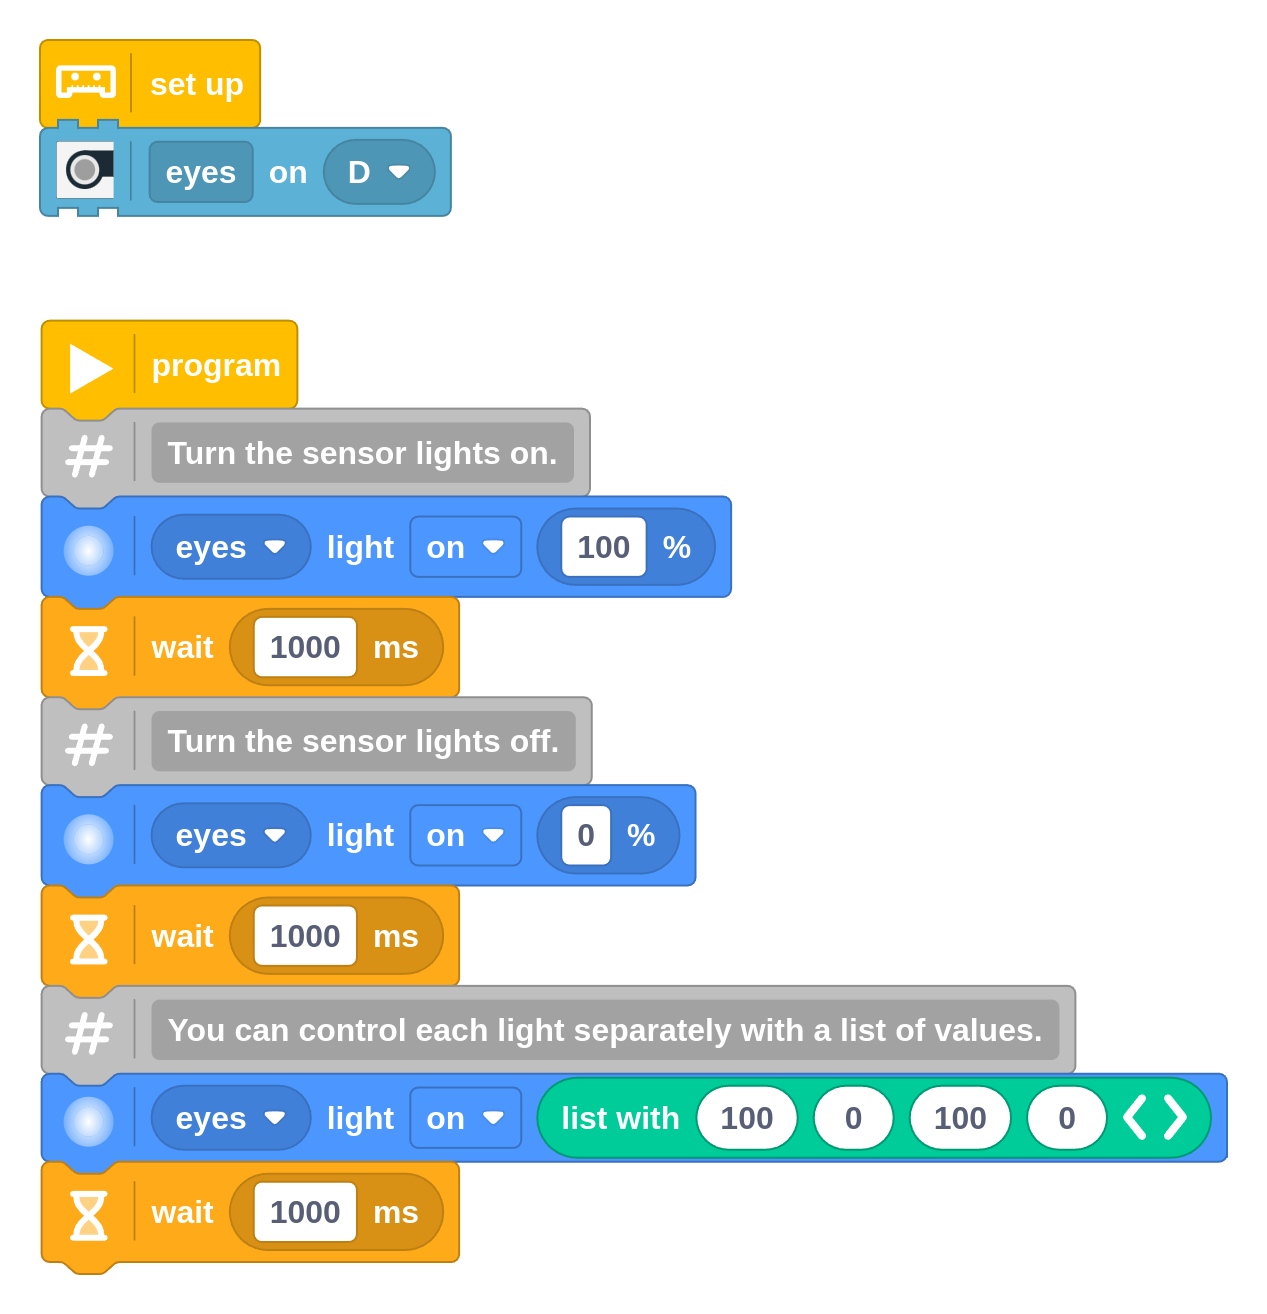
Some sensors such as the Color Sensor and the Ultrasonic Sensor have lights with adjustable brightness. You can set their brightness as follows.
You can use a list block (from the data tab) to set the light segments separately. You’ll learn more about lists later. For now, think of them as a way to pass in multiple values at once.
If you turn the lights off for the Color Sensor, they will be turned back on automatically when you try to measure the reflected color.
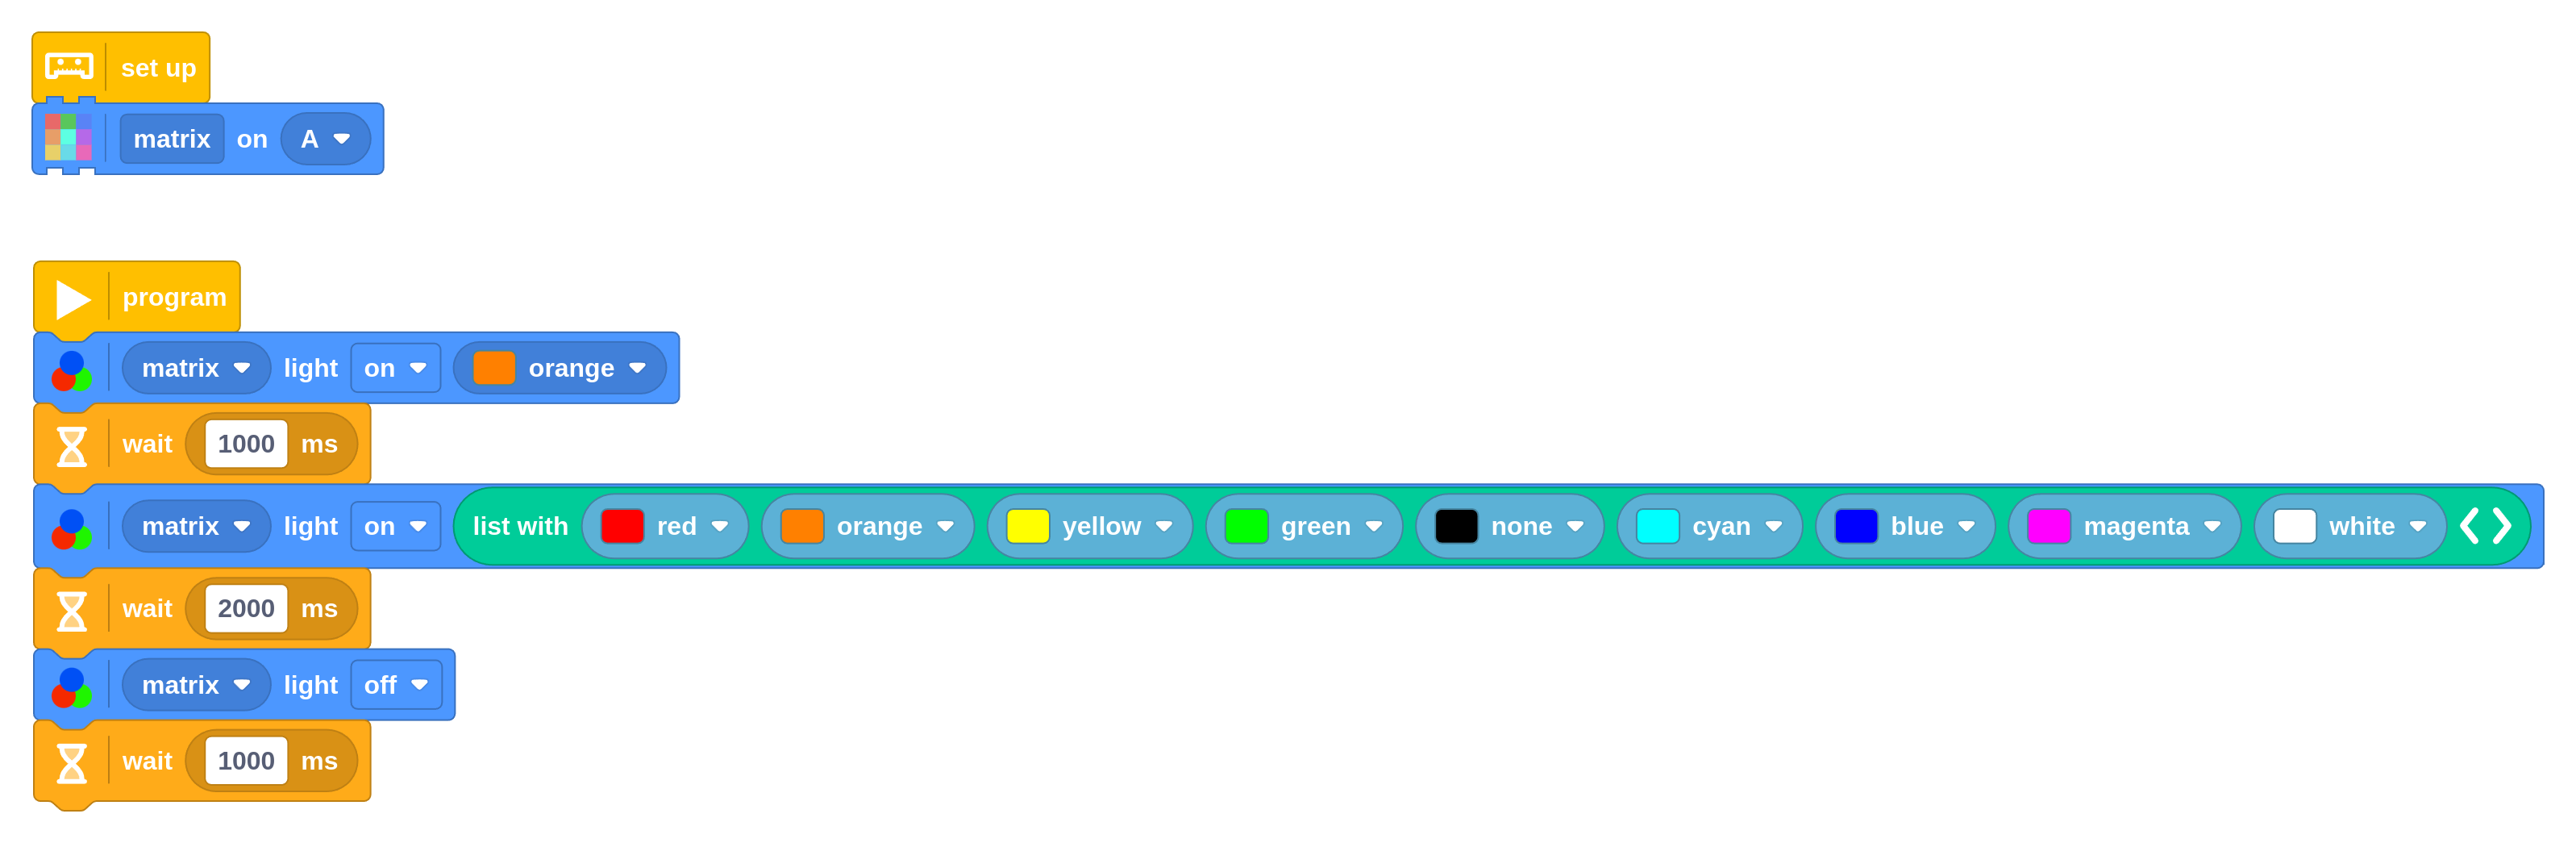
You can use the Color Light Matrix with the same color light block you’ve used earlier. Instead of selecting the hub, you set up the device and select it from the dropdown in the light block.
Challenge #3.4.F: Countdown clock revisited ⸺ In Challenge #3.2.C you got started making a basic countdown clock. Can you make it more lifelike by adding sounds and light patterns to increase tension as you get closer to 0?