Essential coding tools
Much of your code is ultimately intended to make your robot move and perform its tasks accurately. But your programs usually contain much more than just movement blocks.
This section covers several essential techniques to help you better understand what your program is doing. This also helps you identify and solve issues as you build bigger programs.
Devices, names, and ports
In your first example program, you’ve added several setup blocks. You recognize setup blocks by their brick-shaped notch. They can only be attached to other setup blocks.
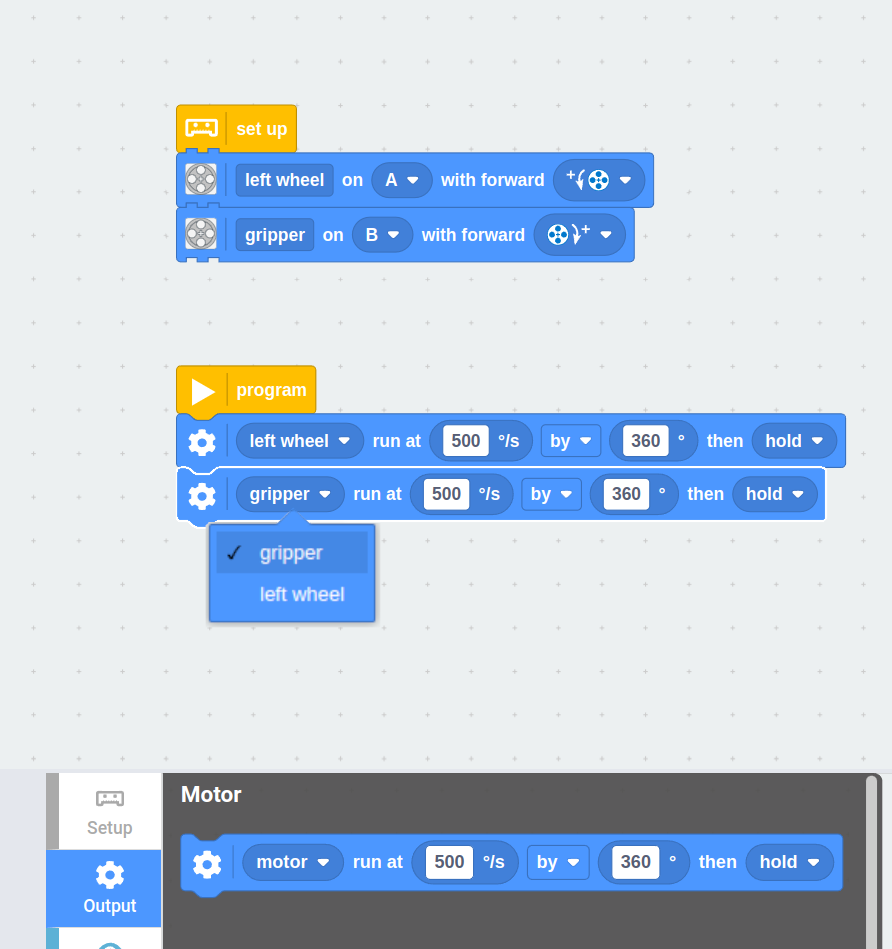
useful name.
motors you have set up.
You use setup blocks to describe how your robot is built. This has several benefits, especially once your program grows in size:
- The robot knows which devices to expect, so it can tell you if one of them isn’t plugged in.
- You specify the port (A through F) and other settings just once. When you modify your robot design, you update your code in one place instead of changing hundreds of blocks.
- Each device gets a useful name like
left wheelorgripper. You’ll use this name throughout, instead of a port letter. This helps you and your team members understand your work better. - The blocks can give you useful feedback about which functions are available for your configured devices.
Each device must have a unique name so that the robot can tell them apart. You can change the name of a device at any time.
Resolving device warnings
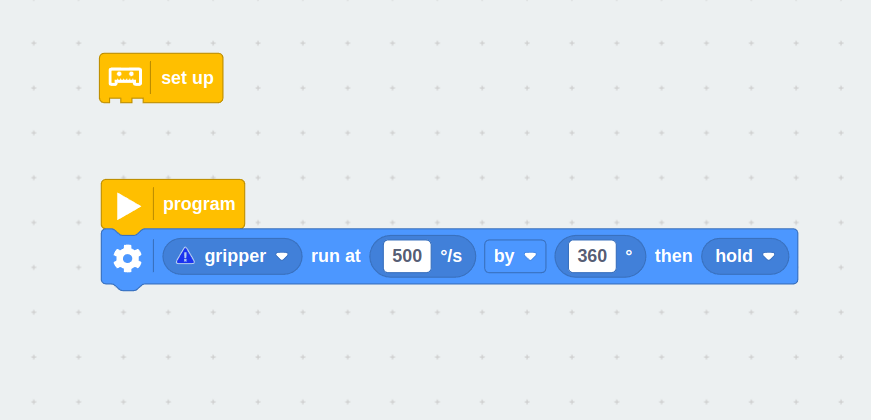
If you forget to add a setup block (or accidentally delete one), the motor blocks will indicate that the selected device is not configured, as shown below.
Make sure to resolve all such warnings to make your program work as intended. You can add new devices, and select the correct device in the dropdown of each block that uses the device.
Challenge #3.2.A: Robot pit stop ⸺ To get some practice with setup blocks, attach all your remaining motors to the hub. Set up the motors and add some blocks to make each motor move. Now unplug the drive motors and plug them into ports B and C instead of A and B. What do you have to change in your code to make this work? Hint: Keep an eye on the output window to observe helpful error messages. Try to do it wrong on purpose to familiarize yourself with the expected errors.
The positive direction
The positive (“forward”) direction on the Motor Setup block specifies which way the motor should turn if you give a positive speed or angle value, when you look directly at the shaft. In the previous chapter for example, you’ve configured the right motor to go clockwise and the left motor to go counterclockwise if you give a positive speed value.
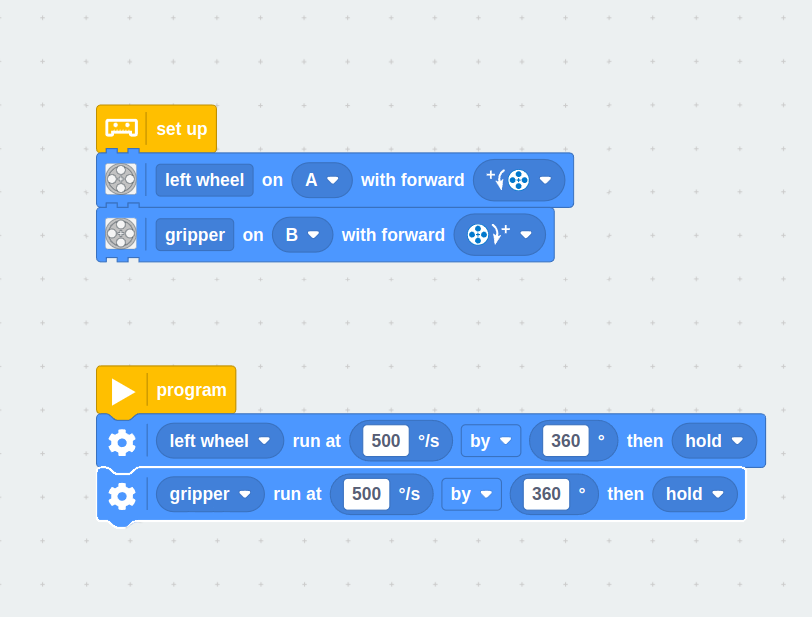
you choose a positive speed later on.
This makes the rest of your code easier to follow, because now you can just give both motors a positive speed to drive forwards, and a negative speed to reverse. Without this setup, you’d have to remember to negate the speed of the left motor in each motor block. That would be error-prone and easy to forget.
Setting the positive direction is also useful for mechanisms such as lifts, grippers, and so on. You can make positive correspond to “up” and negative to “down”. If you aren’t quite sure which direction to select, you can determine it experimentally. Start with a program as shown above and give a positive speed and angle. If your mechanism moves in the “wrong” direction (e.g. the lift mechanism is going down), just flip the forward direction in the setup block.
Challenge #3.2.B: A change of heart ⸺ For this challenge, let’s suppose that you’ve changed your mind about your StarterBot design. Don’t change your build, but just pretend that the support caster is now the front of your robot. How do you configure the positive directions for the left and right motors? Verify your results using the introductory drive base program you made earlier. Is it driving straight and turning in the intended direction? Other than a thought experiment, does this approach have any merits? What do you observe in terms of grip and accuracy?
The Comment block
No matter how simple your program is, it is always a good idea to document your work. Code comments help you document your work for yourself and others. Even if a design choice appears obvious today, a comment will help you remember a few weeks later.
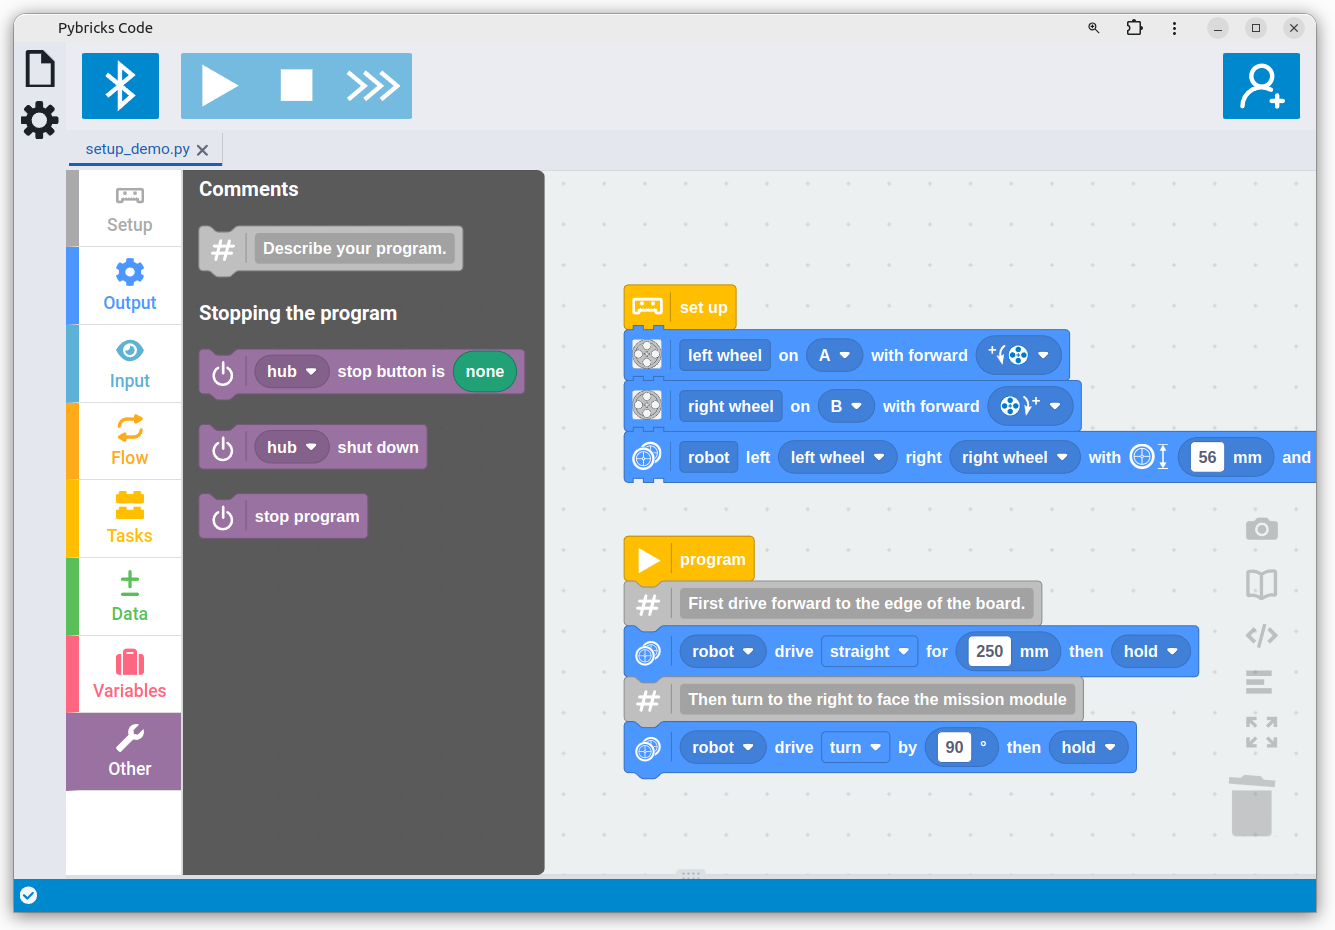
Some comments can be descriptive. They might summarize what a sequence of blocks do. Other comments can describe why you’ve done it in a particular way. You can also describe the required conditions that are needed to run your program.
Comments are filtered out before your code is sent to the robot, so comments have no impact on performance or robot code size.
It is possible to leave a Comment block floating on the canvas if you need to, but it is best practice to attach it like a normal block. This way, it moves along with your code automatically when you add other blocks above or below it.
The Wait Time block
The blocks you place under the yellow program Start block run one by one, from top to bottom. Sometimes it is useful to add a pause between blocks. The Wait Time block does just that. It waits for a duration that you choose, then continues with the next block.
You’ll find the Wait Time block on the tab with the (orange) Flow blocks, which you’ve used in your very first program.
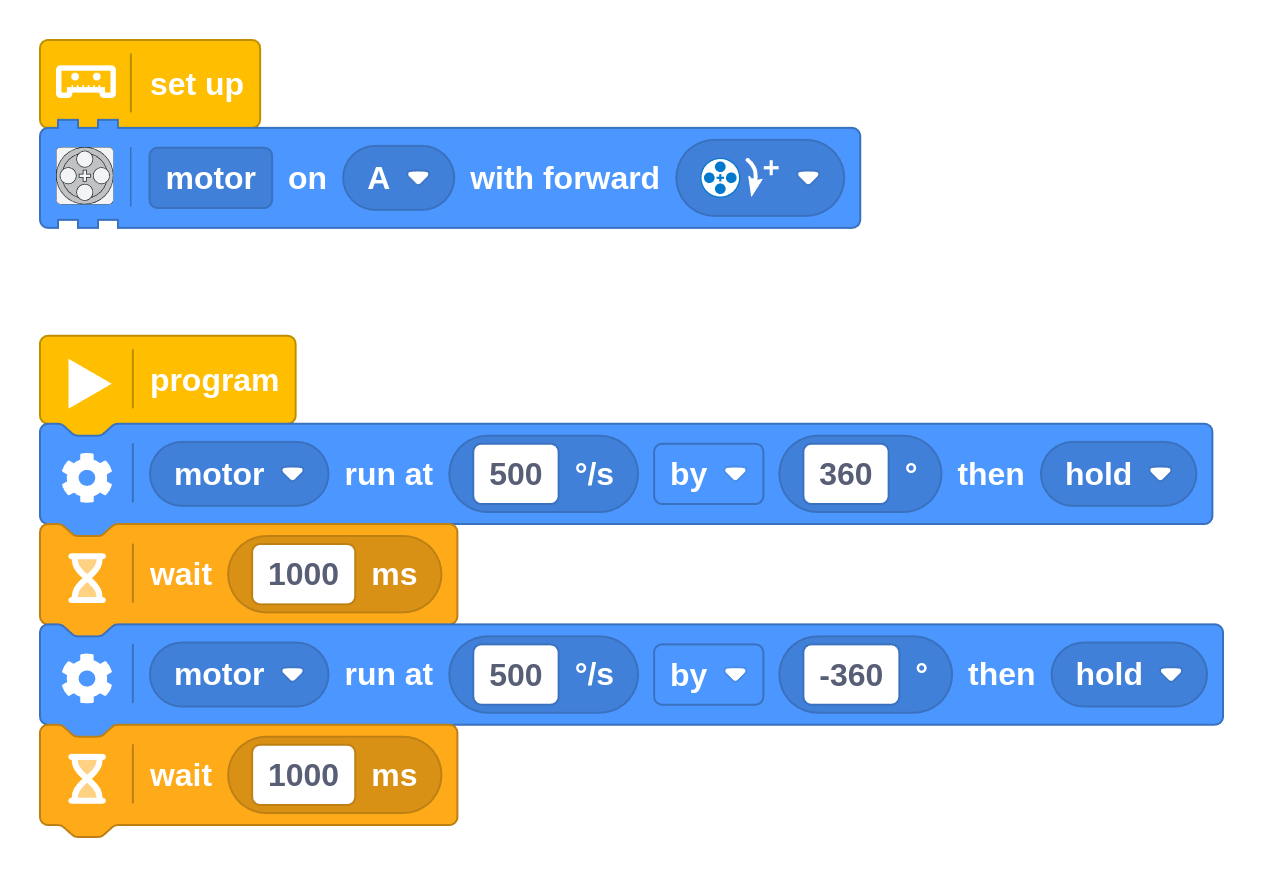
You choose the wait duration in milliseconds, or ms for short. One second equals 1000 milliseconds. You will gradually become used to thinking in milliseconds. The following conversion table lists some commonly used durations.
| Seconds (s) | Milliseconds (ms) | Meaning |
|---|---|---|
| 0.1 | 100 | One tenth of a second |
| 0.25 | 250 | A quarter of a second |
| 0.5 | 500 | Half a second |
| 1 | 1000 | One second |
| 2 | 2000 | Two seconds |
| 10 | 10000 | Ten seconds |
The Print block
The Print block sends text or numbers from your robot to the output pane below your code, as shown below. Each block adds one line to the output.
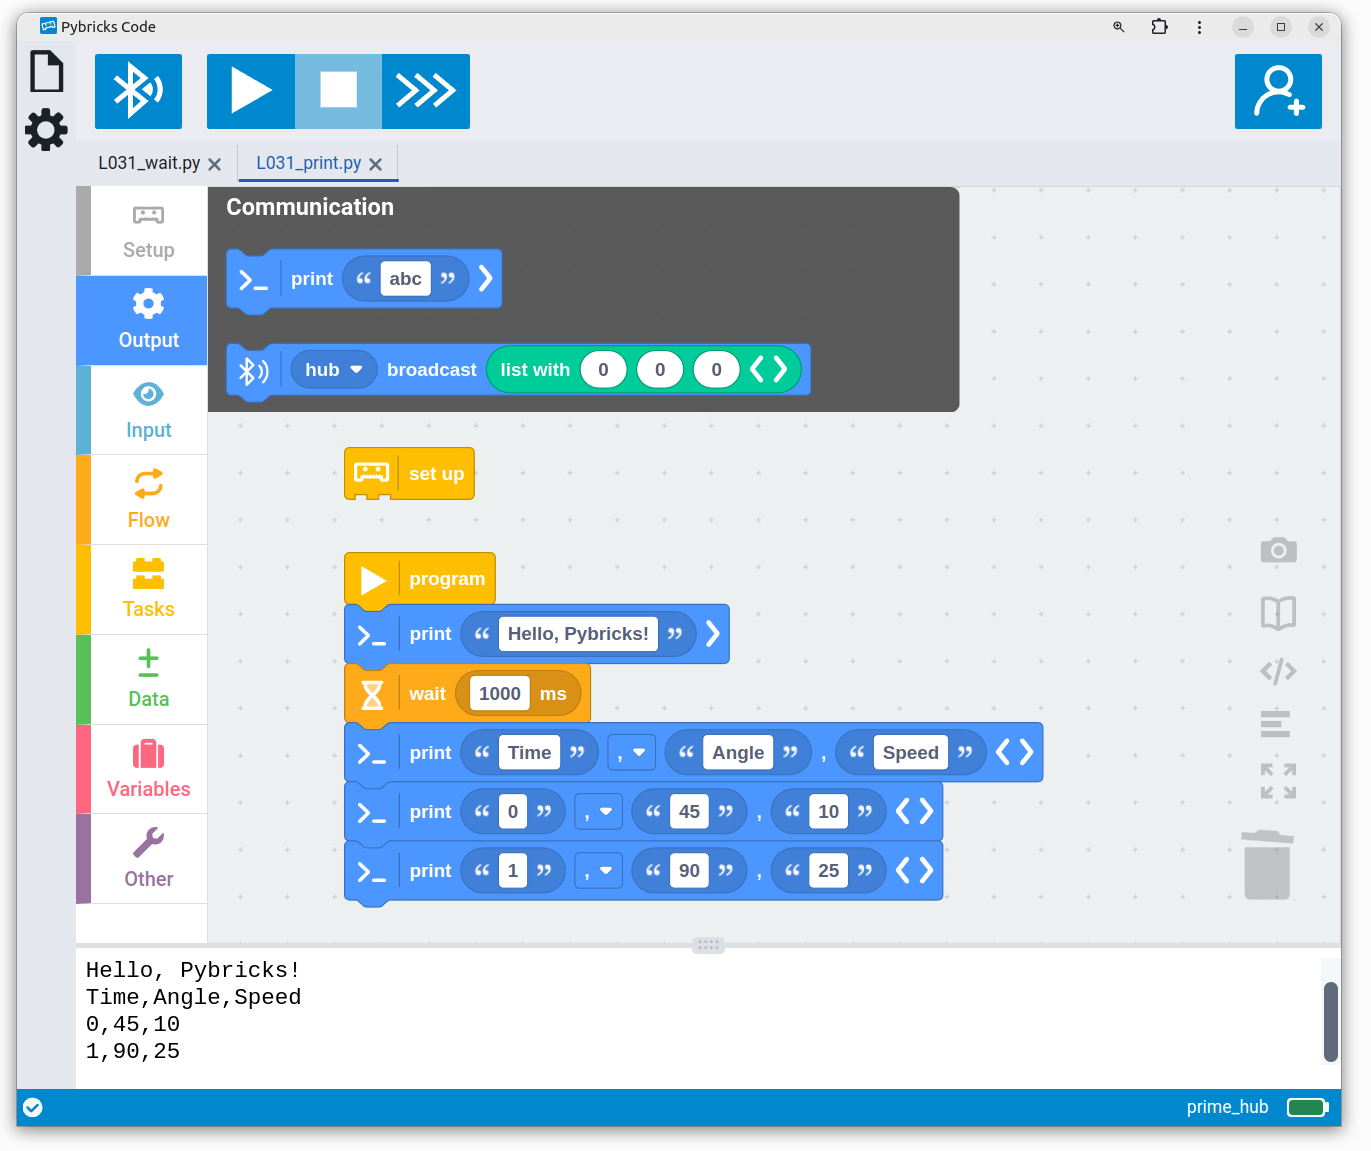
You can use the Print block to stay informed about what the robot is doing. For
example, you can make your robot print Moving Left Wheel just before you use
a motor block. If you see the text but no movement (or movement but no
text), then you know something is wrong in your code. Since you know where that
Print block is placed, you can find and fix your issue quickly.
You’ll see the Print block in many examples throughout this guide. When the robot is not connected to your computer, this block will do nothing. Then your program just continues with the block immediately after it.
Click the > icon on the block to reveal more text fields and an optional
separator between each field. When used like this, you can copy the text from
the output pane to apps like Excel, Calc, or Numbers to produce graphs.
Right click on the output pane to see additional options for copying or erasing the output.
Challenge #3.2.C: Countdown clock ⸺ Can you combine Wait Time blocks,
Print blocks, and Comment blocks to create a countdown clock? First, display
a message to say "Time remaining...", and then display 10, 9, 8 and so
on until time is up. How do you ensure that each new message is exactly one
second apart? Test your result using the stopwatch feature on your phone.
Note: Does this feel repetitive? In the next chapters you’ll learn how to
get the same result with fewer blocks.