Creating and running Pybricks programs
Now that your hub is up and running with Pybricks, let’s have a look around the Pybricks app before diving into all the blocks.
In this section, you’ll learn how to create, run, and back up programs. You’ll also learn how turn the hub on and off, and start programs when you’re away from your computer.
Exploring the app
Previously, you’ve visited the tools menu to install the firmware. You can also open the file manager as shown below. The programs you create can be opened from here.
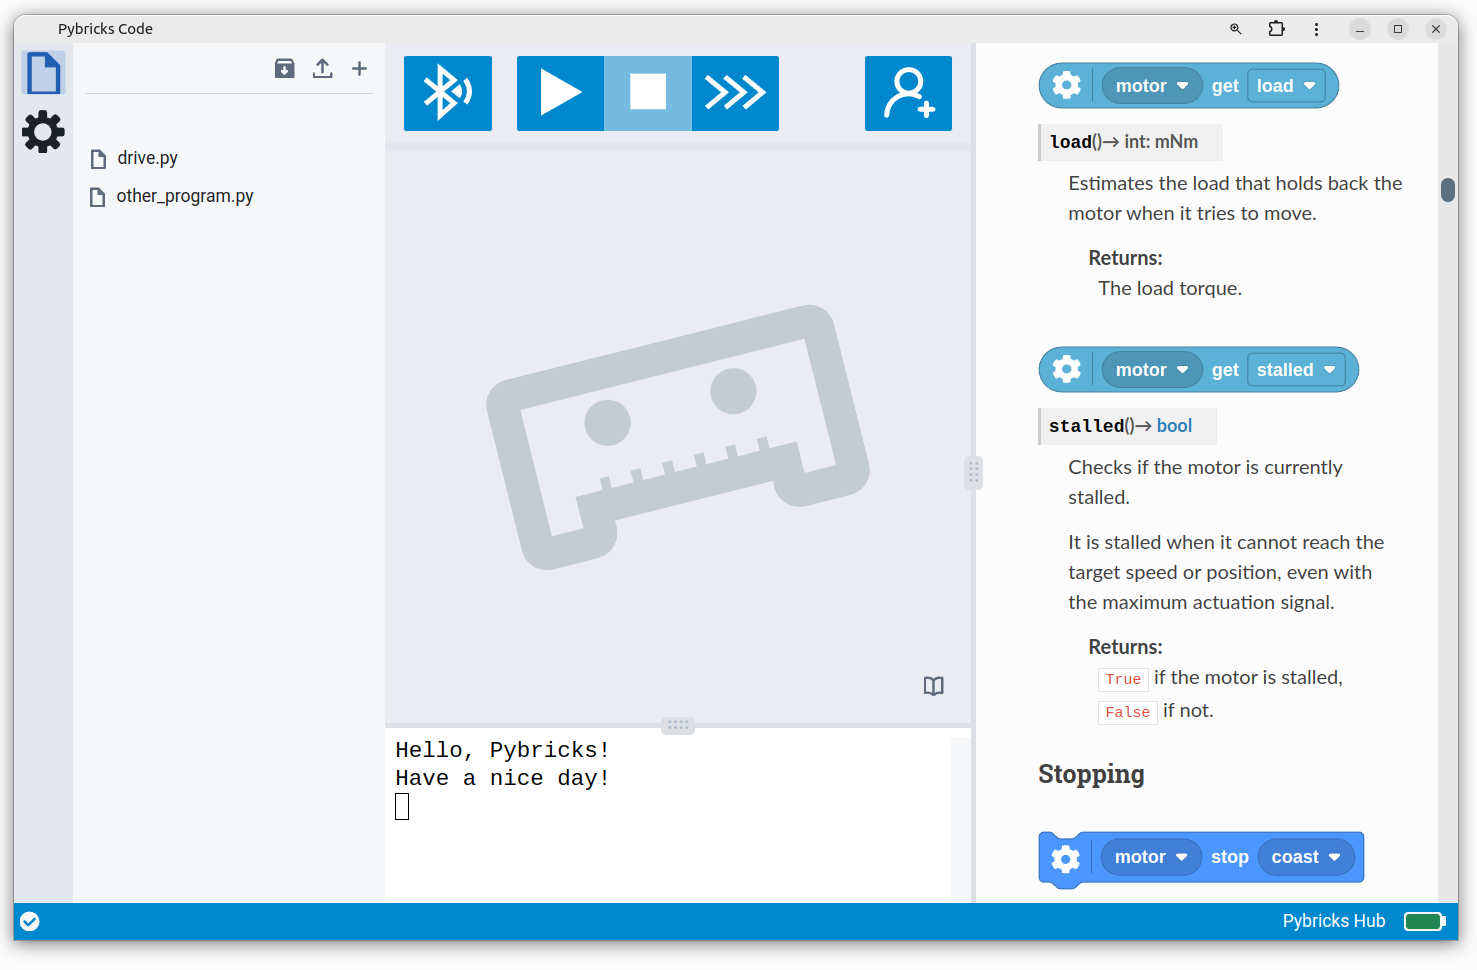
At the top, you’ll find buttons to interact with the hub. Once connected, several buttons to start and stop your program will be enabled. If a program produces any text output, it will be shown in the output window at the bottom.
Using the documentation
The guide you’re reading now explains how you can use many of the available blocks. It also tells you why you might want to use them, and in which situation.
But sometimes you just want to quickly look up what a particular block or setting does. That’s where the documentation comes in. You can open and close it using the book icon on the right hand side of the app. If you use block-based coding, just right-click on any block and choose help to jump to the relevant page.
Checking your account status
Click the user icon to check your account status, as shown above. Here you can sign in to access block coding. You can access block coding by becoming a Patreon supporter or purchasing a license code. You can find the details here.
Creating your first program
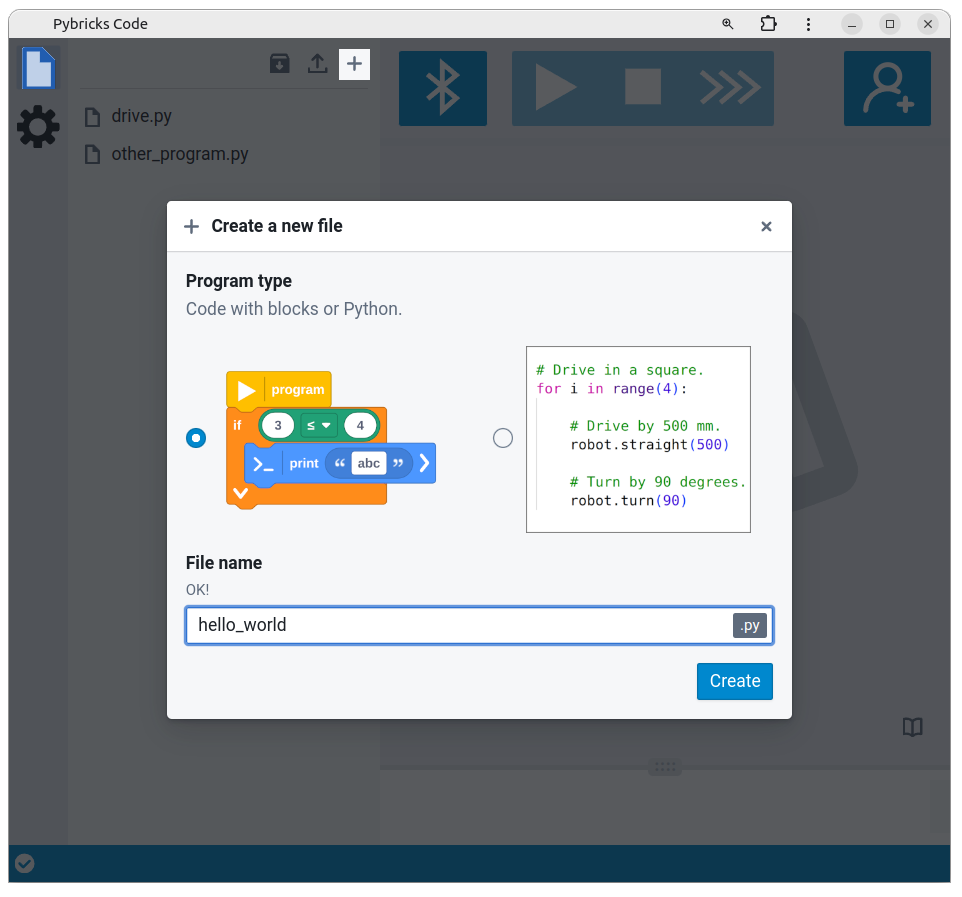
Let’s start by creating a very simple program that prints some text to your computer screen. To begin, open the file menu and start creating a new program using the + icon, as shown below. Choose block coding, enter a program name, and click Create.
As you type a program name, you’ll get suggestions in case the name can’t be used. In that case, click Fix it for me to adjust it automatically.
Your new program contains a few blocks already. There’s a yellow Setup and Start block, as well as a blue Print block. We’ll get to the details of these in the next chapters. For now, just move some of the blocks around to get a feel for how this works.
If you’re here to test your system prior to getting access to Pybricks block
coding, you can run the default program without adding any
blocks. Skip to the next
section to
learn how to run it. You’ll see Hello, Pybricks! in the output pane.
Next, open the Flow blocks tab and select the Wait Time block. Place it on the canvas and adjust the wait time as shown below. Also be sure to close the file menu to free up space on the screen.
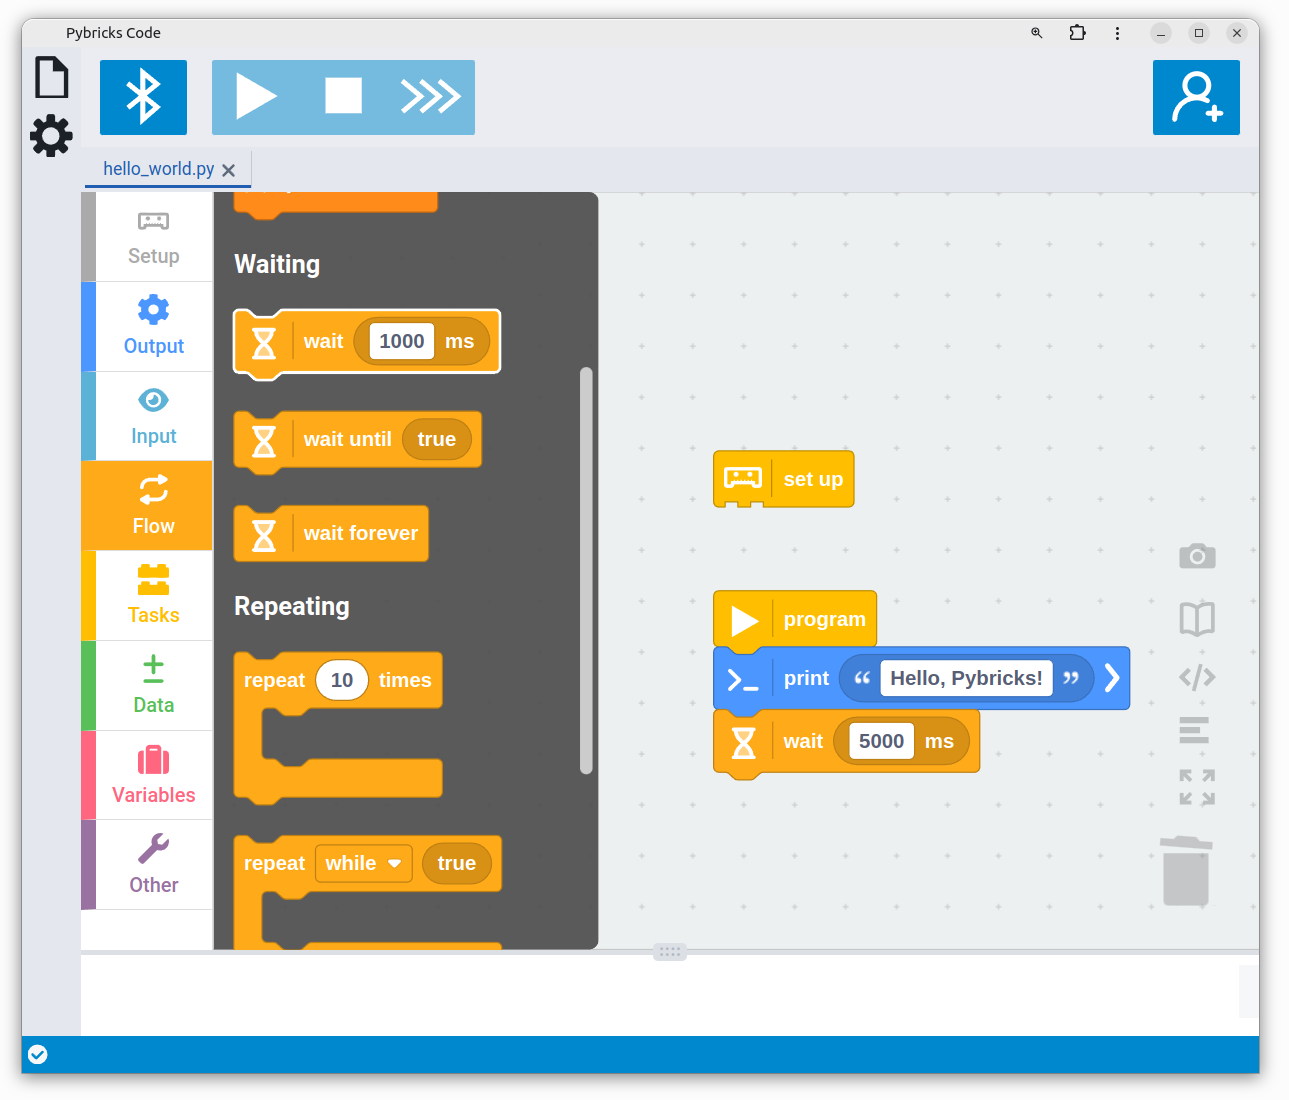
blocks
Next, pick the Print block from the Output tab and attach it to the stack of blocks you’ve built already, as shown below.
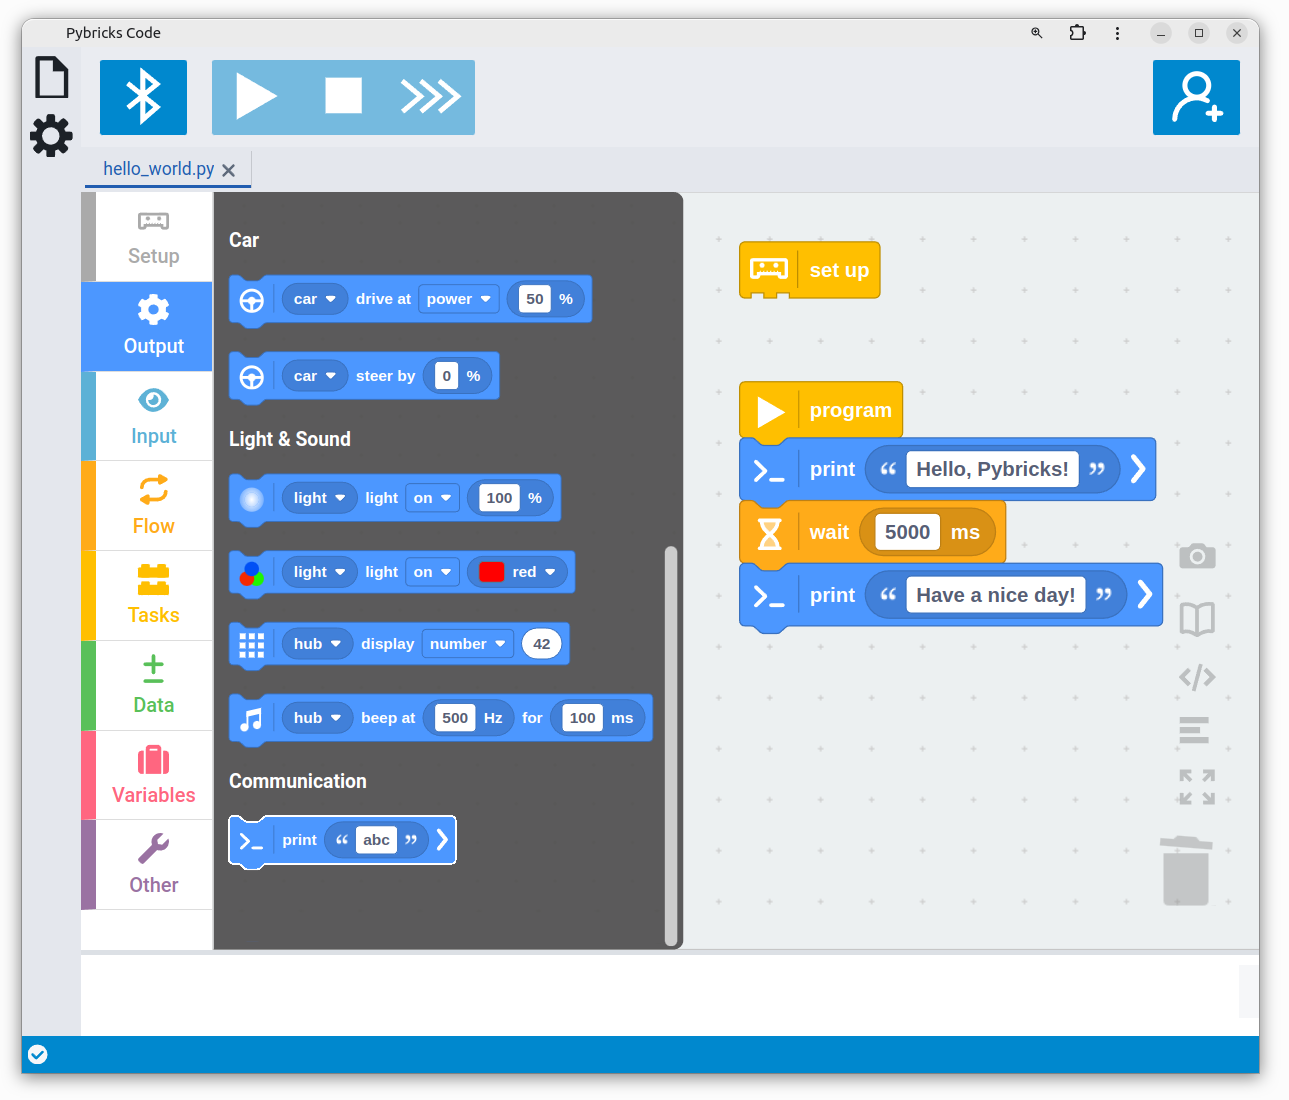
blocks
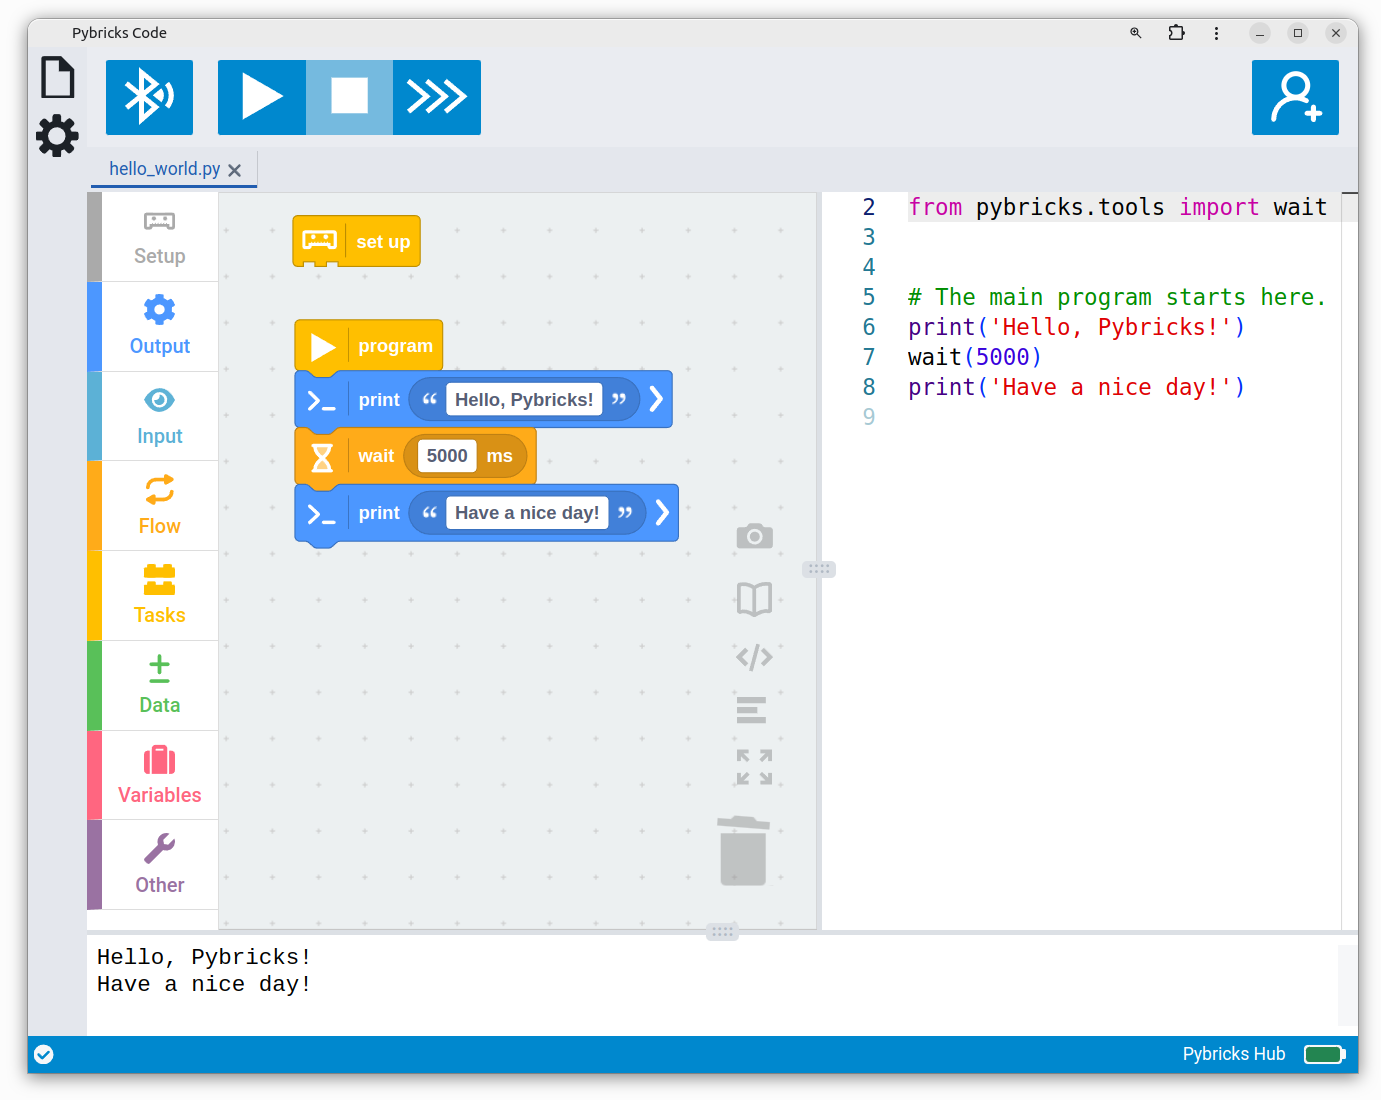
Congratulations, you’ve just created your first program! It should:
- Print
Hello, Pybricks!to the output pane of the app. - Wait 5 seconds.
- Print
Have a nice day!
Connecting to the hub
You’ll now learn to connect to the hub so you can verify that your program works. Turn on the hub. It should blink a blue light, which means it is ready to connect. Click the Bluetooth button as shown below, choose your hub and click Pair.
If you haven’t already done so, install the Pybricks firmware first, as discussed in the previous section.
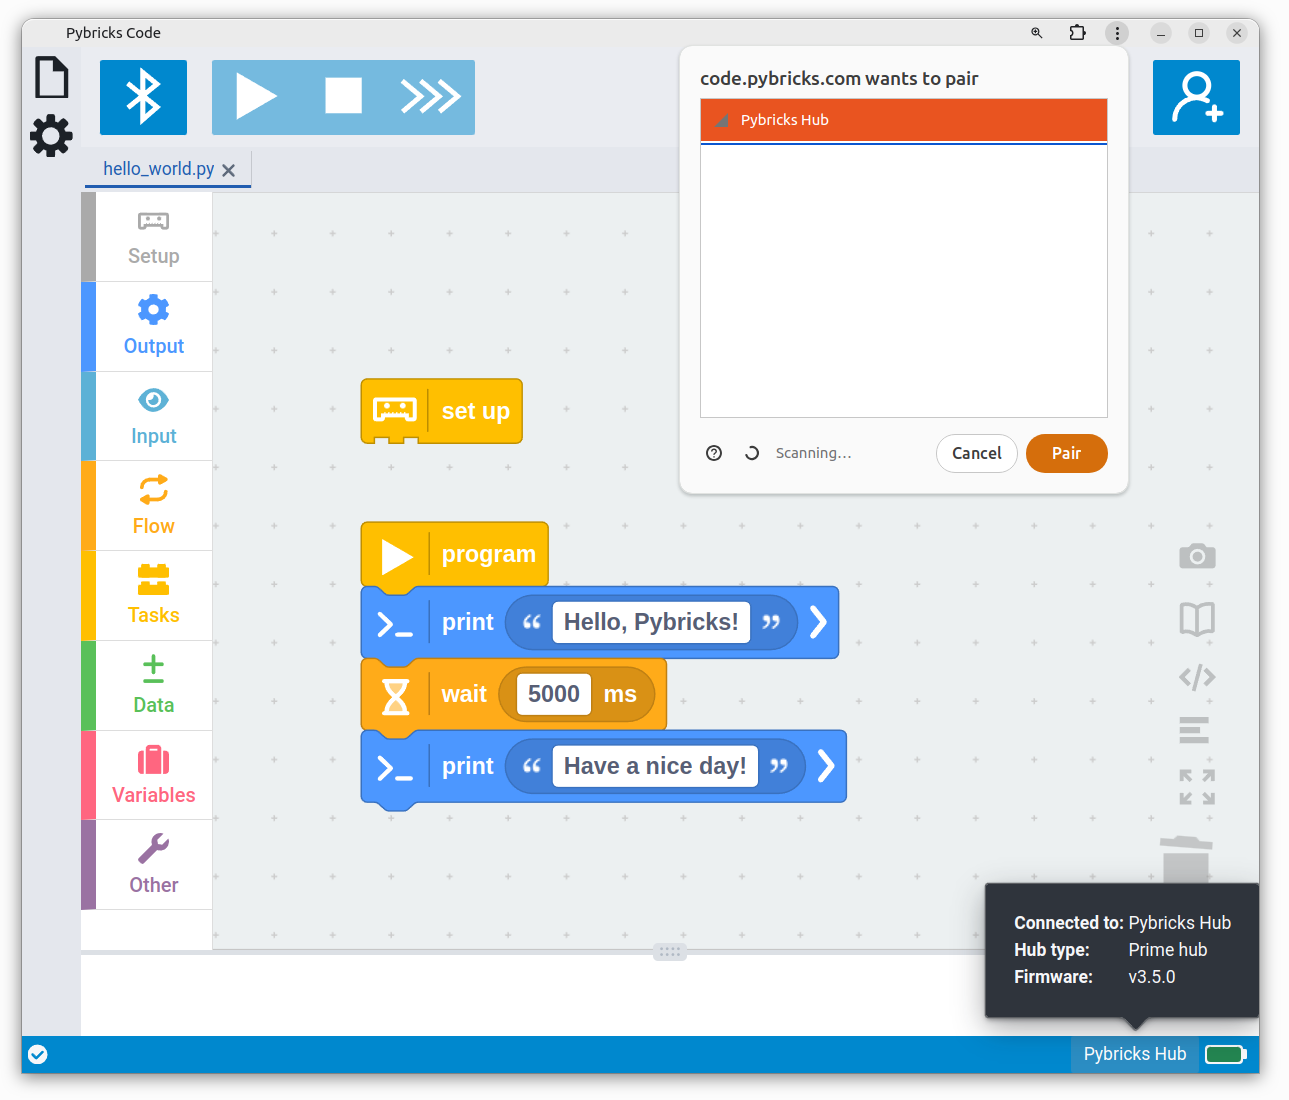
Once connected, you can check the hub status at the bottom of your screen. You’ll see the hub name and version. If your hub battery is low, you’ll see it there as well.
Starting and stopping programs
Now that the hub is connected, click the play (▶) button to start your program. Small programs like these run almost right away.

You should now see the result at the bottom of your screen. You can unfold or increase the size using the handle in the center as needed.
The program starts with the Hello, Pybricks! message. Then it waits for 5
seconds, and prints the Have a nice day! message. The end result is:
Hello, Pybricks!
Have a nice day!
If you run it again, it adds the same output another time. To clear any output, right-click on the text and choose Clear.
If a program is running, you can stop it with the ⏹-button. To try this out, start the program again and press stop right away. The output will be:
Hello, Pybricks!
The program was stopped (SystemExit).
This is because it printed the first message right away, but you stopped it before the second message would print after 5 seconds.
Note ⸺ A Pybricks program ends when the last block completes. Movement and sound stops. In Scratch, it keeps running even after all blocks complete.
Start programs with the hub button
Once you’ve run your program once, you don’t need your computer to run it again! Just press the hub (center) button to start it, even when you’re disconnected from the computer.
The program you’ve just made doesn’t do much, but you can still tell that it’s running from the slowly fading blue status light, as shown in the table below.
Press the (center) button again to stop a program if it is running. This works no matter how you started it.
To turn the hub off, hold the (center) button for three seconds. If the hub is not connected and no program is running, it will shut down after a few minutes of inactivity.
Note ⸺ Programs are saved persistently during shutdown. If you pull the hub batteries before shutting down normally, your program won’t be saved.
You can tell whether a program is running by looking at the status light. This table shows a rectangular light, but the round light of the Prime Hub or Inventor hub blinks the same way.
| Pattern | Description | |
|---|---|---|
 |
Blinking blue | Program is not running. Ready to connect. |
 |
Solid blue | Program is not running. Connected. |
 |
Fading blue | Program is running. (Either with or without a connection, it looks the same.) |
You’ll see the following indications less often, but it’s still useful to know what they mean. If you change the light color in your program, you’ll still see the orange on top of your own color to remind you to charge the battery.
| Pattern | Description | |
|---|---|---|
 |
Blinking orange | Low battery. |
 |
Blinking or steady purple | Ready to enter update mode. |
 |
Red, green, and blue blinks | Update mode active. |
The coding canvas
As you made your first program, you might have come across several buttons on the coding canvas, as shown below. Anywhere on the canvas, you can zoom the blocks in or out by scrolling with your mouse or by pinch a touch screen.
From top to bottom, you’ll find:
- Download screenshot: This is useful to share or present your work conveniently, even if your code is too big for a conventional screenshot.
- Toggle documentation: You can open the documentation to browse the block reference or close it for more space.
- Toggle Python code: You can see the Python code being generated live as you move blocks around.
- Align blocks: As your code grows, this can help you conveniently align your code in a single column.
- Zoom to fit: Helps you keep the overview of a large program.
- Trashcan: You’ll find deleted blocks here. You can take the blocks out if you change your mind. The trash is emptied when you load a new program or switch tabs.
You can close the Python code if you don’t need it. Note that you can’t edit the generated code yourself, since you would lose your changes every time you moved a block. Instead you can copy the code to a new Python program and adjust it there as you like.
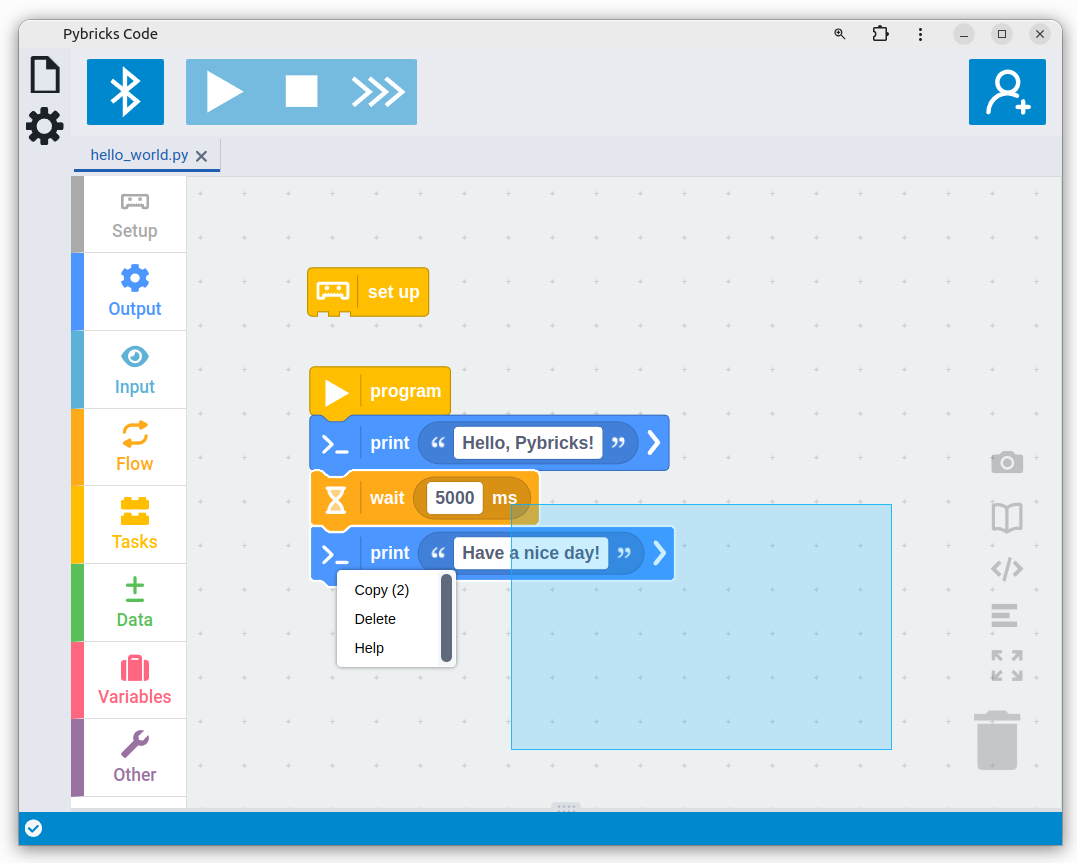
Copying and deleting blocks
You can select a block by clicking or tapping on it. Hold shift and click additional blocks to select more. You can also hold shift to encircle a larger group of blocks, as shown below.
to create a selection.
tap and hold
You can copy a selection via the right-click context menu, or use familiar keyboard shortcuts such as ctrl+c and ctrl+v.
Use Delete to delete selected of blocks. Alternatively, drag them back onto the block palette or into the trash can. If you change your mind, click on the trashcan to see deleted blocks. Note that the trash will be emptied when you close your program or switch to a different program.
Use the familiar shortcuts ctrl+z (or similar) to undo changes you’ve made.
Managing program files
You can find your block programs and Python programs on the files tab. Hover over any program to see options to rename, duplicate, back up or delete a file, as shown below.
The files are stored within your own browser and can be used offline. They will be deleted if you delete your browser data.
As with any digital project, it is a good idea to occasionally back them up to a place where you can easily find them. For convenience, you can also back up or restore all programs at once, using the buttons at the top.

Further exploration
In this section, you’ve learned how to create and run basic programs for your robot. It’s a good idea to play around with the code editor some more before diving into the details of all the blocks you can use. These challenges will help you get started.
Challenge #1.3.A: Countdown clock ⸺ Can you modify the example program to count down from 10 to 0? Hint: You’ll need 11 Wait Time blocks and 11 print blocks. You could type the numbers directly, or write your own notes such as “Time is up!”
Challenge #1.3.B: Twinkle Twinkle Star ⸺ Can you expand the program you’ve just created to display the lyrics of Twinkle Twinkle Star? Look up the lyrics and use a Print block for each line. Ensure the timing between each line is just right by setting the time in the Wait Time blocks as required.
Challenge #1.3.C: Timing the Wait Time block ⸺ The Wait Time block lets you specify a time to wait in milliseconds. But is it accurate? It never hurts to verify if a robot is really doing what you tell it to. Use print statements and a stopwatch on your phone to determine how well it works.
Challenge #1.3.D: File management ⸺ You can back up one program, or all programs at once as a ZIP archive. Can you download this ZIP archive, and open it with Pybricks on another computer? You could send it by email or save it to a service like Dropbox.
Challenge #1.3.E: Python calculator ⸺ Even though we won’t be working with
Python for a while, there’s a few things you can explore already. Click the
>>> key at the top to start the interactive prompt. In the output window
at the bottom, try typing 5+5 and press enter. Do you get the expected
result? You can also try other expressions such as 5 * 4 * 3. Use the stop
button to exit this prompt.