Waiting and repeating
So far, you’ve built programs as a stack of blocks for the robot to run. In these programs, blocks run one by one, as the execution flows from top to bottom.
In practice, robots rarely execute a long, fixed list of actions from start to finish. Robots often need to repeat some actions or decide to skip actions depending on what their sensors see. You control how the code execution flows from top to bottom with Flow blocks. A few Flow blocks are shown below.
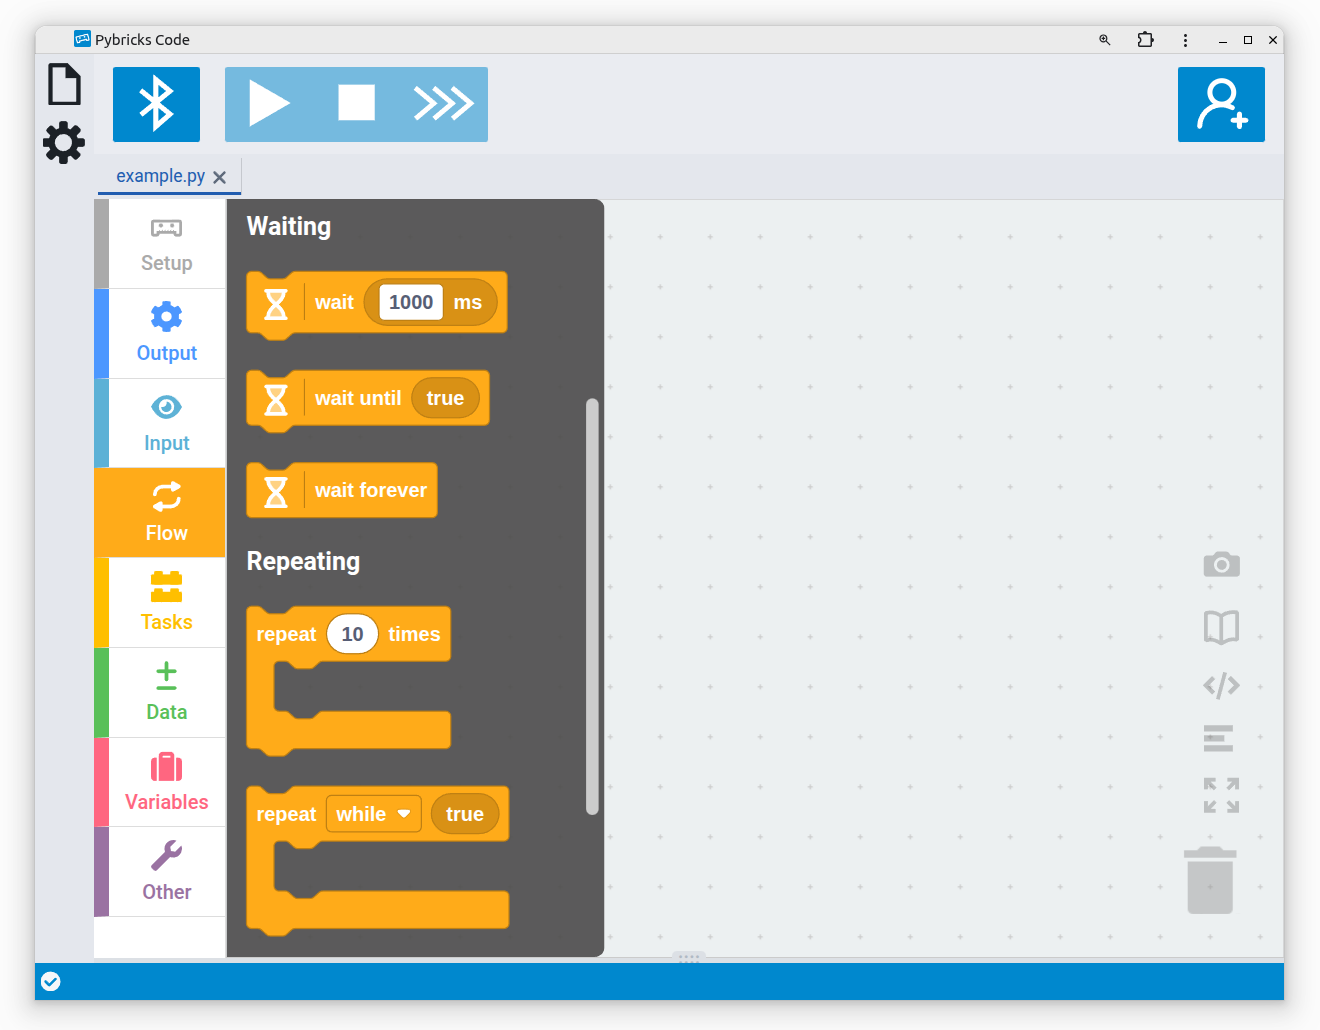
blocks
You’ve already learned to use the Wait Time block. It pauses the stack of blocks for the specified duration. This chapter introduces the Wait Forever block as well.
You’ll then learn to use the Repeat Times block to execute several actions multiple times. In the next sections of this chapter, you’ll learn how to group frequently used actions in a dedicated task block. You’ll also learn how to run multiple actions at the same time.
Waiting forever
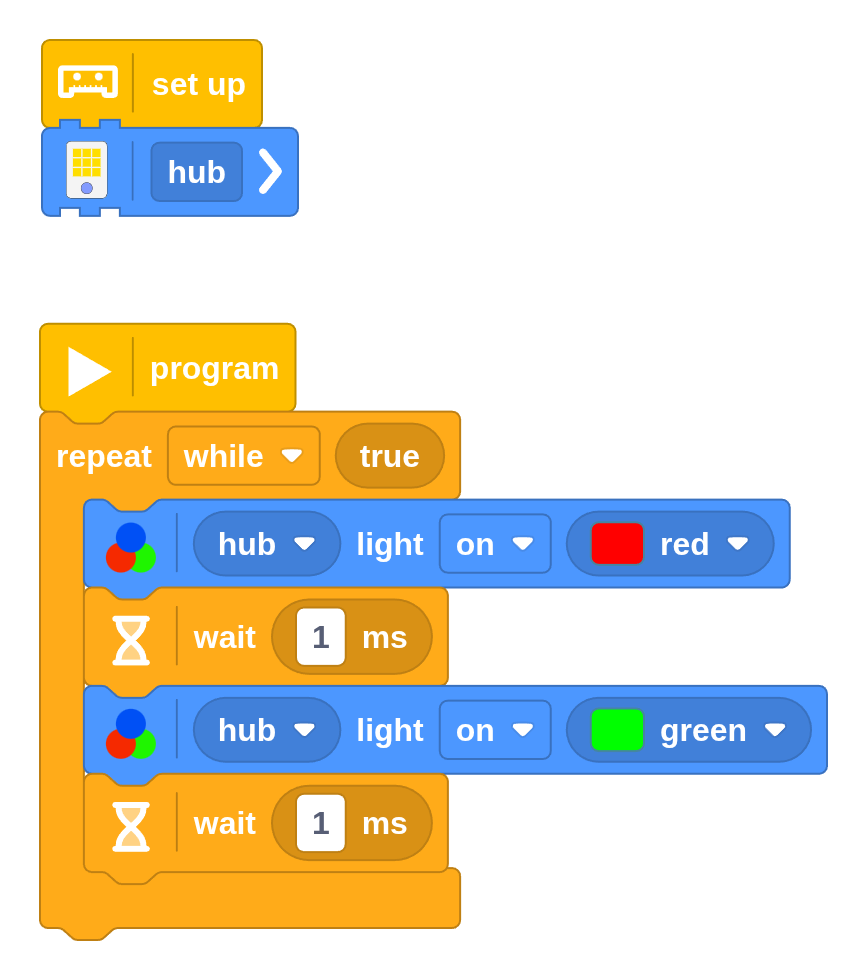
In Pybricks, the program ends when the last block in your program completes. Motors will be stopped, and the hub menu reappears. To keep your program running even after it completes, add the Wait Forever block to your program, as shown below. This mimics the standard behavior in Scratch.
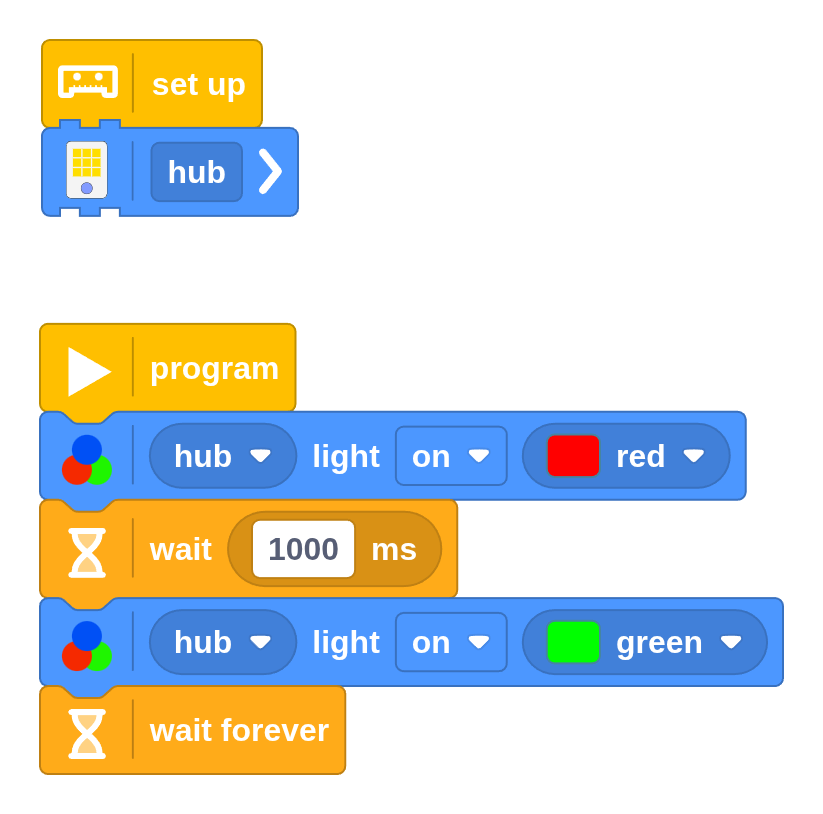
In this example, the hub light turns red for a second and then turns green. Because of the Wait Forever block, it stays green forever, until you press the stop button. Without this block, the program would end immediately after turning the light green, leaving no time for you to see it.
You cannot attach any blocks to the bottom of the Wait Forever block, as they would never run.
Repeating actions several times
Imagine you’re walking along a square-shaped path, as shown below. As you walk, you follow a certain pattern over and over again: go straight, then turn right, go straight, turn right, and so on.
To create this sort of behavior with your robot, you could use one Drive block to go straight and another to turn right. To make one complete square and return to its starting position, you would need to use these two blocks four times, for a total of eight blocks.
Rather than using eight blocks, it’s much easier to use the Repeat Times block, which lets you repeat sequences of blocks that are placed within it. The following program creates the square pattern by repeating a straight and a turn four times. Repeating like this is sometimes called a loop.

Challenge #4.1.A: Chicken or the egg ⸺ When driving in a square, does it matter if the straight or the turn comes first? Will the robot follow a different path if you swap them? Draw your prediction for both cases on a piece of paper and swap the blocks to test your hypothesis.
Challenge #4.1.B: Cutting corners ⸺ Change the square program to drive with rounded corners instead of in-place turns, as shown below. Use the continue option in the Drive block to blend the paths together. Discuss ⸺ Why do you have to reduce the lengths of the straights to maintain the same size of the square? Can you come up with a formula to calculate the length of the straights, given the width (W) and corner radius (R)? Does your formula still work for large corners or small squares? If not, when does it break down? What shape does the square turn into at this breaking point?
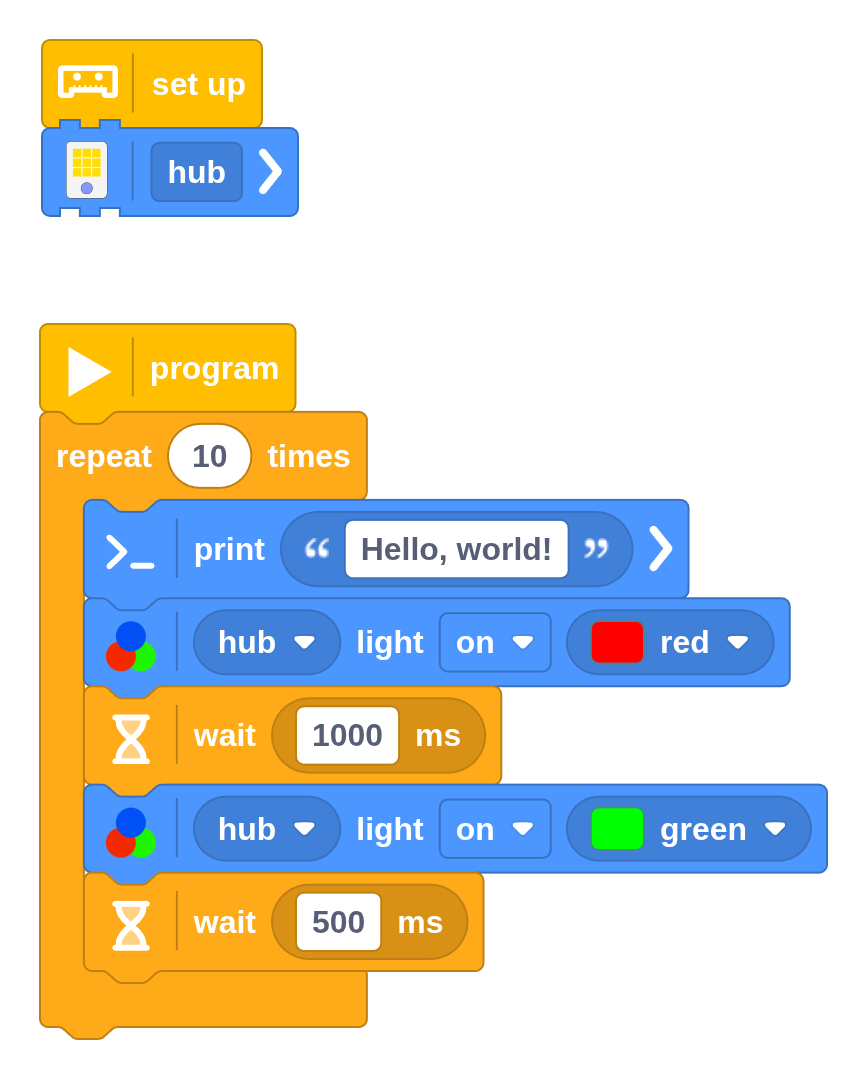
You can repeat any type of block, not just Drive blocks. The following example illustrates how you can repeatedly print text or change the hub light color. By adding Wait Time blocks after changing the light color, you create your own blink pattern.
Repeating forever
So far, you’ve repeated actions a fixed number of times. Sometimes, you’ll want to repeat actions over and over without stopping. For example, you might want to keep blinking a light or keep driving a certain pattern.
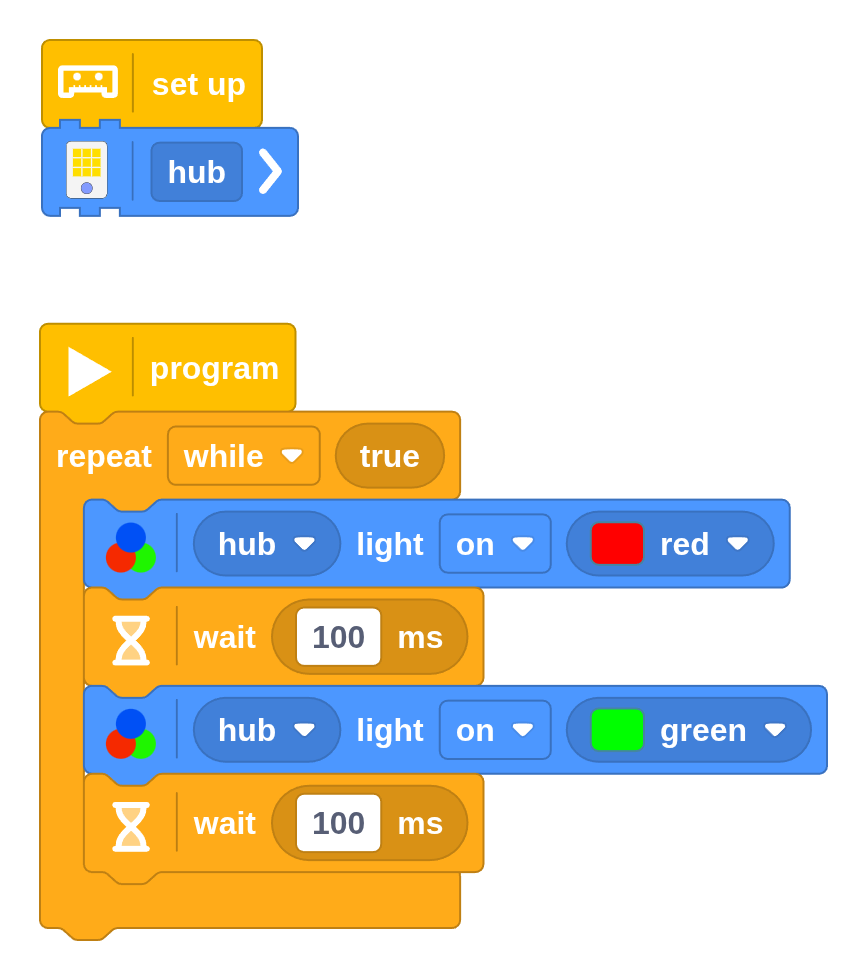
You can repeat actions forever with the Conditional Repeat block, as shown below.
You’ll learn the meaning of the while True condition in the next chapters. For
now, just remember that this block repeats any blocks placed within it forever by default.
The actions repeat until you press the hub center button or the stop button in the app.
Challenge #4.1.C: It’s all a blur ⸺ Reduce the wait duration as shown below. Now the light changes color hundreds of times per second. What is the result? This example creates a 50-50 mix of red and green. Why? Can you make it 75% green and 25% red? If you increase the wait duration, at what point does the light start to blink instead of blending smoothly? Research ⸺ Mixing light colors is very different from mixing paint colors. Write a one-page essay describing the differences. What are primary colors, and what happens if you mix them in the case of paint or light? How can you create a white light?
Repeating… repeatedly
In the square example, the Repeat Times block was used to repeat two Drive blocks four times, giving a total of eight movements. After that, the program continues with blocks attached below it. For example, you could add a Beep block so you can hear it when the square completes.
Repeat blocks can be moved around like normal blocks. Any blocks placed within it just move along. Likewise, you can place one Repeat Times block inside another repeat block. Try this out by creating the following program.
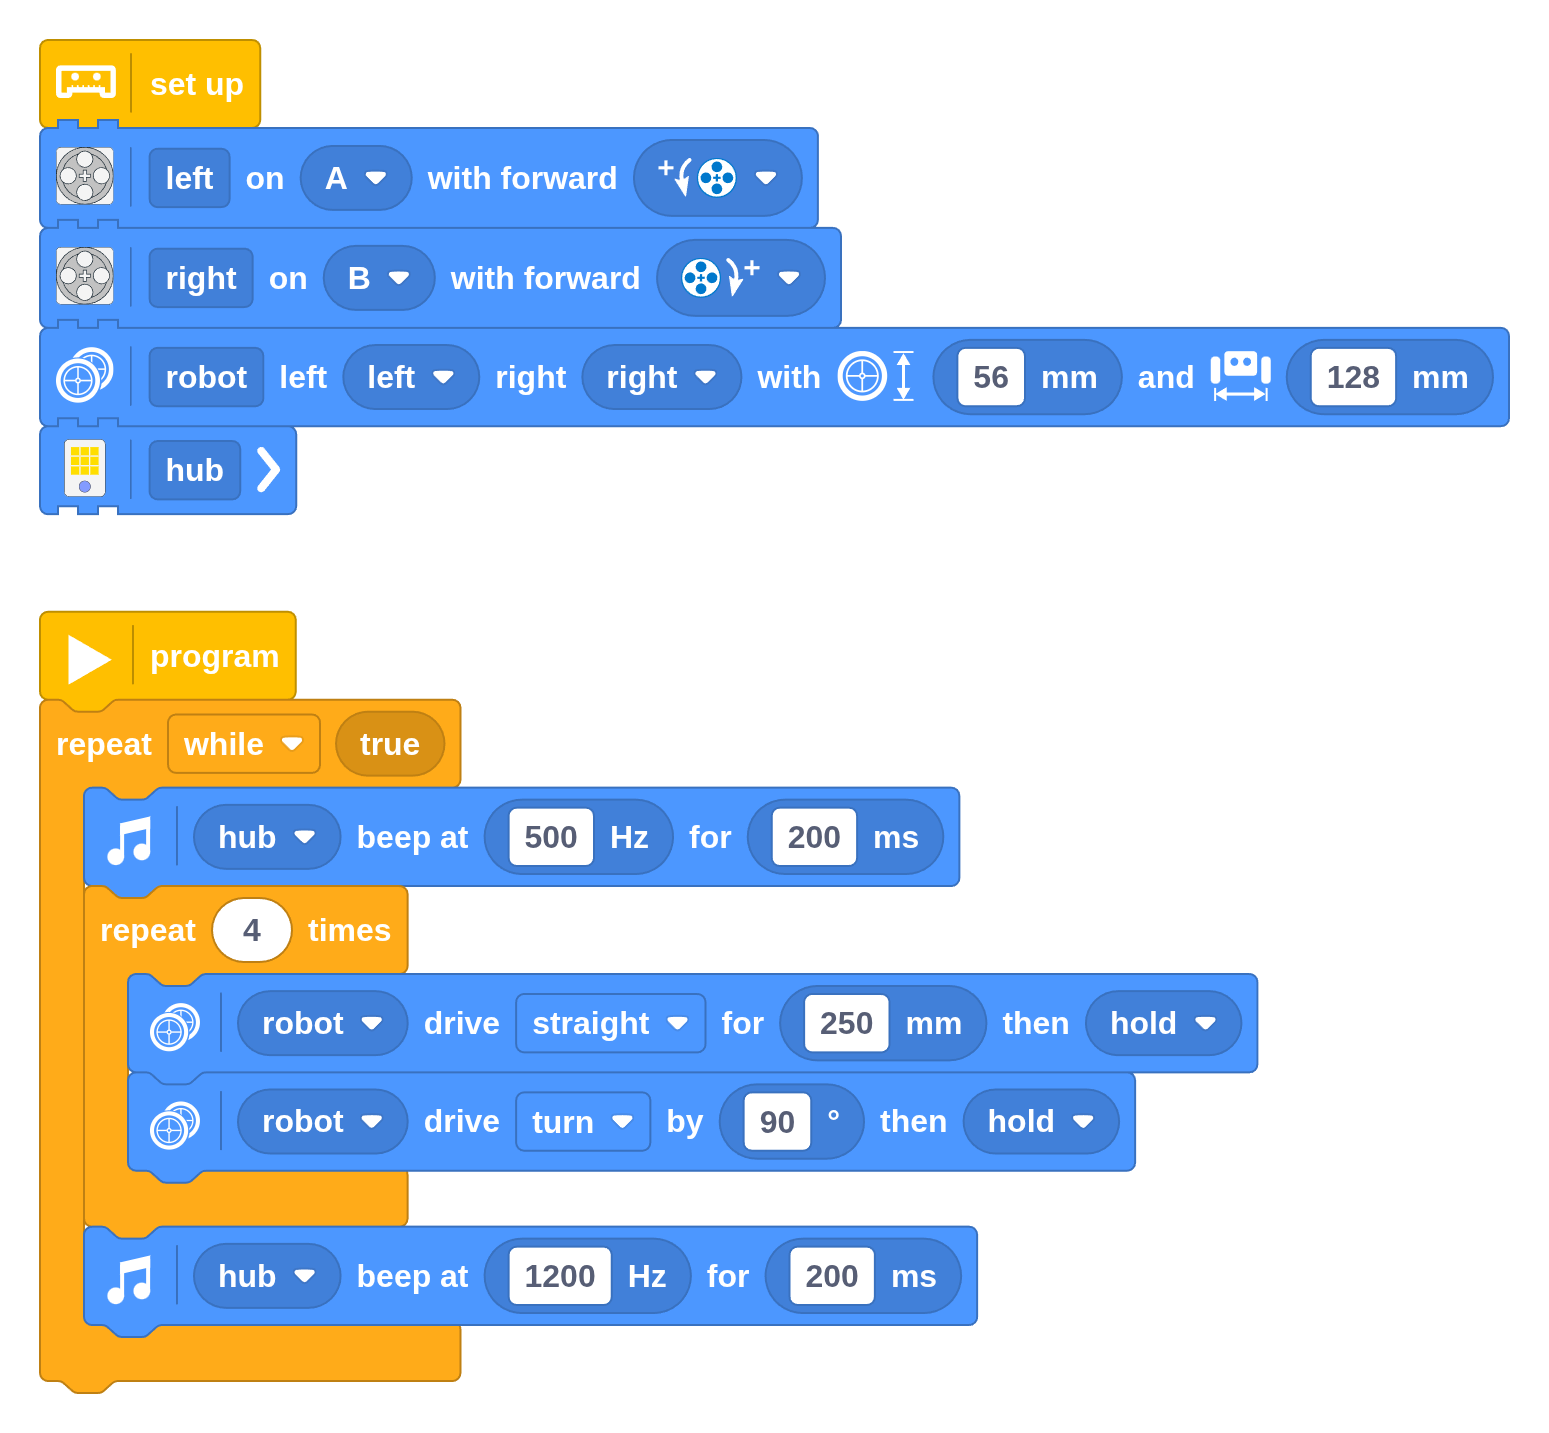
This program makes the robot play a low-pitch sound, drive in a square shape, and then play a higher-pitch sound. This whole sequence repeats forever.
Challenge #4.1.D: Chicken or the egg, revisited ⸺ With the program above, you’ll hear two beeps between successive squares. Perhaps surprisingly, you hear the higher-pitch beep first. Why is that?
Challenge #4.1.E: Try again ⸺ Replicate the program shown above but swap the two repeat blocks. The outer one should repeat 4 times and the inner one should repeat forever. Now you don’t hear a sound after each square, even though the Beep blocks are still there. Why is that? Hint ⸺ Add Print blocks throughout your program with different text messages to help you see which blocks are running. Why does it never get to the second Beep block in this case?