Hub to PC Communication
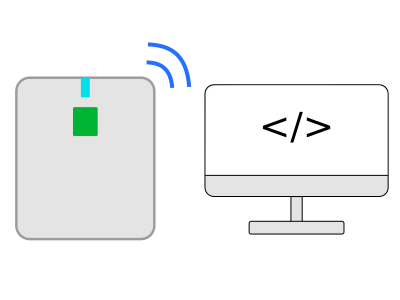
This project shows how you can exchange data between the hub and a script running on your computer.
Standard input and output
When you run a program, input and output is normally handled via the Pybricks Code terminal pane, as demonstrated here.
But once disconnected from Pybricks Code, you can use other devices and programs to connect to the hub. In this project, you’ll learn how to connect your computer to the hub and send data to it using a Python script.
Pybricks BLE characteristics
The Pybricks firmware supports three Bluetooth Low Energy (BLE) characteristics:
- Pybricks Command/Event Characteristic
- Pybricks Hub Capabilities Characteristic
- Nordic UART Service
The first two are specific to Pybricks. They are used to download programs to the hub and run them.
The Nordic UART Service (NUS) is a standard
characteristic that can be thought of as a BLE serial port. The Pybricks
firmware uses it for things like input() and print().
Characteristics, simplified
Fortunately, you don’t need to know about the two Pybricks characteristics if you use Pybricks Code to download a program to the hub in advance. Then the script on your computer only has to deal with the Nordic UART Service. This works as follows:
- Create a Pybricks program that handles input and output as you like. We’ll show you an example below.
- Disconnect from Pybricks Code.
- Write a script to find the hub and connect to it. We’ll show you an example for this too.
- Start your (previously loaded) Pybricks script with the button.
- Exchange data with the hub.
The next sections take you through this step by step.
Handling input and output on the hub
From the hub’s point of view, all input and output happens via the
usys.stdin and usys.stdout files, whether you use Pybricks Code or any
other tool.
In this example, we’ll make the hub listen for incoming data via stdin and
use it to control the direction of a motor:
- If the hub receives
fwd, the motor goes forward. - If the hub receives
rev, the motor goes in reverse. - If the hub receives
bye, the hub ends the program. - If the hub receives something else, the motor stops.
For each successful motor command, the hub will respond with OK via
stdout. In this example, print("OK") would have achieved the same
result, but print limits you to standard characters only.
To try it out, run the following program on the hub and type fwd or rev
in the terminal pane. You should see the motor respond accordingly, and get
OK in response.
Now end the program by pressing the button or by typing bye.
from pybricks.pupdevices import Motor
from pybricks.parameters import Port
from pybricks.tools import wait

# Standard MicroPython modules
from usys import stdin, stdout
from uselect import poll

motor = Motor(Port.A)

# Optional: Register stdin for polling. This allows
# you to wait for incoming data without blocking.
keyboard = poll()
keyboard.register(stdin)

while True:

    # Let the remote program know we are ready for a command.
    stdout.buffer.write(b"rdy")

    # Optional: Check available input.
    while not keyboard.poll(0):
        # Optional: Do something here.
        wait(10)

    # Read three bytes.
    cmd = stdin.buffer.read(3)

    # Decide what to do based on the command.
    if cmd == b"fwd":
        motor.dc(50)
    elif cmd == b"rev":
        motor.dc(-50)
    elif cmd == b"bye":
        break
    else:
        motor.stop()
This program works on all hubs except for the BOOST Move Hub, since it does not
support the usys or uselect module.
Sending and receiving data from a PC
The next step is to get your computer ready to connect to the hub and exchange some data. In essence, your script will play the role that the Pybricks Code terminal pane normally would.
To accomplish this, we need to:
- Scan for the hub.
- Connect to the hub.
- Get the NUS characteristic.
- Read and write data.
Since this is not specific to Pybricks, you can use any programming language or device that supports the Nordic UART Service. You could even do this from another MicroPython board.
In this example, we’ll show you how
to do it with Python and a BLE library called bleak:
pip install bleak
The asynchronous main() function in the example below will scan for the hub
and connect to it. Note that it can only find the hub if no other apps (like
Pybricks Code) are connected, and if no program is currently running.
Once it finds the hub and establishes the connection, you can start the previously loaded program on the hub by pressing the button.
At this point, the script sends several fwd and rev commands. The hub
should respond by making the motor turn and by returning OK. After doing
this five times, sending bye causes the program on the hub to terminate.
# SPDX-License-Identifier: MIT
# Copyright (c) 2020 Henrik Blidh
# Copyright (c) 2022-2023 The Pybricks Authors

"""
Example program for computer-to-hub communication.

Requires Pybricks firmware >= 3.3.0.
"""

import asyncio
from contextlib import suppress
from bleak import BleakScanner, BleakClient

PYBRICKS_COMMAND_EVENT_CHAR_UUID = "c5f50002-8280-46da-89f4-6d8051e4aeef"

# Replace this with the name of your hub if you changed
# it when installing the Pybricks firmware.
HUB_NAME = "Pybricks Hub"


async def main():
    main_task = asyncio.current_task()

    def handle_disconnect(_):
        print("Hub was disconnected.")

        # If the hub disconnects before this program is done,
        # cancel this program so it doesn't get stuck waiting
        # forever.
        if not main_task.done():
            main_task.cancel()

    ready_event = asyncio.Event()

    def handle_rx(_, data: bytearray):
        if data[0] == 0x01:  # "write stdout" event (0x01)
            payload = data[1:]

            if payload == b"rdy":
                ready_event.set()
            else:
                print("Received:", payload)

    # Do a Bluetooth scan to find the hub.
    device = await BleakScanner.find_device_by_name(HUB_NAME)

    if device is None:
        print(f"could not find hub with name: {HUB_NAME}")
        return

    # Connect to the hub.
    async with BleakClient(device, handle_disconnect) as client:

        # Subscribe to notifications from the hub.
        await client.start_notify(PYBRICKS_COMMAND_EVENT_CHAR_UUID, handle_rx)

        # Shorthand for sending some data to the hub.
        async def send(data):
            # Wait for hub to say that it is ready to receive data.
            await ready_event.wait()
            # Prepare for the next ready event.
            ready_event.clear()
            # Send the data to the hub.
            await client.write_gatt_char(
                PYBRICKS_COMMAND_EVENT_CHAR_UUID,
                b"\x06" + data,  # prepend "write stdin" command (0x06)
                response=True
            )

        # Tell user to start program on the hub.
        print("Start the program on the hub now with the button.")

        # Send a few messages to the hub.
        for i in range(5):
            await send(b"fwd")
            await asyncio.sleep(1)
            await send(b"rev")
            await asyncio.sleep(1)
            print(".", end="", flush=True)

        # Send a message to indicate stop.
        await send(b"bye")

        print("done.")

    # Hub disconnects here when async with block exits.


# Run the main async program.
if __name__ == "__main__":
    with suppress(asyncio.CancelledError):
        asyncio.run(main())
When you run the program, the expected output should be similar to:
python ./demo.py
Start the pre-load program on the hub now with the button.
Received: bytearray(b'OK')
Received: bytearray(b'OK')
Received: bytearray(b'OK')
Received: bytearray(b'OK')
Received: bytearray(b'OK')
Received: bytearray(b'OK')
Received: bytearray(b'OK')
Received: bytearray(b'OK')
Received: bytearray(b'OK')
Received: bytearray(b'OK')
Hub was disconnected.
Further exploration: BLE terminal
In the aforementioned examples, you prepared the hub to handle commands with a specific set of actions and response messages. Using a small set of messages and commands is usually the quickest and most reliable way to do it.
If you want to make it more generic, it is also possible to programatically interact with the REPL so you can access the entire Pybricks API remotely. The REPL is normally activated with the REPL button in Pybricks Code, but you can also enter it from a program on the hub as follows:
raise KeyboardInterrupt
On the computer, you can run a script like this to emulate a UART terminal. You may need to modify the scanning filters to connect to the hub.
Further exploration: Automatic start
So far, we had to load a script on the hub in advance to avoid dealing with the two Pybricks BLE characteristics.
If you want to automate the process of loading the script as well, you can use the pybricksdev library, which implements both Pybricks characteristics.
This project was submitted by The Pybricks Team.