iodevices – Generic I/O Devices
Generic input/output devices.
Note
This module provides classes to interact with unofficial motors, sensors, and other custom electronics. You should only connect custom electronics or unofficial devices if you know what you are doing. Proceed with caution.
LUMP Device
-
class
LUMPDevice(port)¶ Devices using the LEGO UART Messaging Protocol.
Parameters: port (Port) – Port to which the device is connected. -
read(mode)¶ Reads values from a given mode.
Parameters: mode ( int) – Device mode.Returns: Values read from the sensor. Return type: tuple
-
write(mode, values)¶ Writes values to the sensor. Only selected sensors and modes support this.
Parameters: - mode (
int) – Device mode. - data (
tuple) – Values to be written.
- mode (
-
Analog Sensor
-
class
AnalogSensor(port)¶ Generic or custom analog sensor.
Parameters: port (Port) – Port to which the sensor is connected. -
voltage()¶ Measures analog voltage.
Returns: Analog voltage. Return type: voltage: mV
-
resistance()¶ Measures resistance.
This value is only meaningful if the analog device is a passive load such as a resistor or thermistor.
Returns: Resistance of the analog device. Return type: resistance: Ω
-
active()¶ Sets sensor to active mode. This sets pin 5 of the sensor port to high.
This is used in some analog sensors to control a switch. For example, if you use the NXT Light Sensor as a custom analog sensor, this method will turn the light on. From then on,
voltage()returns the raw reflected light value.
-
passive()¶ Sets sensor to passive mode. This sets pin 5 of the sensor port to low.
This is used in some analog sensors to control a switch. For example, if you use the NXT Light Sensor as a custom analog sensor, this method will turn the light off. From then on,
voltage()returns the raw ambient light value.
-
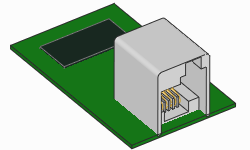
I2C Device
-
class
I2CDevice(port, address)¶ Generic or custom I2C device.
Parameters: - port (Port) – Port to which the device is connected.
- address (int) – I2C address of the client device. See I2C Addresses.
-
read(reg, length=1)¶ Reads bytes, starting at a given register.
Parameters: - reg (
int) – Register at which to begin reading: 0–255 or 0x00–0xFF. - length (
int) – How many bytes to read.
Returns: Bytes returned from the device.
Return type: bytes- reg (
-
write(reg, data=None)¶ Writes bytes, starting at a given register.
Parameters: - reg (
int) – Register at which to begin writing: 0–255 or 0x00–0xFF. - data (
bytes) – Bytes to be written.
- reg (
Show/hide example
Example: Read and write to an I2C device.
#!/usr/bin/env pybricks-micropython
from pybricks.hubs import EV3Brick
from pybricks.iodevices import I2CDevice
from pybricks.parameters import Port

# Initialize the EV3
ev3 = EV3Brick()

# Initialize I2C Sensor
device = I2CDevice(Port.S2, 0xD2 >> 1)

# Read one byte from the device.
# For this device, we can read the Who Am I
# register (0x0F) for the expected value: 211.
if 211 not in device.read(0x0F):
    raise OSError("Device is not attached")

# To write data, create a bytes object of one
# or more bytes. For example:
# data = bytes((1, 2, 3))

# Write one byte (value 0x08) to register 0x22
device.write(0x22, bytes((0x08,)))
I2C Addresses
I2C addresses are 7-bit values. However, most vendors who make LEGO compatible
sensors provide an 8-bit address in their documentation.
To use those addresses, you must shift them by 1 bit.
For example, if the documented address is 0xD2, you can do
address = 0xD2 >> 1.
Advanced I2C Commands
Some rudimentary I2C devices do not require a register argument or even any data. You can achieve this behavior as shown in the examples below.
Show/hide example
Example: Advanced I2C read and write techniques.
#!/usr/bin/env pybricks-micropython
from pybricks.hubs import EV3Brick
from pybricks.iodevices import I2CDevice
from pybricks.parameters import Port

# Initialize the EV3
ev3 = EV3Brick()

# Initialize I2C Sensor
device = I2CDevice(Port.S2, 0xD2 >> 1)

# Recommended for reading
result, = device.read(reg=0x0F, length=1)

# Read 1 byte from no particular register:
device.read(reg=None, length=1)

# Read 0 bytes from no particular register:
device.read(reg=None, length=0)

# I2C write operations consist of a register byte followed
# by a series of data bytes. Depending on your device, you
# can choose to skip the register or data as follows:

# Recommended for writing:
device.write(reg=0x22, data=b'\x08')

# Write 1 byte to no particular register:
device.write(reg=None, data=b'\x08')

# Write 0 bytes to a particular register:
device.write(reg=0x08, data=None)

# Write 0 bytes to no particular register:
device.write(reg=None, data=None)
Additional technical resources
The I2CDevice class methods call functions from the Linux SMBus driver.
To find out which commands are called under the hood, check the
Pybricks source code.
More details about using I2C without MicroPython can be found on
the ev3dev I2C page.
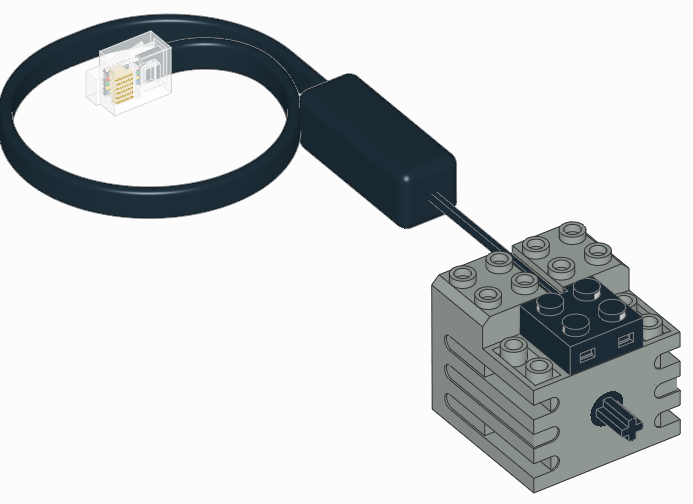
UART Device

-
class
UARTDevice(port, baudrate, timeout=None)¶ Generic UART device.
Parameters: -
read(length=1)¶ Reads a given number of bytes from the buffer.
Your program will wait until the requested number of bytes are received. If this takes longer than
timeout, theETIMEDOUTexception is raised.Parameters: length ( int) – How many bytes to read.Returns: Bytes returned from the device. Return type: bytes
-
read_all()¶ Reads all bytes from the buffer.
Returns: Bytes returned from the device. Return type: bytes
-
write(data)¶ Writes bytes.
Parameters: data ( bytes) – Bytes to be written.
-
waiting()¶ Gets how many bytes are still waiting to be read.
Returns: Number of bytes in the buffer. Return type: int
-
clear()¶ Empties the buffer.
-
Show/hide example
Example: Read and write to a UART device.
#!/usr/bin/env pybricks-micropython
from pybricks.hubs import EV3Brick
from pybricks.iodevices import UARTDevice
from pybricks.parameters import Port
from pybricks.media.ev3dev import SoundFile

# Initialize the EV3
ev3 = EV3Brick()

# Initialize sensor port 2 as a uart device
ser = UARTDevice(Port.S2, baudrate=115200)

# Write some data
ser.write(b'\r\nHello, world!\r\n')

# Play a sound while we wait for some data
for i in range(3):
    ev3.speaker.play_file(SoundFile.HELLO)
    ev3.speaker.play_file(SoundFile.GOOD)
    ev3.speaker.play_file(SoundFile.MORNING)
    print("Bytes waiting to be read:", ser.waiting())

# Read all data received while the sound was playing
data = ser.read_all()
print(data)
DC Motor
-
class
DCMotor(port, positive_direction=Direction.CLOCKWISE) Generic class to control simple motors without rotation sensors, such as train motors.
Parameters: -
dc(duty) Rotates the motor at a given duty cycle (also known as “power”).
Parameters: duty (percentage: %) – The duty cycle (-100.0 to 100).
-
stop() Stops the motor and lets it spin freely.
The motor gradually stops due to friction.
-
Ev3dev sensors
EV3 MicroPython is built on top of ev3dev, which means that a sensor
may be supported even if it is not listed in this documentation. If so, you can
use it with the Ev3devSensor class. This is easier and faster than using
the custom device classes given above.
To check whether you can use the Ev3devSensor class:
- Plug the sensor into your EV3 Brick.
- Go to the main menu of the EV3 Brick.
- Select Device Browser and then Sensors.
- If your sensor shows up, you can use it.
Now select your sensor from the menu and choose set mode. This shows all
available modes for this sensor. You can use these mode names as the mode
setting below.
To learn more about compatible devices and what each mode does, visit the ev3dev sensors page.
-
class
Ev3devSensor(port)¶ Read values of an ev3dev-compatible sensor.
Parameters: port (Port) – Port to which the device is connected. -
sensor_index¶ Index of the ev3dev sysfs lego-sensor class.
-
Show/hide example: Reading values with the Ev3devSensor class
Example
In this example we use the LEGO MINDSTORMS EV3 Color Sensor with the raw RGB mode. This gives uncalibrated red, green, and blue reflection values.
#!/usr/bin/env pybricks-micropython
from pybricks.parameters import Port
from pybricks.tools import wait
from pybricks.iodevices import Ev3devSensor

# Initialize an Ev3devSensor.
# In this example we use the
# LEGO MINDSTORMS EV3 Color Sensor.
sensor = Ev3devSensor(Port.S3)

while True:
    # Read the raw RGB values
    r, g, b = sensor.read('RGB-RAW')

    # Print results
    print('R: {0}\t G: {1}\t B: {2}'.format(r, g, b))

    # Wait
    wait(200)
Show/hide example: Extending the Ev3devSensor class
Example
This example shows how to extend the Ev3devSensor class by accessing
additional features found in the Linux system folder for this device.
#!/usr/bin/env pybricks-micropython
from pybricks.parameters import Port
from pybricks.iodevices import Ev3devSensor


class MySensor(Ev3devSensor):
    """Example of extending the Ev3devSensor class."""

    def __init__(self, port):
        """Initialize the sensor."""

        # Initialize the parent class.
        super().__init__(port)

        # Get the sysfs path.
        self.path = '/sys/class/lego-sensor/sensor' + str(self.sensor_index)

    def get_modes(self):
        """Get a list of mode strings so we don't have to look them up."""

        # The path of the modes file.
        modes_path = self.path + '/modes'

        # Open the modes file.
        with open(modes_path, 'r') as m:

            # Read the contents.
            contents = m.read()

            # Strip the newline symbol, and split at every space symbol.
            return contents.strip().split(' ')


# Initialize the sensor
sensor = MySensor(Port.S3)

# Show where this sensor can be found
print(sensor.path)

# Print the available modes
modes = sensor.get_modes()
print(modes)

# Read mode 0 of this sensor
val = sensor.read(modes[0])
print(val)